How To Create A Fully-Automated Shopify POD Store
Overview: This guide shows Shopify print-on-demand sellers how to connect art generation, bulk product creation, premium mockups, catalog distribution, marketing automations, live support, pricing, and more—so your store scales with minimal manual effort. We’ll map manual tasks to automated workflows and show how to save you a tremendous amount of time on your Shopify POD workflow.
Automation Isn’t “Lazy”; It’s The Most Effective Way To Scale Fast.
There are no bonus points for taking ten times longer to reach the same outcome. In print-on-demand, manual effort is not craftsmanship—it’s a throughput cap. Shopify sellers who scale quickly do it by engineering systems that multiply their output per hour and remove human bottlenecks wherever possible. That means using AI and automation at every step where “clicking around” adds no value.
This post shows you exactly how to do that. We’ll break your POD workflow into discrete tasks to be automated, contrast the slow manual path with the automated path, and specify the exact tools and setup to get from “image folder” to “high-volume Shopify revenue engine” with minimum effort.
TASK 1 — Creating Your POD Products + Writing SEO Product Info
(Automate with the Bulk POD Product Creator)
What the manual process looks like
- Pick a base product in your POD provider, then pick variants (sizes, finishes, orientations) one by one.
- Upload artwork, resize/position per variant, try not to misalign or crop anything critical.
- Set prices for each variant; sanity-check margins against costs.
- Write titles, descriptions, and tags from scratch—over and over—trying to avoid repetition while staying keyword-rich.
- Repeat that entire sequence for every single image you want to list.
Result: hours vanish, consistency drifts, and your catalog grows far too slowly to matter.

How to automate these tasks on your Shopify store
Use the Bulk POD Product Creator to automate this. This tool will convert your selected artwork images into Shopify-ready POD products in a completely automated operation. The created products are fully configured, consistently formatted, and SEO-optimized.
Step 1: Upload images and choose a placement rule
Tell the system how each image should fit the print area(s). You have three precise modes to cover nearly every scenario:
- Stretch Images To Fit Print Area(s) — edge-to-edge coverage across variants; fast, uniform production for posters/canvas.
- Preserve Image Aspect Ratio & Center — proportional resize with zero distortion; centered placement for typography, logos, geometry-sensitive art.
- Exactly Match Example Image(s) — clones the exact placement/scale from your chosen reference product for pixel-consistent outputs (ideal for complex surfaces).

Step 2: Select your Example Product (your “blueprint”)
Pick one existing Example Product whose variant structure, per-variant pricing, and defaults you want cloned across the batch. If you selected “Exactly Match Example Image(s),” the precise placement is cloned too.
Maintain multiple blueprints (e.g., POSTER_2x3_Matte, CANVAS_SQUARE_GalleryWrap) so switching product families is a 2-second decision, not a 20-minute rebuild.
Benefits: consistent margins, zero variant mistakes, clean catalog uniformity.

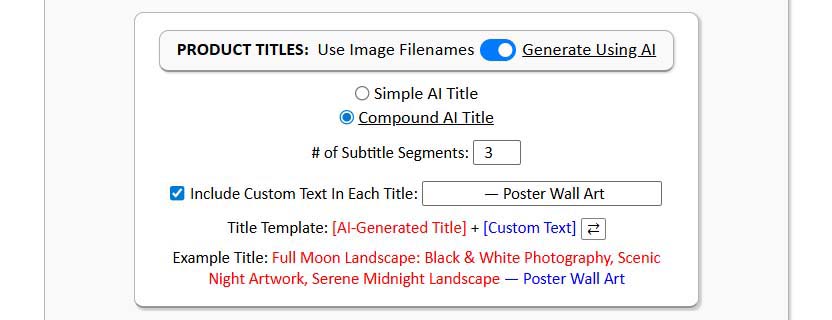
Step 3: Define New Product Creation Rules (titles, descriptions, tags)
This is where AI does the heavy lifting accurately and at scale:
- Titles: choose Simple (concise subject) or Compound (root title + 1–2 subtitle segments after a colon). Add Custom Text into titles to give your products an SEO boost (e.g., “— Poster Wall Art”).
- Descriptions: select paragraph length (usually 1–2). The tool writes artwork-specific copy (subject, style, composition, palette, mood). Append Custom HTML to standardize materials, sizes, and care across every listing.
- Tags: let AI propose artwork-specific tags and layer your broad, product-level tags (e.g., “poster”, “canvas print”, “wall decor”) for consistent collection coverage.

Step 4: Run the operation
Click Create My Products. The system applies placements, clones your Example Product’s structure/pricing, generates titles/descriptions/tags, and creates all products in one pass. Save the configuration as a Saved Operation so the next batch is literally: load preset → upload images → go.

The benefits of automating these tasks
- Order-of-magnitude throughput: Replace hours of low-leverage clicking with a governed, four-step pipeline. Large releases go from “someday” to “this afternoon.”
- Consistent margins and options: Cloned variants/pricing enforce discipline—no more accidental underpricing on a single size.
- Better SEO coverage with less effort: AI-generated, artwork-specific titles/descriptions/tags expand long-tail reach while reducing self-cannibalization.
- Professional, uniform presentation: Every listing looks intentional—same structure, same suffix conventions, same quality bar.
- Reusability: Saved Operations compound over time. Each subsequent drop gets faster as your playbooks mature.
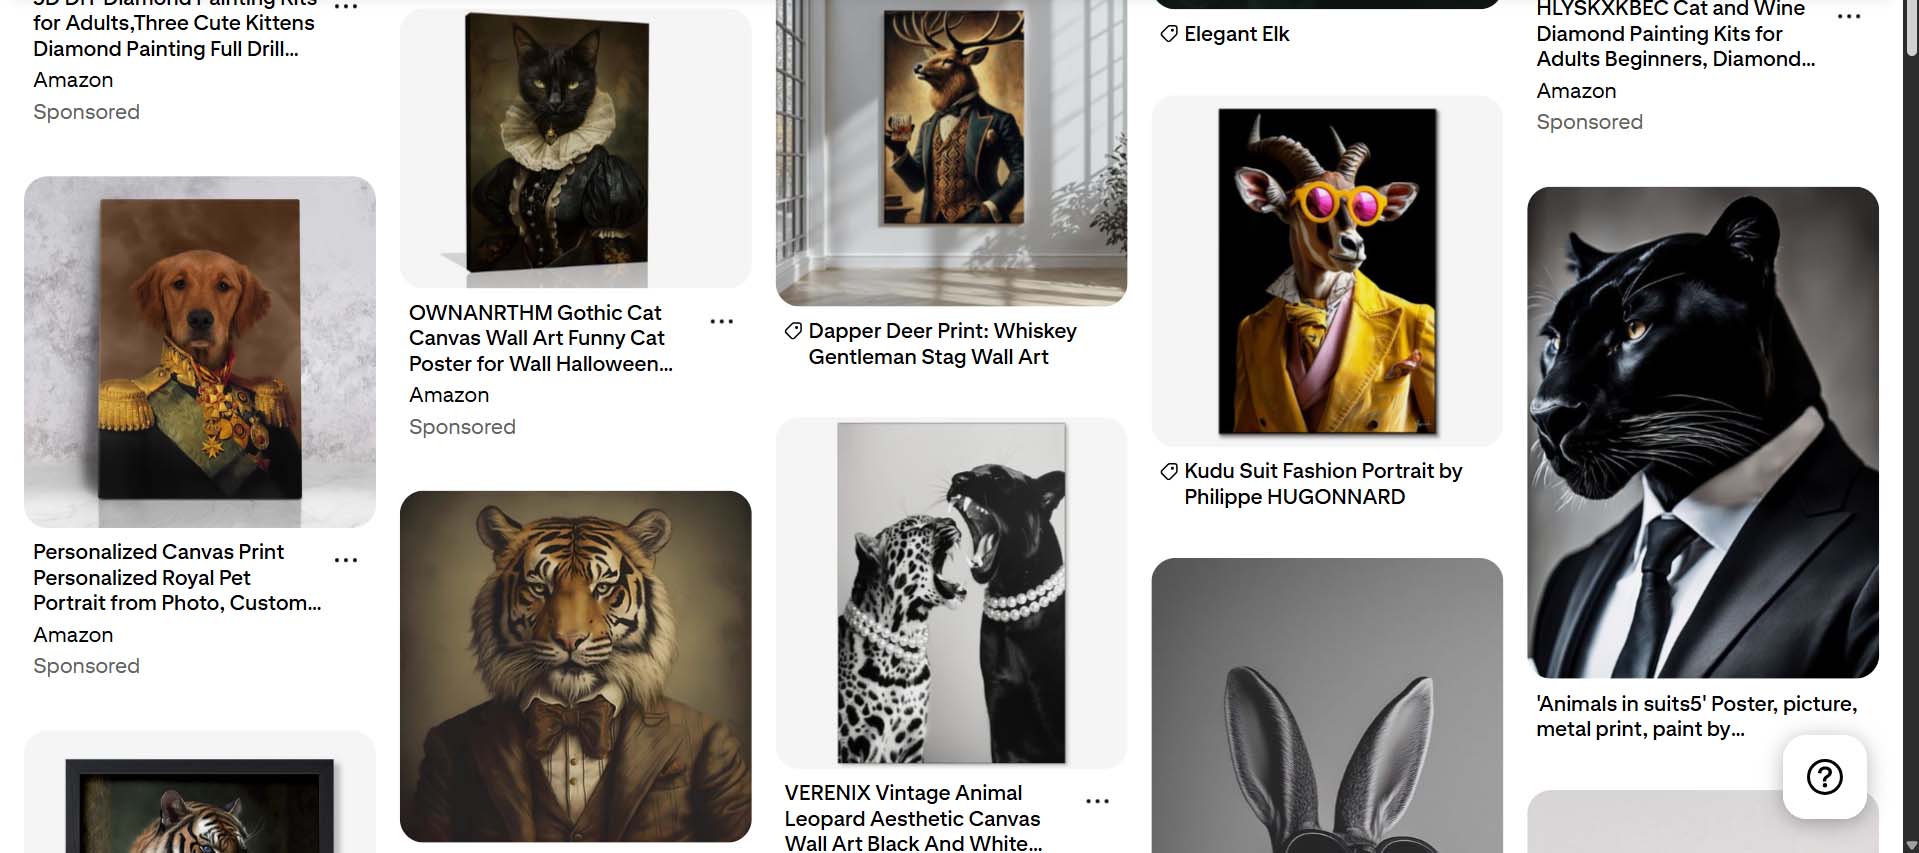
TASK 2 — Creating AI Artwork Images To Convert Into Your POD Products
What the manual process looks like
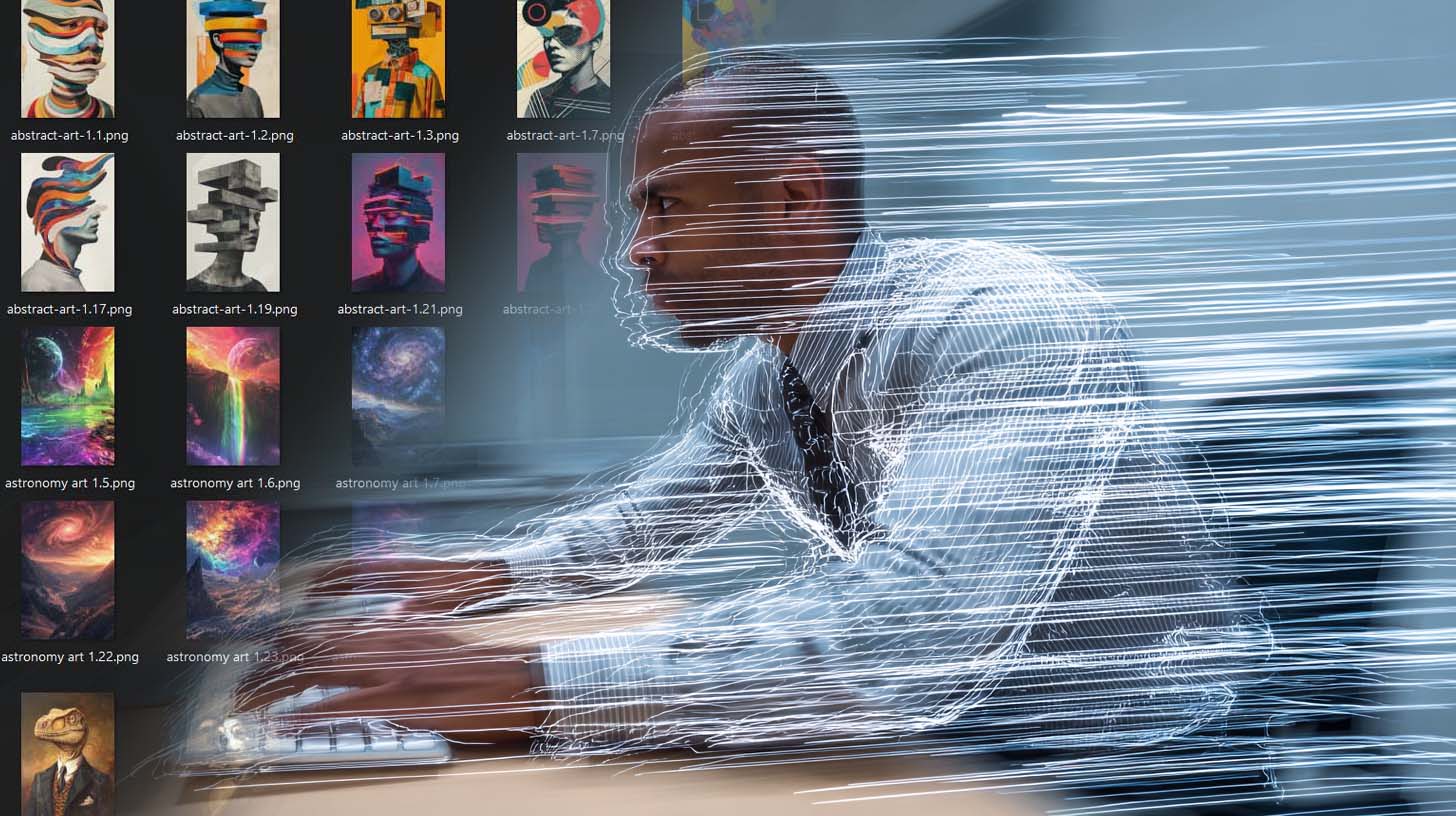
You brainstorm a prompt, paste it into an image generator, wait for results, tweak wording, re-run, then manually download and sort files. You repeat that cycle dozens (or hundreds) of times. Output quality swings, aspect ratios are inconsistent, filenames are messy, and you spend more time clicking than creating. By the time you’ve curated a usable set, your momentum is gone—and you still haven’t turned any of it into products.
How to automate these tasks on your Shopify store
There are three practical paths. Pick based on how “hands-off” you want to be and how much technical setup you’re willing to do.
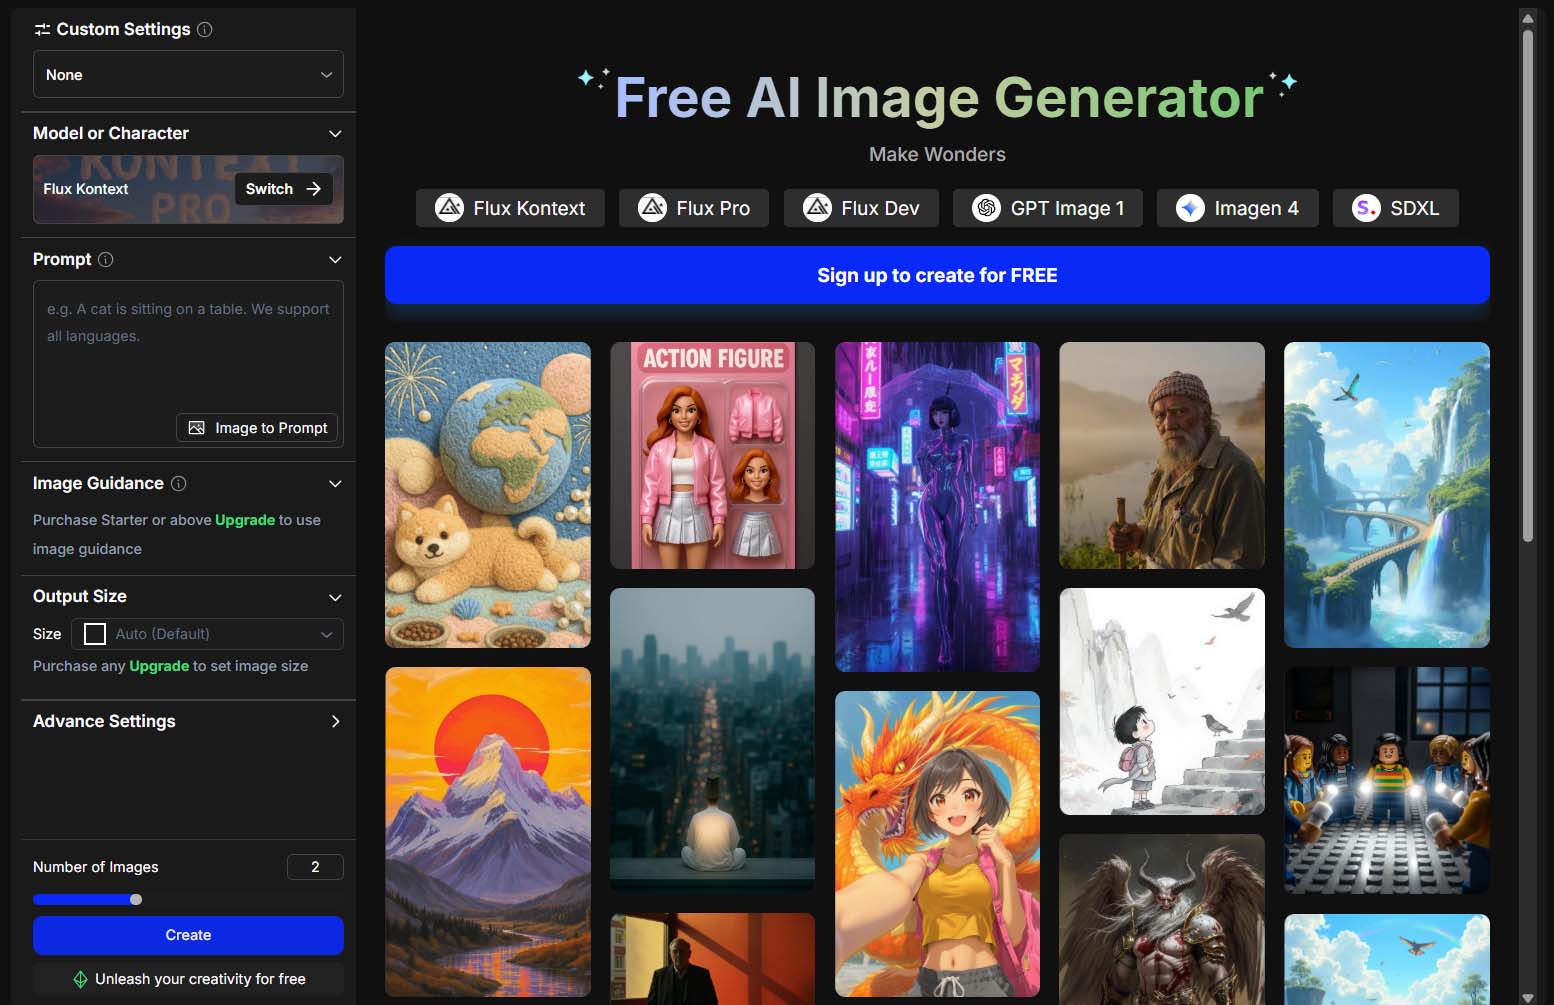
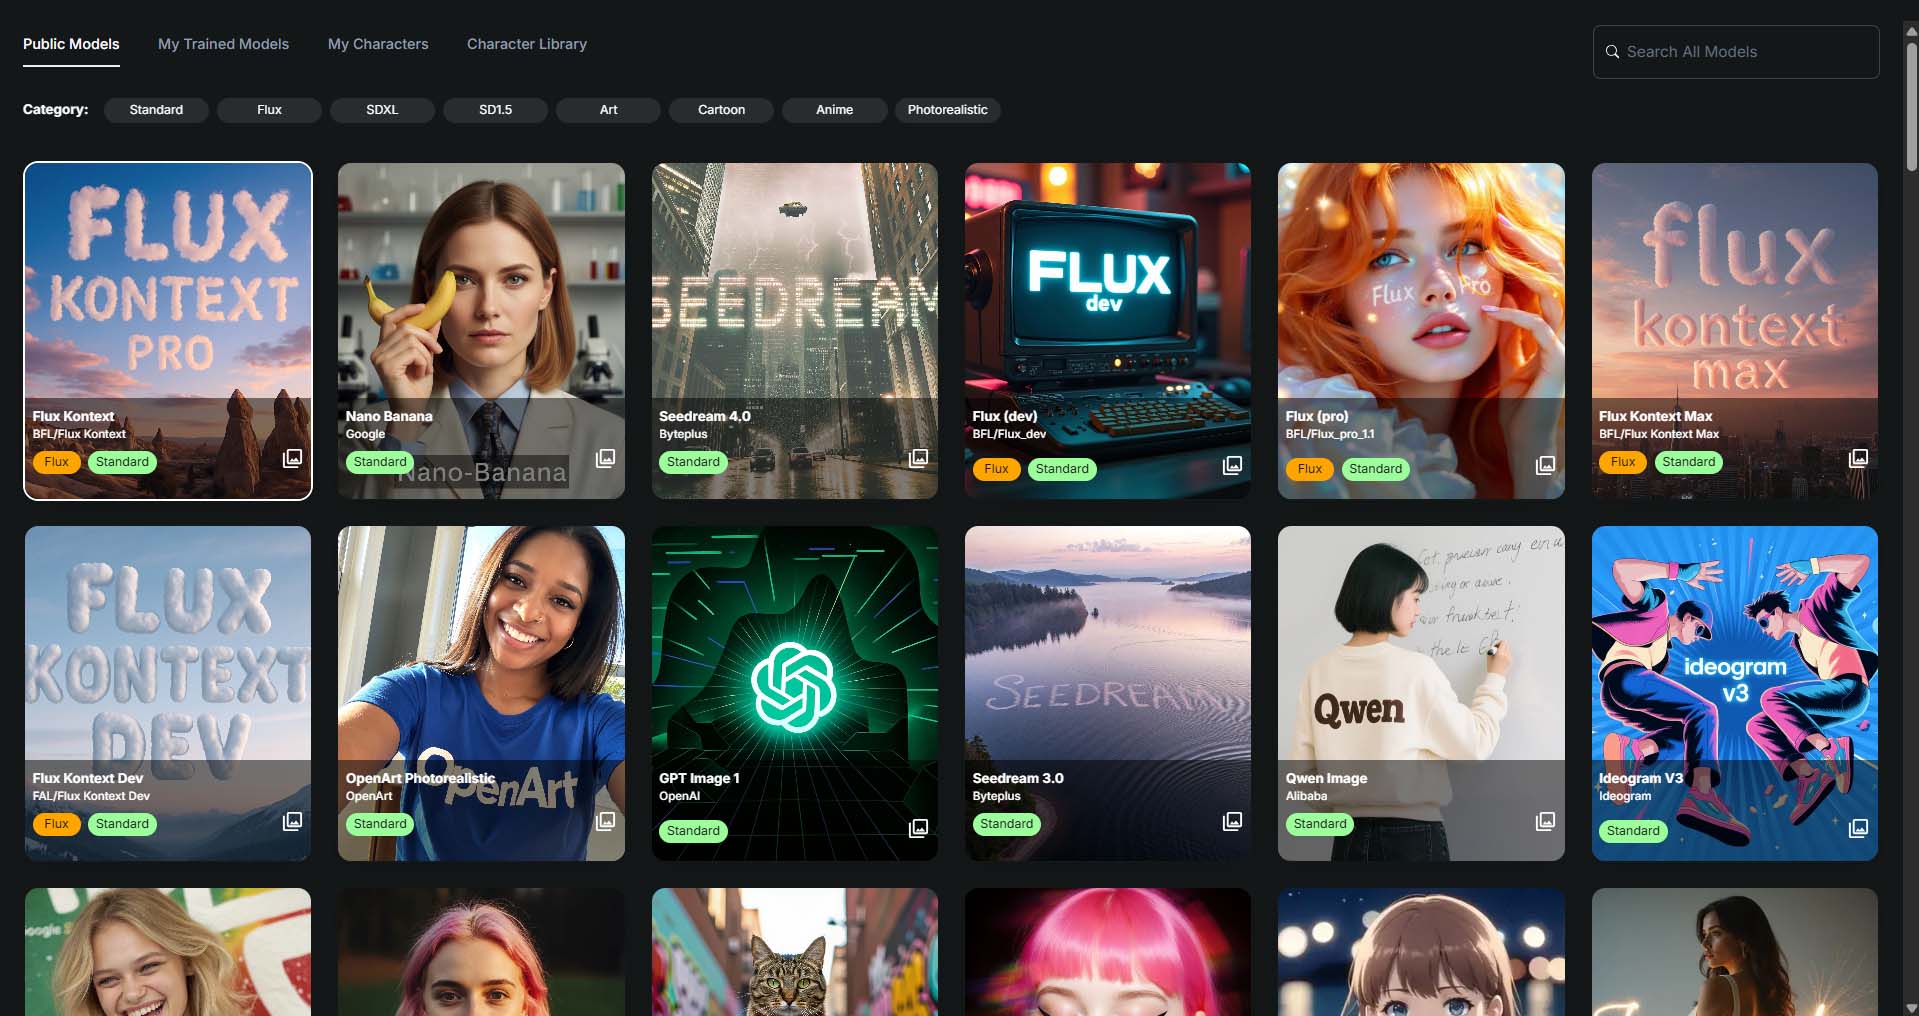
Path A (No-code): Use an online bulk image generator like OpenArt
Goal: Fire off large batches around a theme with minimal setup.
Why this works: OpenArt supports native bulk creation (specify a target number of images for a single prompt) and CSV-driven generation (upload a spreadsheet of prompts—one per row—and it will generate images for each line automatically).
Setup & run:
- Define your theme and guardrails. Choose a tight visual lane (e.g., “minimalist line-art botanicals, ink-on-parchment aesthetic”) and aspect ratio to match your product blueprint (e.g., 2:3 for posters).
- Generate prompts in bulk with ChatGPT.
- Provide ~5 “golden prompts” that produced winners for you.
- Ask ChatGPT to expand to 200–500 variations while preserving style, subject constraints, aspect ratio, and negative keywords (e.g., “no text, no watermarks”).
- Export as CSV with a single prompt column.
- Run OpenArt bulk.
- Option 1: Bulk Create by setting a target count from one master prompt.
- Option 2: CSV Upload to run prompt-per-row at scale.
- Download winners & organize.
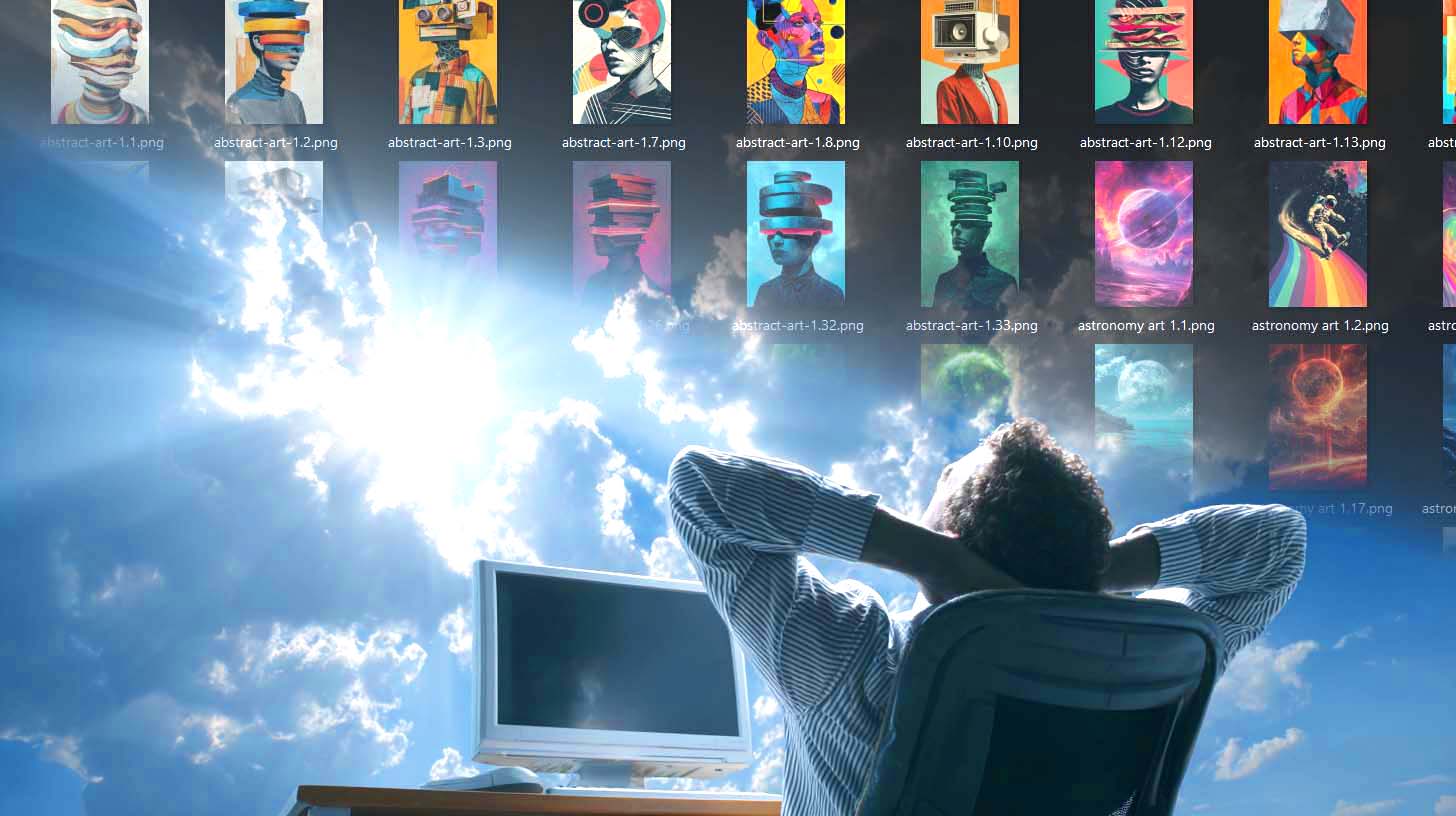
- Evaluate the results, and download the very best images that you want to convert into POD products.
- Tip: Store images in corresponding aspect-ratio folders (2x3, 1x1, etc) to keep your downstream product creation frictionless and organized.
Useful feature: OpenArt allows you to select the specific AI image generation model to use, when creating your images. This allows you to play around with the different models, determine which produces the very best-quality images for the types of images/products you're selling on your store, then scale the creation of your images using that model.
Notes: Any SaaS that claims bulk image generation is only as good as the underlying model and its tuning. Expect variability; that’s normal. Your job is to choose a generator whose hit rate aligns with your standards and then scale what's working best for you.
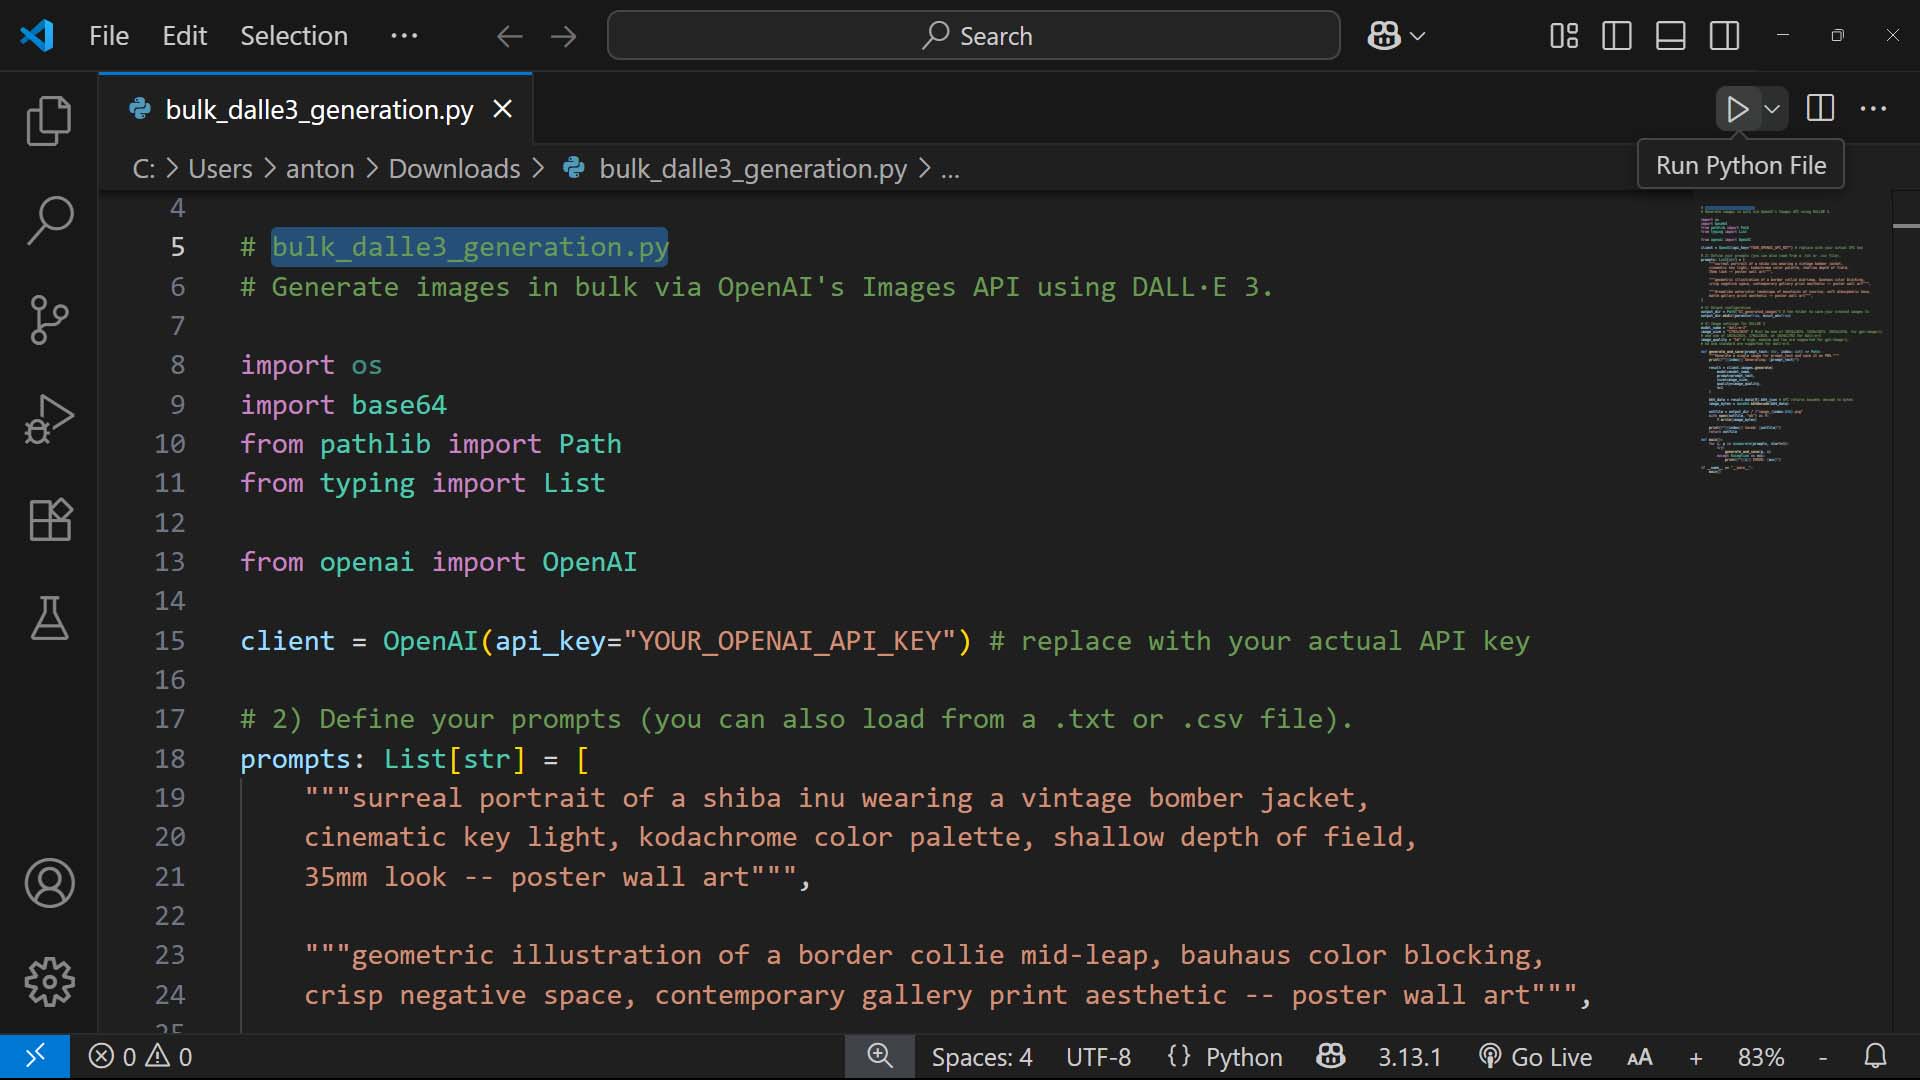
Path B (Fully automated): Write a Python script to call the OpenAI API (DALL·E 3 / gpt-image-1)
Goal: Truly hands-off batches—no UI clicking after kickoff.
What this gives you: End-to-end automation with text prompts → batched API calls → saving images to your computer. Once set up, you can schedule or trigger runs and wake up to a fresh bank of images.
High-level blueprint:
- Inputs: CSV of artwork-generation text prompts.
- The Code: A Python script that:
- Iterates over your spreadsheet of prompts (one prompt per row).
- Calls the image endpoint (model: DALL·E 3 or gpt-image-1) to generate your images with your size/ratio settings.
- Saves generated images using simple naming conventions.
Non-technical? ChatGPT can bridge the gap.
- You can paste the above blueprint into ChatGPT and ask for:
- A step-by-step code-execution setup (how to install Python, how to run Python code via Visual Studio Code, how to create your OpenAI API account, etc).
- A ready-to-run script that allows you to generate your AI images via OpenAI's API, in your desired manner.
ChatGPT can then assist you, answering whatever questions arise as you go, until the script runs cleanly end-to-end.
When to choose Path B: You want repeatable, timed drops (e.g., nightly 2,000-image batches), hands-off execution, and tight control over every aspect of the automated system.
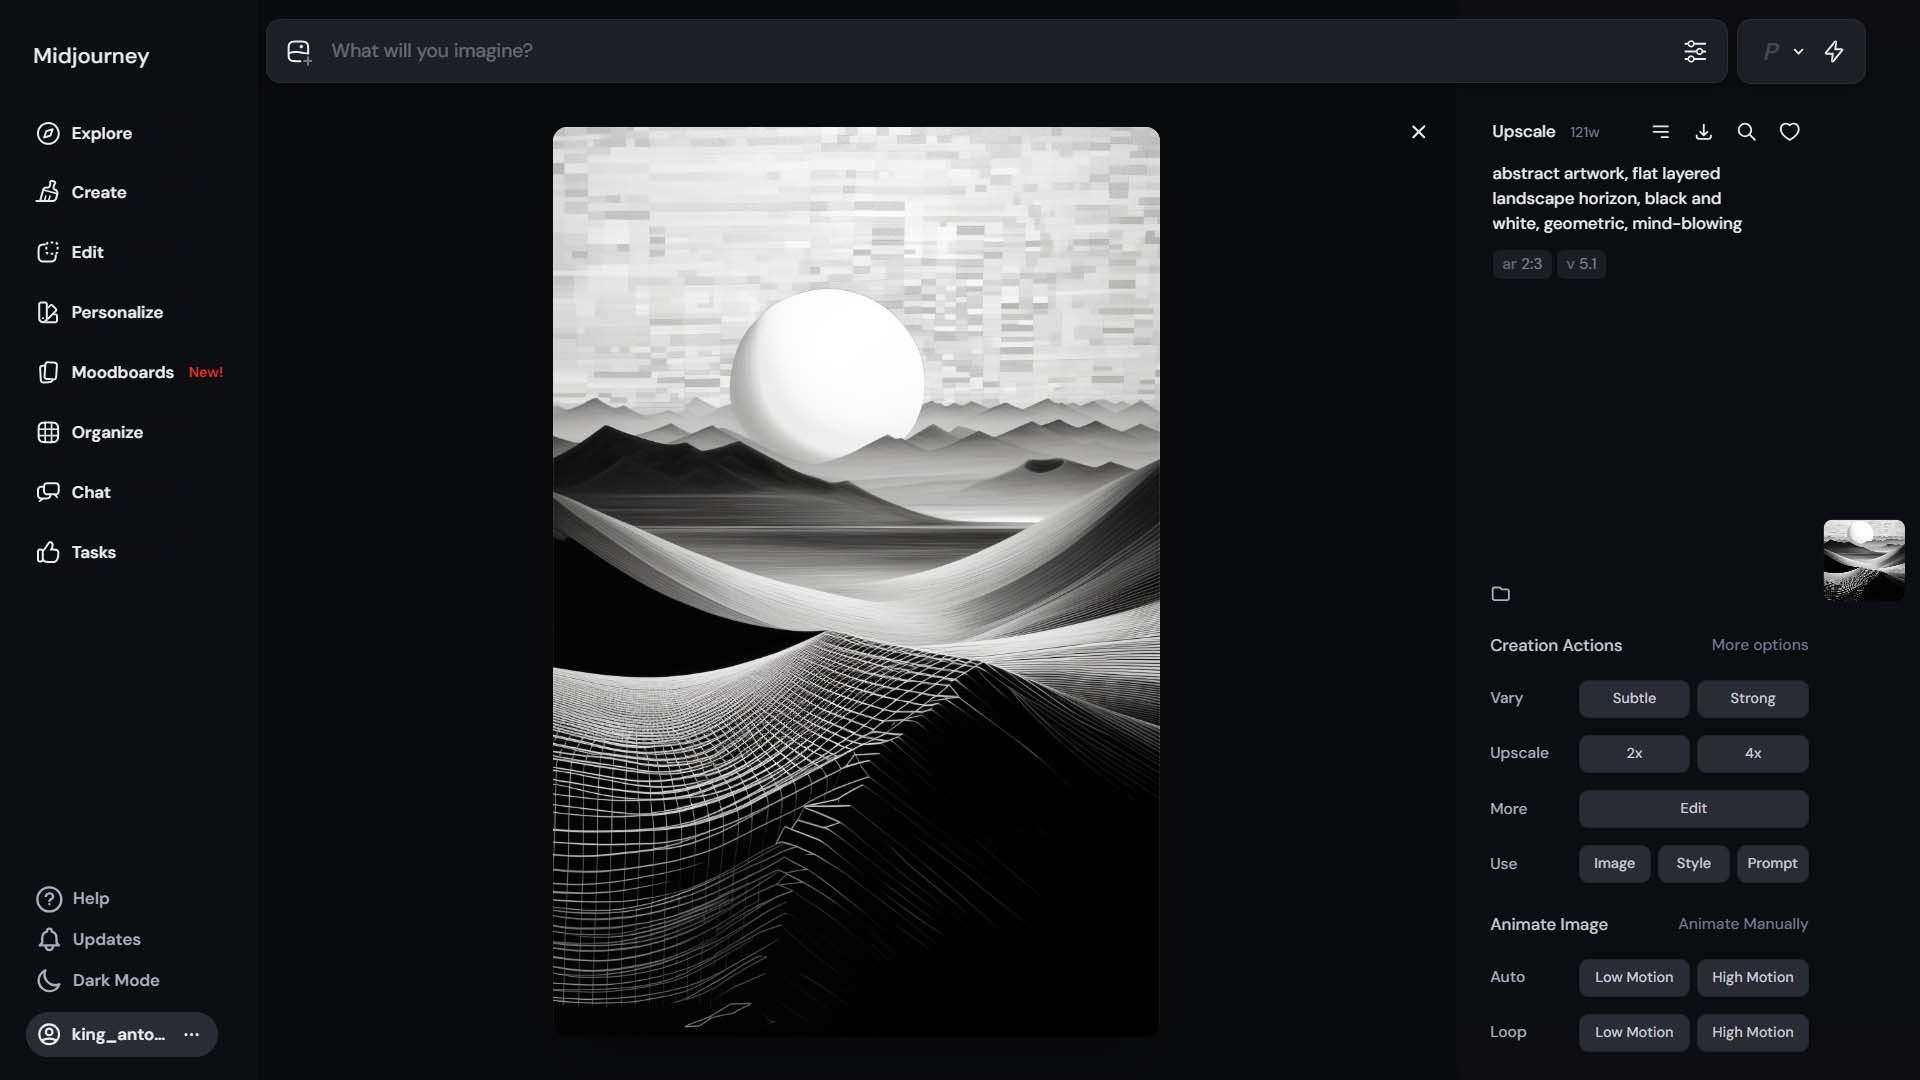
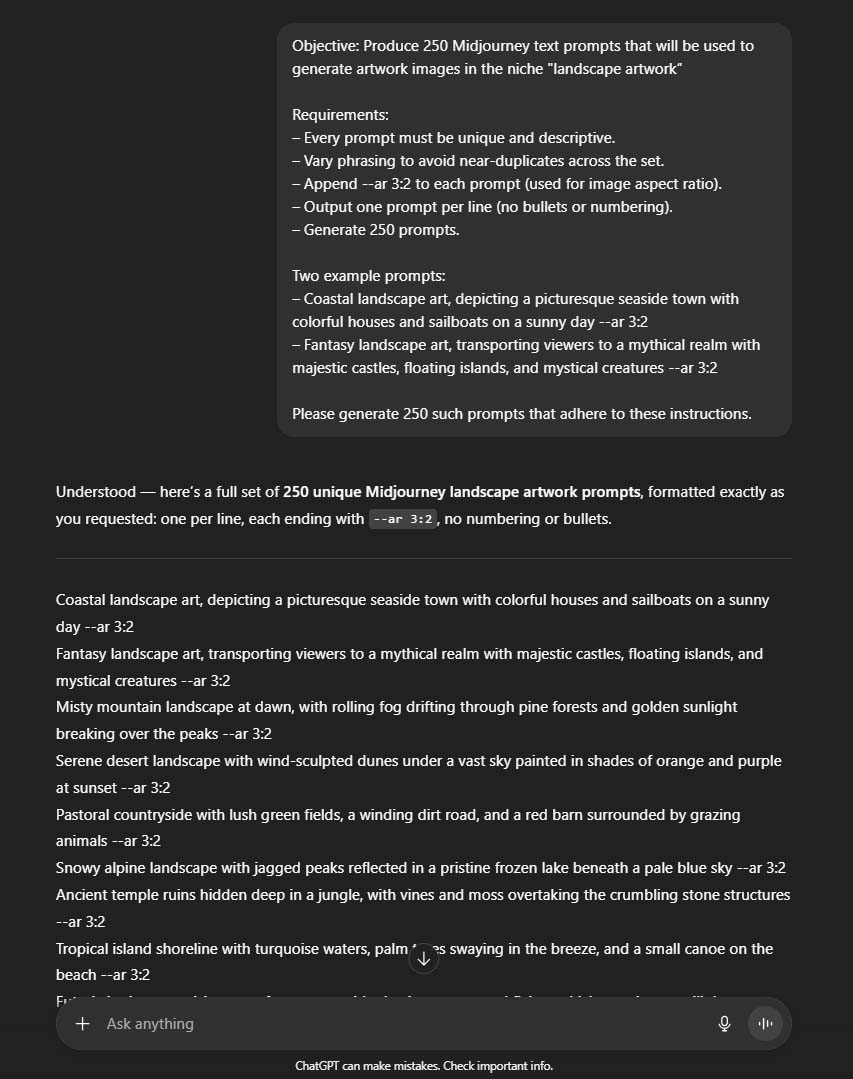
Path C (Semi-automated, extremely simple, highest aesthetic control): Midjourney with ChatGPT-assisted prompt generation
Goal: Maximize visual quality, even if it’s not 100% automated.
Why this works: Many sellers find Midjourney still produces the most consistently striking results for certain styles. While you’ll paste prompts manually, the throughput is surprisingly high with a good station setup.

Workflow:
- First, prove that your prompts are excellent. Spend a short session validating a specific recipe that yields a ≥30% “keeper” rate for your target subject. Identify specific prompts and patterns that work well for your image-creation needs, vs. those that consistently fail to meet your standards and miss the mark. Doing this experimentation work before trying to scale your volume of image creation will save tons of time downstream in the long-run, preventing you from trying to prematurely optimize and scale around a style of image-generation prompt that yields poor results.
- Have ChatGPT generate 200–500 prompts from 5–10 perfect exemplars. Instruct it to preserve composition, materials, mood, and other vital attributes of your prompts depending on your needs, and lock aspect ratio with
--arflags that match your product templates. - Efficient split-screen setup, to maximize your image-generation productivity: spreadsheet of prompts (left) + Midjourney (right). Paste prompts down the list; run multiple concurrent image-generation jobs in parallel, at the highest volume of concurrency that your Midjourney tier allows.
- Upscale + download winners as you go, saving into a designated folder labeled with the image aspect ratio.

Why it’s still efficient: You must curate no matter which path you choose. With Midjourney, curation happens in real time as you upscale only the best, so the “manual” step is partly the selection step you’d do later anyway.
Reality check: DALL·E 3 and gpt-image-1 are strong, but Midjourney is arguably best-in-class for certain looks. SaaS bulk tools vary widely depending on what model they wrap. Choose based on your quality threshold, scale needs, and tolerance for setup. Also compare the estimated dollar-cost of the various workflows, per 1000-generated images, to balance cost-effectiveness against time-efficiency.
The benefits of automating these tasks
- Throughput on demand: Move from tens to hundreds or thousands of images per batch, unlocking catalog scale.
- Aspect-ratio discipline: Enforce 2:3 / 3:4 / 1:1 families at generation time so downstream placement is zero-drama.
- Higher keeper rates over time: Bulk generation + quick curation cycles let you learn what wins and double down on the text prompts with the best hit rate.
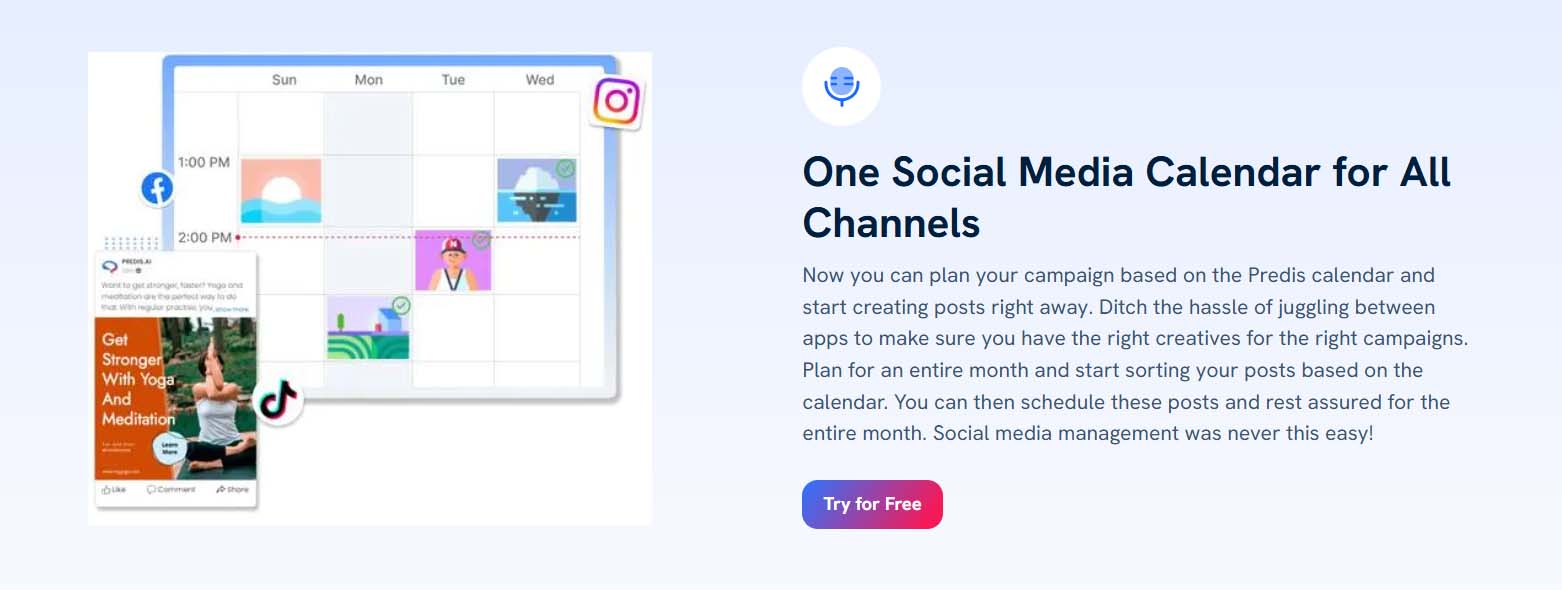
TASK 3 — Creating Social Media Posts To Market/Sell Your Products
(Automate with Predis.ai — ideation, creation, scheduling, and posting in one place)
What the manual process looks like
You brainstorm post ideas, write captions, hunt for hashtags, design creatives (or crop product photos), then manually post to each platform one by one. You repeat that grind daily or weekly, hoping to keep a consistent cadence while also running your store.
How to automate these tasks on your Shopify store
Use Predis.ai to compress ideation → writing → design → scheduling into a single flow.
Setup & sync
- Connect your social channels (Instagram, Facebook, Pinterest, TikTok, X, LinkedIn—whichever you use).
- Define your brand voice & guardrails (tone, banned phrases, emoji policy, CTA style). Save as reusable presets.
- Plug in your product feed (titles, descriptions, prices, URLs). If you don’t want full feed sync, export a CSV of featured products and upload.
Create posts in batches
- Prompt packs: Feed Predis.ai a simple prompt like “Create 30 posts promoting minimalist botanical posters—evergreen tips, product spotlights, soft CTAs. Include 3 variations for each core product.”
- Auto-caption + creative: Let it draft on-brand captions, choose relevant hashtags, and generate image/video creatives (or auto-format your existing product photos).
- Template library: Lock down a few brand-consistent templates (cover image, carousel format, promo badge). Enforce aspect ratios per platform.
Schedule and auto-publish
- Calendar view: Drag posts onto a weekly/monthly schedule for each channel.
- Time-zone aware posting: Queue content at peak engagement times per network.
- Evergreen queues: Build “always-on” product spotlights and tips that recycle automatically to keep the feed active.
The benefits of automating these tasks
- Relentless consistency: Daily presence without daily effort.
- Compounding surface area: More posts across more networks → more product link-clicks → more sales.
- Creative velocity: On-brand captions/creatives at batch speed; your time shifts to approving, not composing.
- Promo synchronization: Social calendars align automatically with store sales, product drops, and seasonal moments.
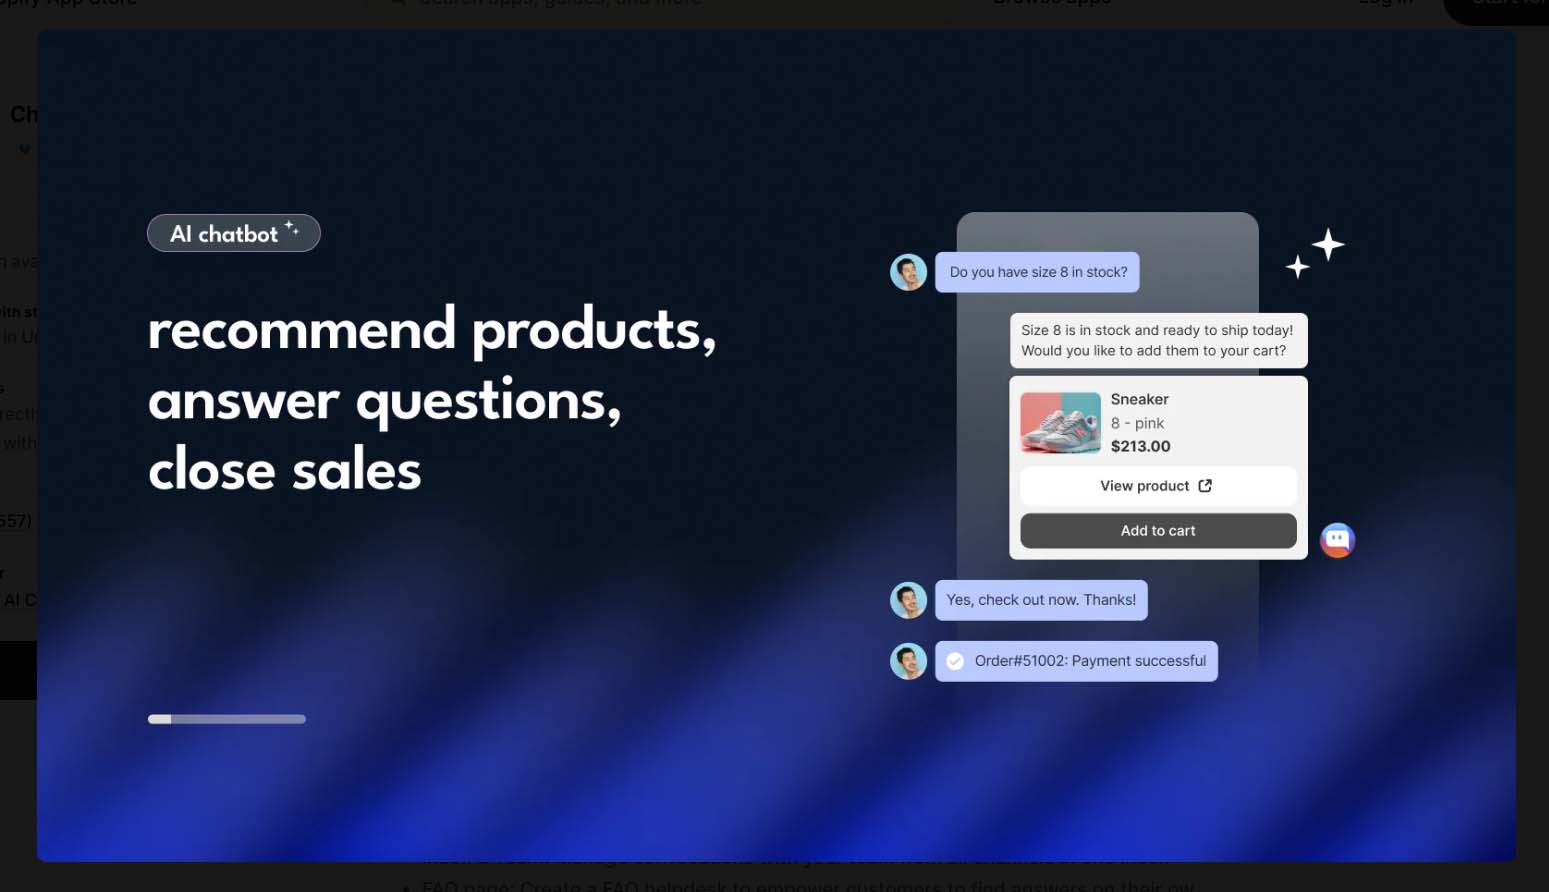
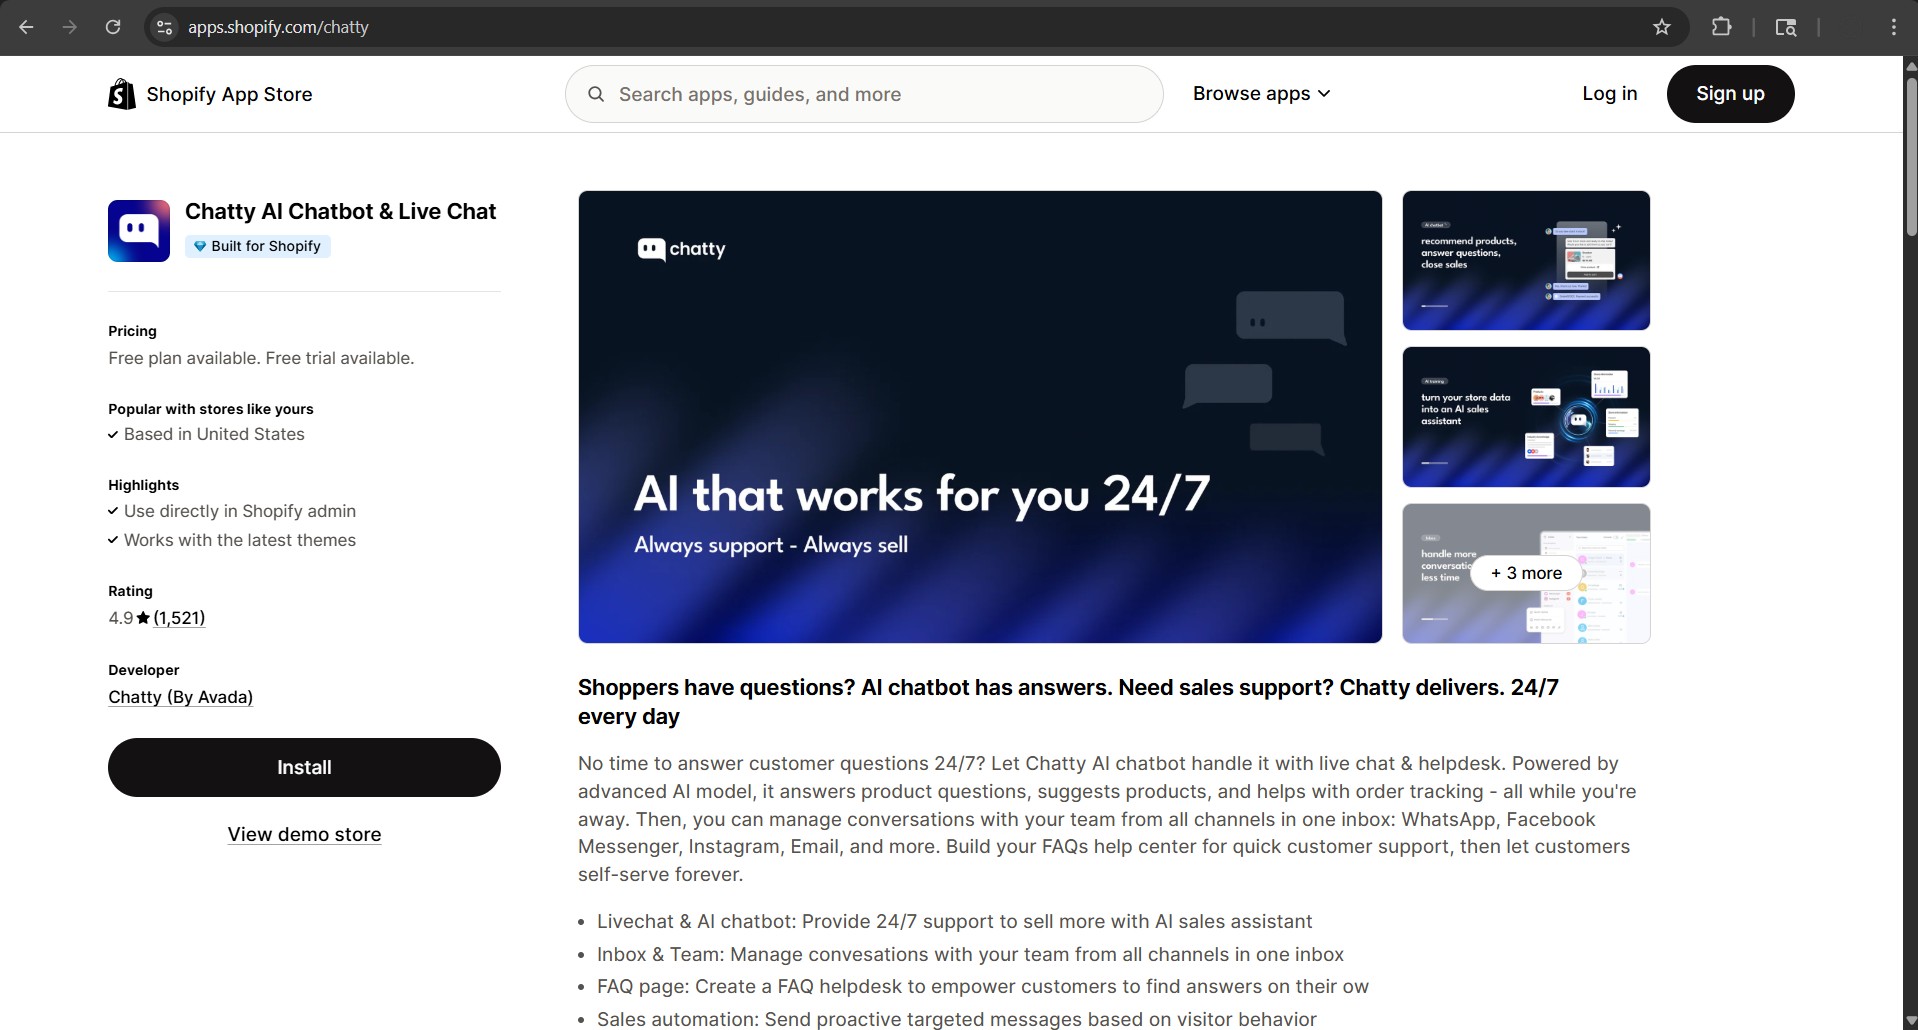
TASK 4 — Providing Live Chat Customer Support, In Real Time, On Your Shopify Store
(Automate first-response + FAQs with the Chatty Shopify app, escalate to humans when needed)
What the manual process looks like
You (or your team) watch an inbox or chat widget all day, repeating the same answers about shipping times, sizing, returns, frame options, and order status. Response times slip during busy hours; shoppers bounce before you reply.
How to automate these tasks on your Shopify store
Use the Chatty app (Shopify) to automate high-volume, repeatable conversations while preserving smooth escalation to a human when needed.
Foundation & training
- Connect your store: Allow Chatty to read key data (products, variants, inventory, order status).
- Seed FAQs & policies: Paste shipping, returns, sizing guides, materials, framing, and care information. Keep a single “source of truth” so updates flow into chat responses.
- Tone configuration: Choose friendly/professional voice, escalation rules, and safe-reply boundaries.
Automated support, instantly
- 24/7 instant answers: Chatty handles common questions (shipping timelines, sizing availability, restock ETA, materials, care).
- Order lookups: Customers can check order status via the widget without waiting on a human.
- Product assistance: The bot can surface matching products, variants, and links directly in the chat.
Escalation & operations
- Smart handoff: If confidence is low or an issue is sensitive (refunds, damaged orders), Chatty routes to a human with full conversation context.
- Snippets & macros: Your team keeps curated replies for edge cases to maintain speed/consistency.
- Inbox unification: Manage live threads, follow-ups, and tags so nothing falls through the cracks.
Conversion boosters
- Proactive prompts: Trigger helpful nudges (e.g., “Unsure about sizing? Ask me!”) on product pages or exit intent.
- Cart-save flows: Offer assistance when a cart goes idle; surface shipping info or bundle suggestions to prevent abandonment.
- Feedback loops: Tag recurring questions and push them back into product page copy, FAQs, or email flows to reduce future load.
The benefits of automating these tasks
- Faster responses, higher conversion: Immediate answers keep shoppers engaged and buying.
- Lower support load: The bot absorbs repetitive queries; humans handle the nuanced cases.
- 24/7 coverage without staffing bloat: Weekend and after-hours shoppers still get help.
- Cleaner operations: Centralized FAQs + conversation history = fewer errors and better training data.
- Insights that improve the store: Trends from chat (common objections, confusing variants) inform product pages, pricing, and bundles.
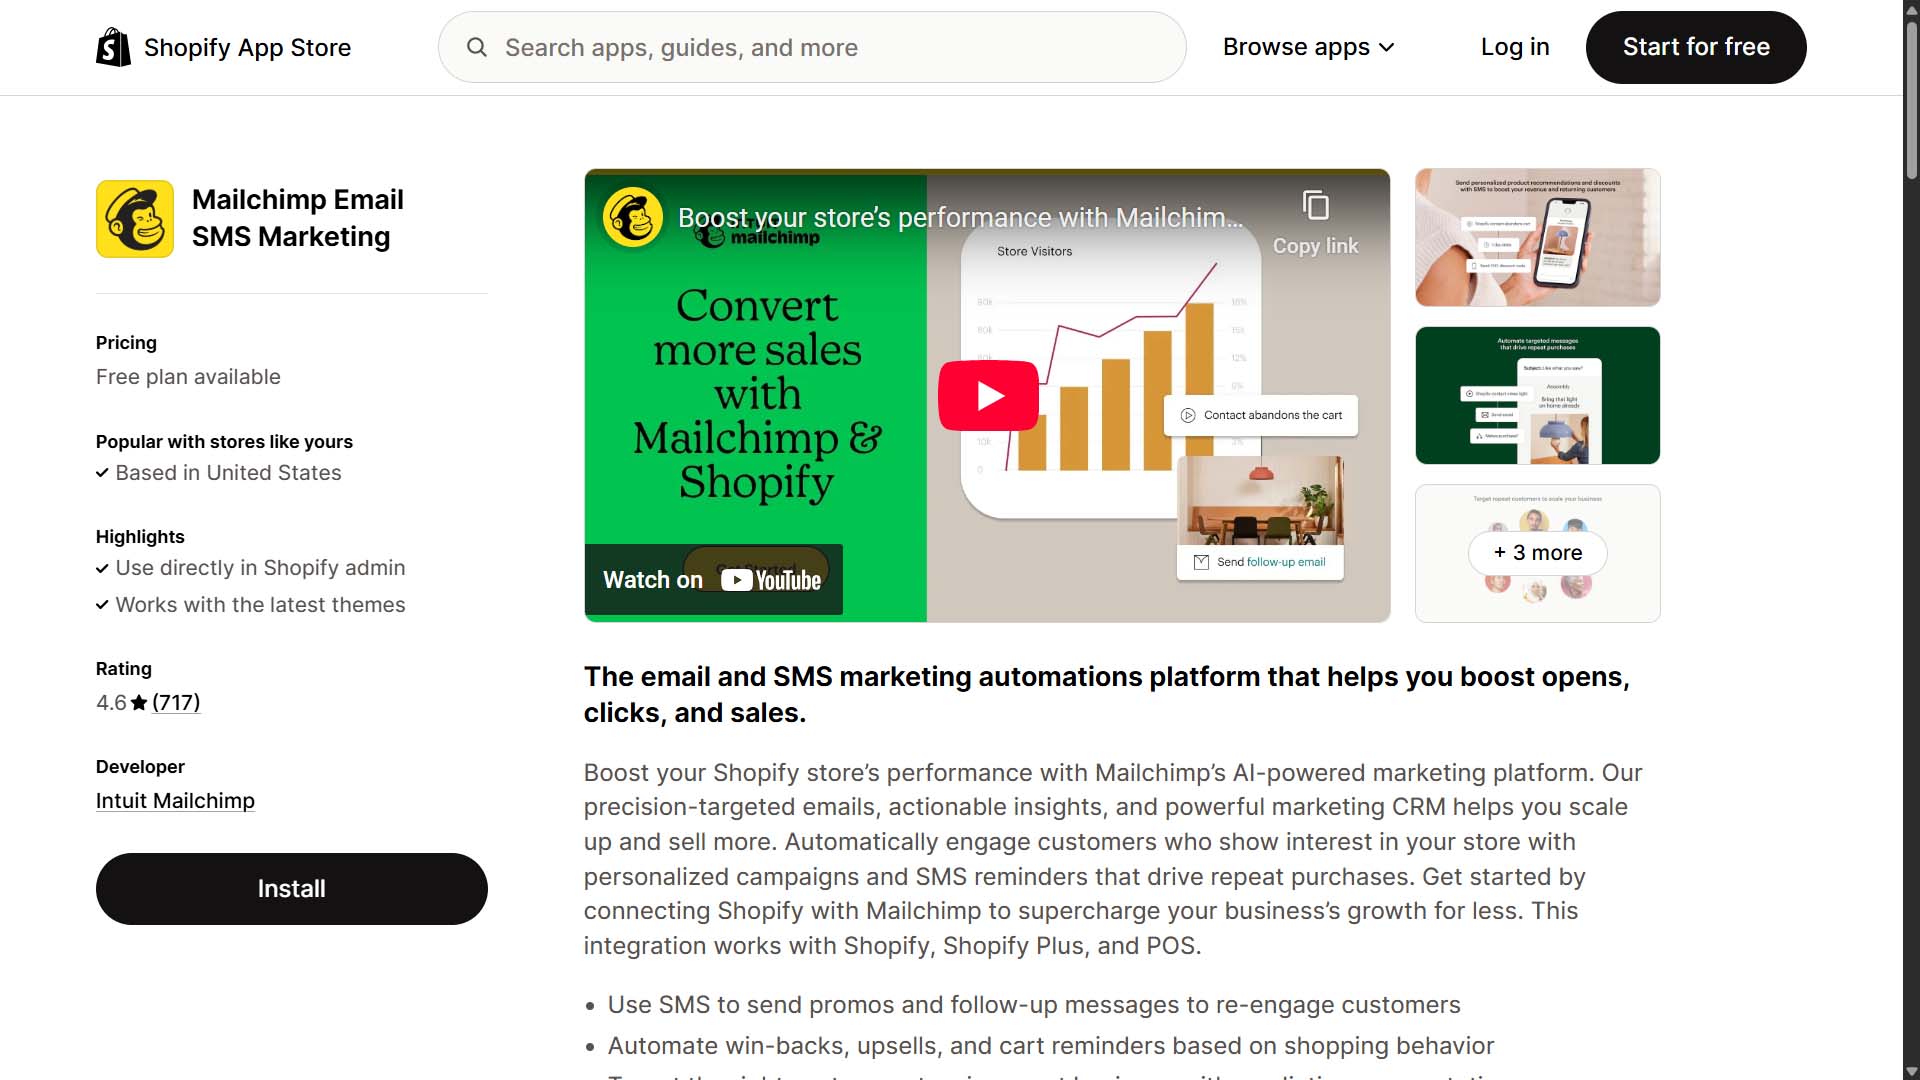
TASK 5 — Sending Promotional Emails to Your Customers
(Automate with the Mailchimp app for Shopify: list capture, compliance, campaigns, sequences, and abandoned-cart flows)
What the manual process looks like
You export CSVs from Shopify, clean them up by hand, and try to keep a running list of subscribers vs. customers. You copy/paste product links into a basic email tool, write every campaign from scratch, guess send times, and manually segment (or skip it entirely). You attempt a “welcome series,” but it’s just one email you remember to send sometimes. Abandoned carts? You mean the tab you keep meaning to set up.
How to automate these tasks on your Shopify store
Use Mailchimp's Shopify app to centralize capture, compliance, and automated delivery—so your list grows automatically and your email machine runs itself.
Foundation & capture
- Install and connect the Shopify app so Mailchimp can sync customers, orders, products, and tags.
- Enable on-site capture: add a footer form and checkout opt-in; use a simple pop-up for first-time visitors.
- Consent + hygiene: turn on double opt-in (if desired), auto-suppression for bounces/unsubscribes, and basic list cleaning so your sender reputation stays healthy.
Segmentation that matters
- Build audiences by purchase behavior (first-time vs. repeat), product category, average-order-value bands, tags (e.g., “canvas buyer”), and engagement (open/click recency).
- Save these as reusable segments so every campaign sends to the right people by default.
Automations that print money
- Welcome series: 3–7 emails that introduce your brand, highlight bestsellers, and provide a light incentive to buy.
- Post-purchase: care instructions, cross-sells, review requests, and “complete the set” offers.
- Win-back: if someone hasn’t purchased in 60–120 days, trigger a value-first reactivation sequence.
- Sale campaigns (bulk send): schedule store-wide announcements that auto-pull products and CTAs; layer urgency with send-time optimization.
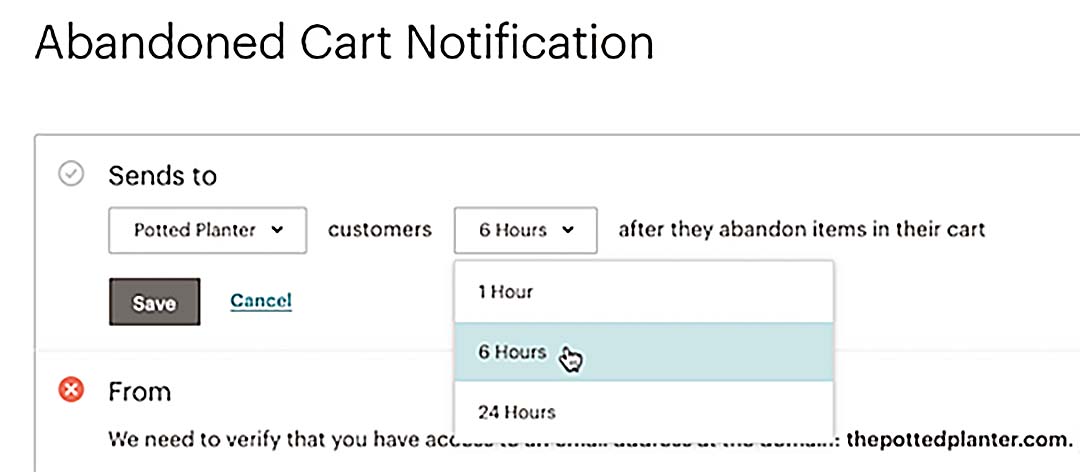
- Abandoned cart flows: on by default—recover revenue with reminders at +1h / +24h / +72h, optionally including a single-use discount on the last touch.
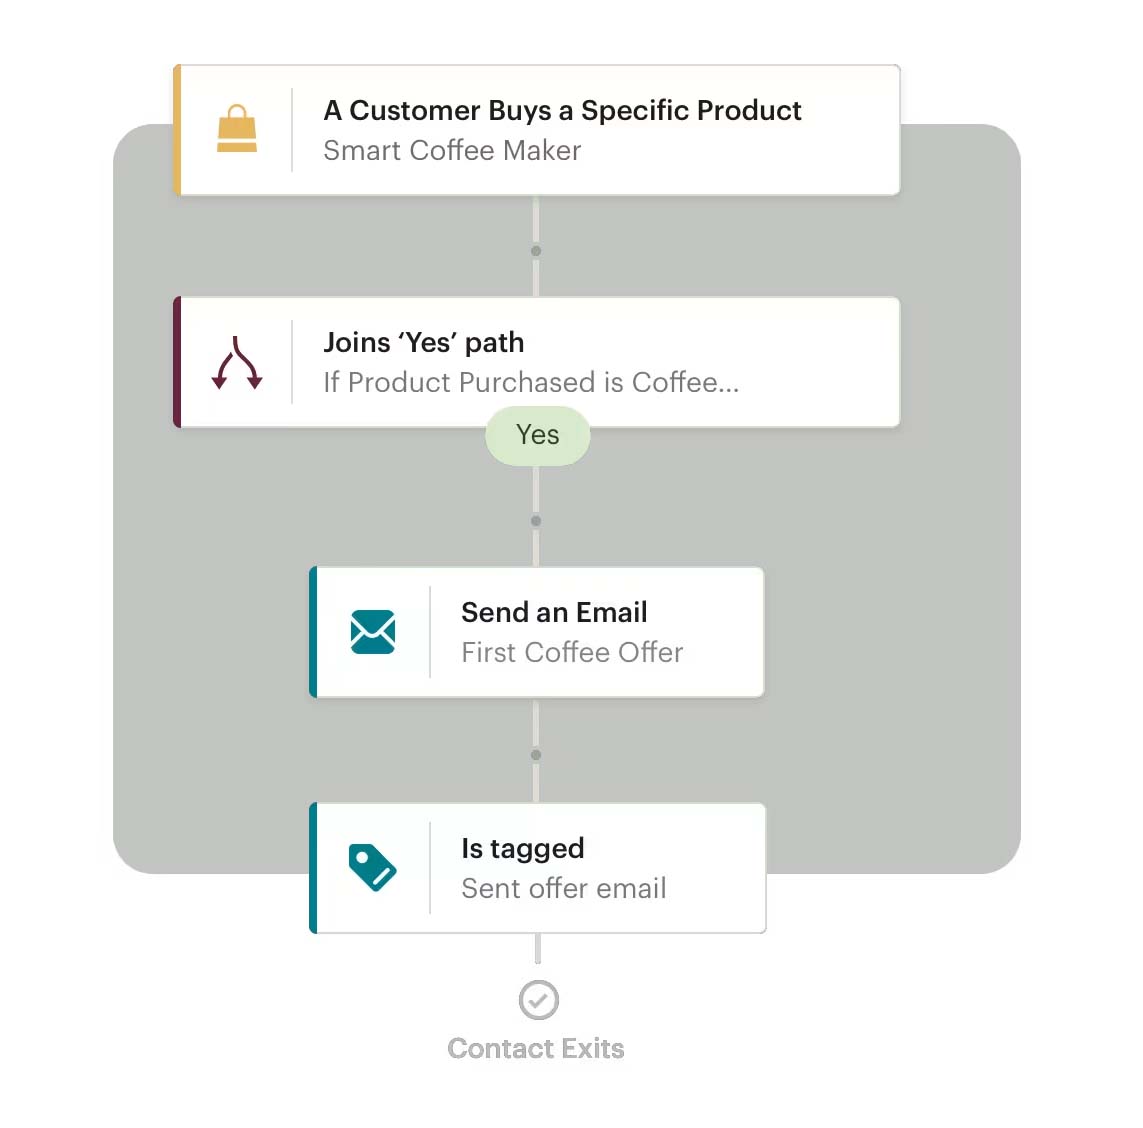
- Tag/trigger logic: when a customer is added to a list, given a tag (e.g., “Frames_Interest”), or hits a threshold (e.g., total spend), they’re automatically enrolled into the correct automation—no manual work.
Creative & operations
- Use brand kits and content blocks so every campaign stays on-brand and fast to produce.
- Create promotional templates (launch, mid-sale reminder, last-chance) once—then just swap headlines and featured products.
- A/B test subject lines and hero sections; promote winners to default.
Scheduling & cross-tool coordination
- Align email calendars with your Bulk Discount Editor sale schedule and social posts from TASK 3.
- For major drops, pre-schedule the warm-up, launch, restock notice, and last-chance emails—then let Mailchimp publish on autopilot.
The benefits of automating these tasks
- Hands-off growth: emails capture, clean, and segment themselves as your store grows.
- Always-on revenue: welcome, post-purchase, win-back, and abandon flows run 24/7.
- Better deliverability: built-in hygiene and consent controls protect sender reputation.
- Clear attribution: UTMs and revenue reporting show what actually drives sales.
- Reusable assets: once you build the sequences and templates, every future campaign is mostly “select segment → update offer → schedule.”
TASK 6 — Creating High-Quality Custom Mockup Images for Your Products
(Automate mockup image export in Photoshop with the Batch-Replace Smart Objects plugin.)
What the manual process looks like
Open PSD → dive into the Smart Object → paste artwork → resize/align → save → export → name file → repeat for every artwork × every mockup angle.
Even at ~30 seconds per mockup, a 500-image set consumes an entire day—and invites naming mistakes, misalignments, and inconsistent output sizes.
Why custom mockups matter (and why you should start from premium PSDs)
If you’ve already sourced polished PSD mockups from marketplaces like Creative Market or Creatsy, you’ve done the most important part: locking in visuals that make your products look ultra-professional—true-to-life lighting, shadows, fabric depth, frame texture, and environment styling. Compared to default POD previews, high-quality custom mockups:
- Elevate perceived value and support higher pricing power (premium imagery signals premium product).
- Improve conversion rates by helping customers actually see the product in context.
- Give you variety at scale—framed vs. unframed, lifestyle room scenes, close-ups, etc.
How to automate with your ready-made PSD mockups
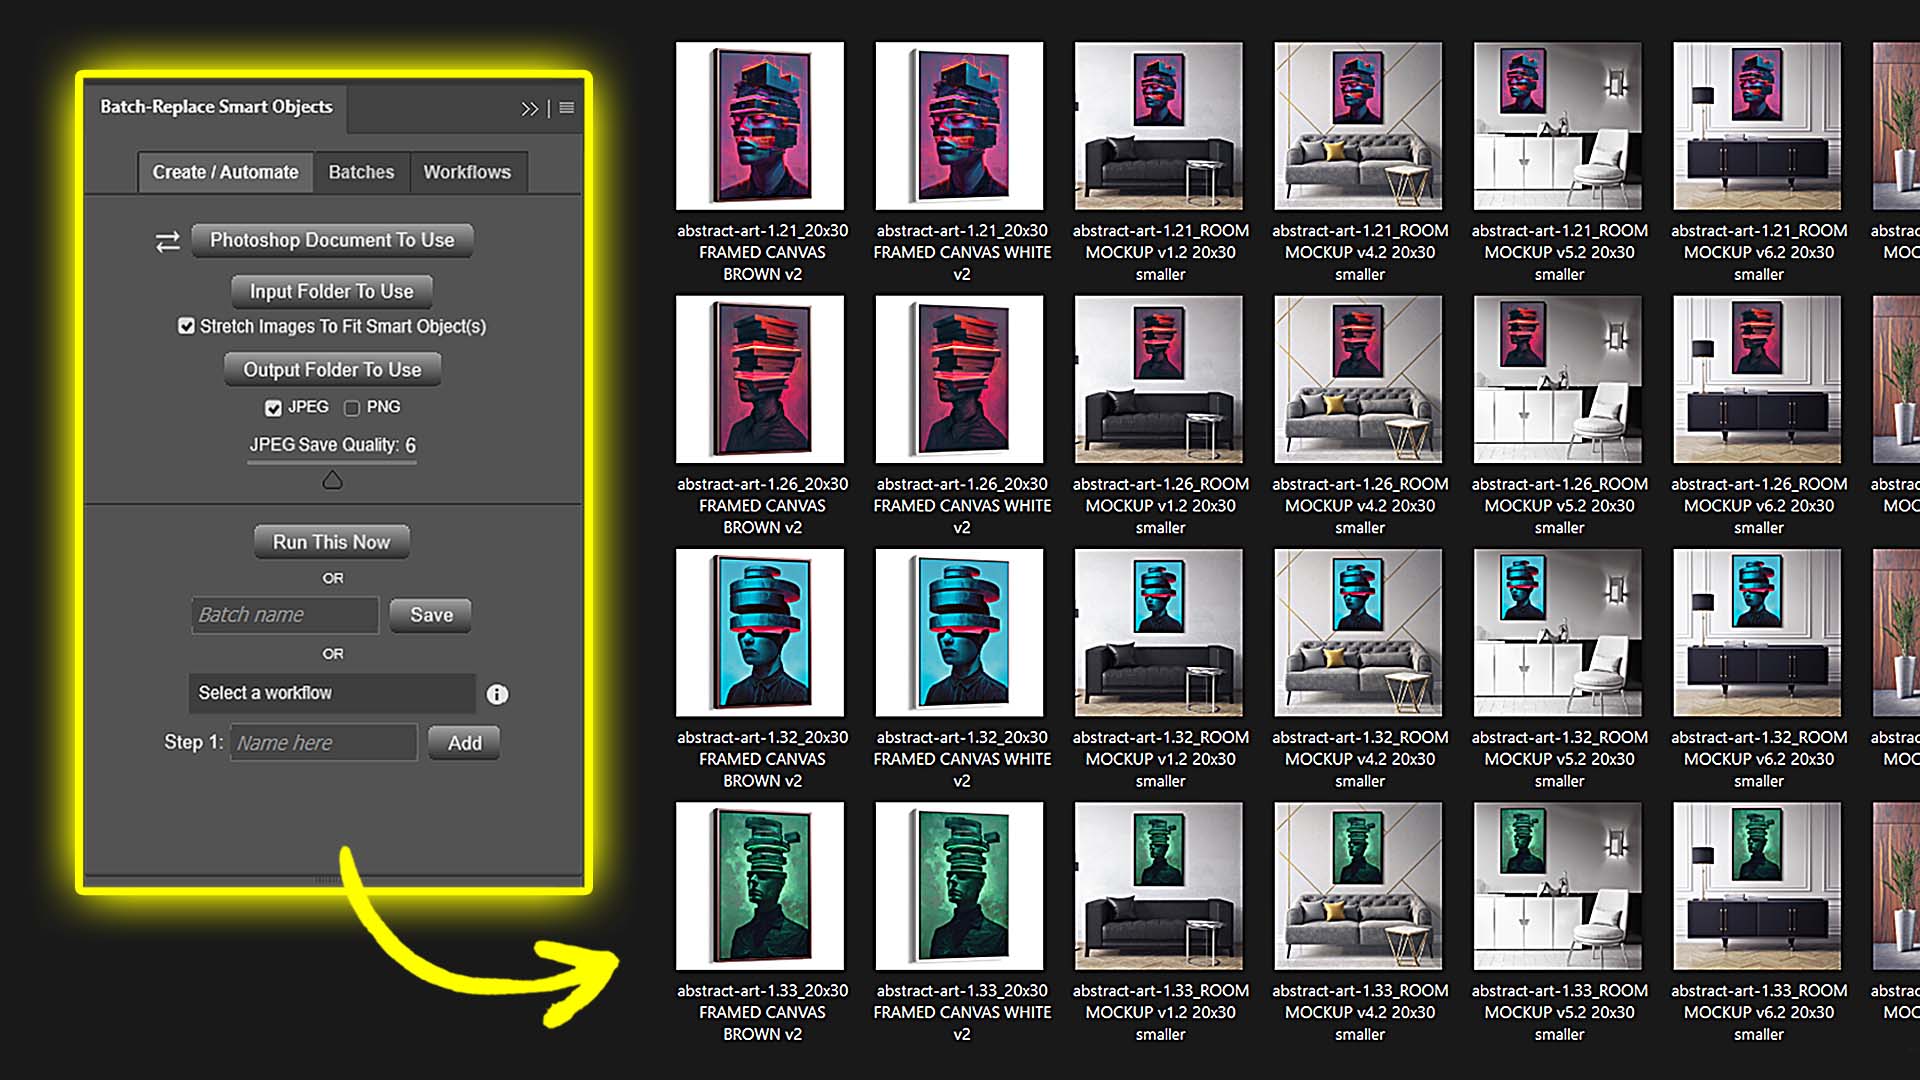
Use the Batch-Replace Smart Objects plugin to inject an entire folder of artwork into your PSD mockups and export final images—hands-free. You’re not building mockups from scratch; you’re mass-producing finished images from the premium templates you already downloaded.
Single-PSD Mode
- Select the PSD mockup you want to use.
- Choose your input folder of artwork images (final, curated exports).
- Choose your output folder and export format (JPG/PNG, quality level).
- Optional: enable Stretch images to fit Smart Objects if your artwork dimensions vary.
- Click Run—Photoshop cycles through every artwork, replaces the Smart Object, and exports clean, ready-to-upload mockups.
Folder Mode (multiply across many templates/angles)
Point the plugin at a folder of PSD mockups (e.g., straight-on frame, angled frame, room scene, detail crop). It will iterate template × artwork and export the full grid of combinations.
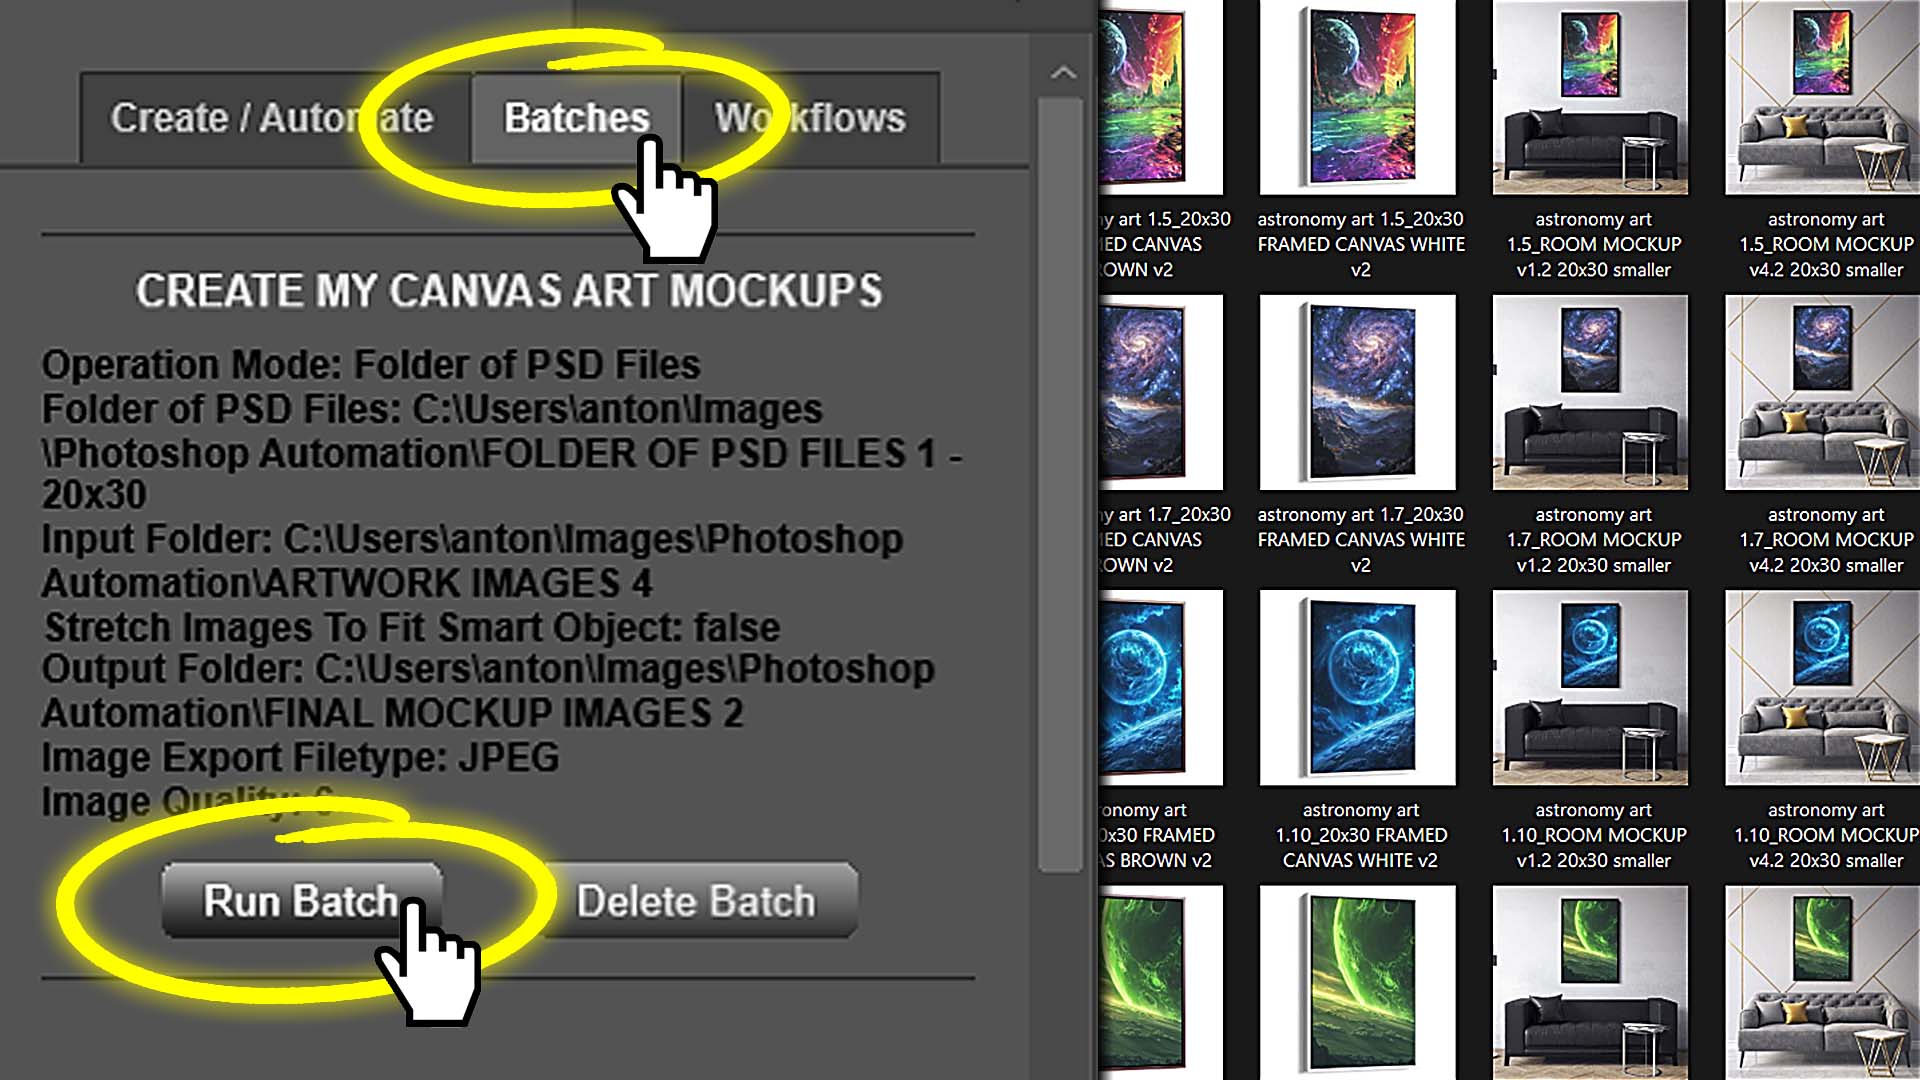
Saved Operations & Workflows (fire-and-forget)
- Save your configuration as a Batch (“Canvas_Room_Series”) and reuse it next time without re-entering paths or settings.
- Chain multiple Batches into a Workflow (“All Poster Mockups”) so the plugin runs Step 1 (frames), then Step 2 (room scenes), then Step 3 (detail crops) automatically—zero manual babysitting.
Multi-Smart-Object support (when a template has more than one placement)
If your PSD includes multiple Smart Object layers (e.g., two frames in one scene), simply select the target layer(s) before running. The plugin will apply the current artwork to each selected Smart Object and export the result—great for multi-angle apparel mockups.
Performance & housekeeping tips
- Keep artwork grouped by aspect-ratio family (2x3, 1x1, etc.) so stretch-to-fit is rarely needed.
- The plugin closes PSDs as it finishes to keep Photoshop responsive during large runs.
The benefits of automating these tasks
- Minutes, not days: Generate hundreds or thousands of mockups from your premium PSDs without touching layers or exports.
- Brand-grade consistency: Identical framing, perspective, output sizes, and compression across the entire catalog.
- Higher perceived quality → higher average-order-value: Premium visuals justify premium price points and reduce buyer hesitation.
- Scales with your catalog: As your artwork bank grows, you can regenerate complete mockup suites with two clicks.
TASK 7 — Converting All Your POD Products Into SEO-Optimized Pinterest Pins
(Automate with the Pinterest Shopify app: instant product-to-Pin publishing at scale)
What the manual process looks like
You export product images, paste titles/descriptions into Pinterest, craft keywords, add links, and manually upload Pins—one by one. You repeat for every color/size/artwork variant you want discoverable. Best case, you get through a dozen Pins before momentum stalls; meanwhile, your catalog has hundreds (or thousands) of products sitting invisible to Pinterest searchers.
How to automate these tasks on your Shopify store
Use the Pinterest app for Shopify to connect your catalog so Pins auto-generate from your product data—no hand uploads.
Setup (one time):
- Install the app and connect your Pinterest account.
- Sync your product catalog: titles, descriptions, images, price, availability, and URLs pull directly from Shopify.
- Map collections you want pushed to Pinterest, and verify your domain.
Run (ongoing):
- New/updated products in Shopify automatically become Pins, using your product info as the Pin title/description.
- Price/availability stay in sync with your store.
- You can optionally create product groups (by collection, tag, price band) to keep high-priority items front-and-center.
Make your Pins “SEO-rich” by design:
Because the app uses your existing product titles/descriptions, the work you did in TASK 1 pays off: if you created listings with long-tail, keyword-dense copy (e.g., via the Bulk POD Product Creator), those same phrases become your Pin metadata—helping you index for more searches with zero extra effort.
The benefits of automating these tasks
- Hands-free distribution: Every new product becomes a discoverable Pin—no extra publish step.
- Compounding organic reach: More SKUs → more Pins → more entry points from Pinterest search and boards.
- Zero extra work required: Your Shopify SEO becomes your Pinterest SEO automatically.
- Always up to date: Pricing, availability, and links stay synced—no stale Pins to babysit.
TASK 8 — Converting All Your POD Products Into Google Shopping Feed Listings
(Automate with the Simprosys Google Shopping Feed app for Shopify)
What the manual process looks like
You hand-craft a product feed (XML/CSV), figure out attribute requirements, upload to Merchant Center, fix errors, re-export, re-upload, repeat. Each catalog change requires another round of export/cleanup—so the feed falls out of date, and free listings vanish.
The reality is that manually converting your Shopify POD products into Google Shopping Feed listings is so technically complicated that most sellers probably wouldn't even bother to figure out how to do it, meaning they're missing out on some easy, organic traffic opportunities from Google.
How to automate these tasks on your Shopify store
Use the Simprosys app to generate and auto-sync a compliant feed to Google Merchant Center without touching files.
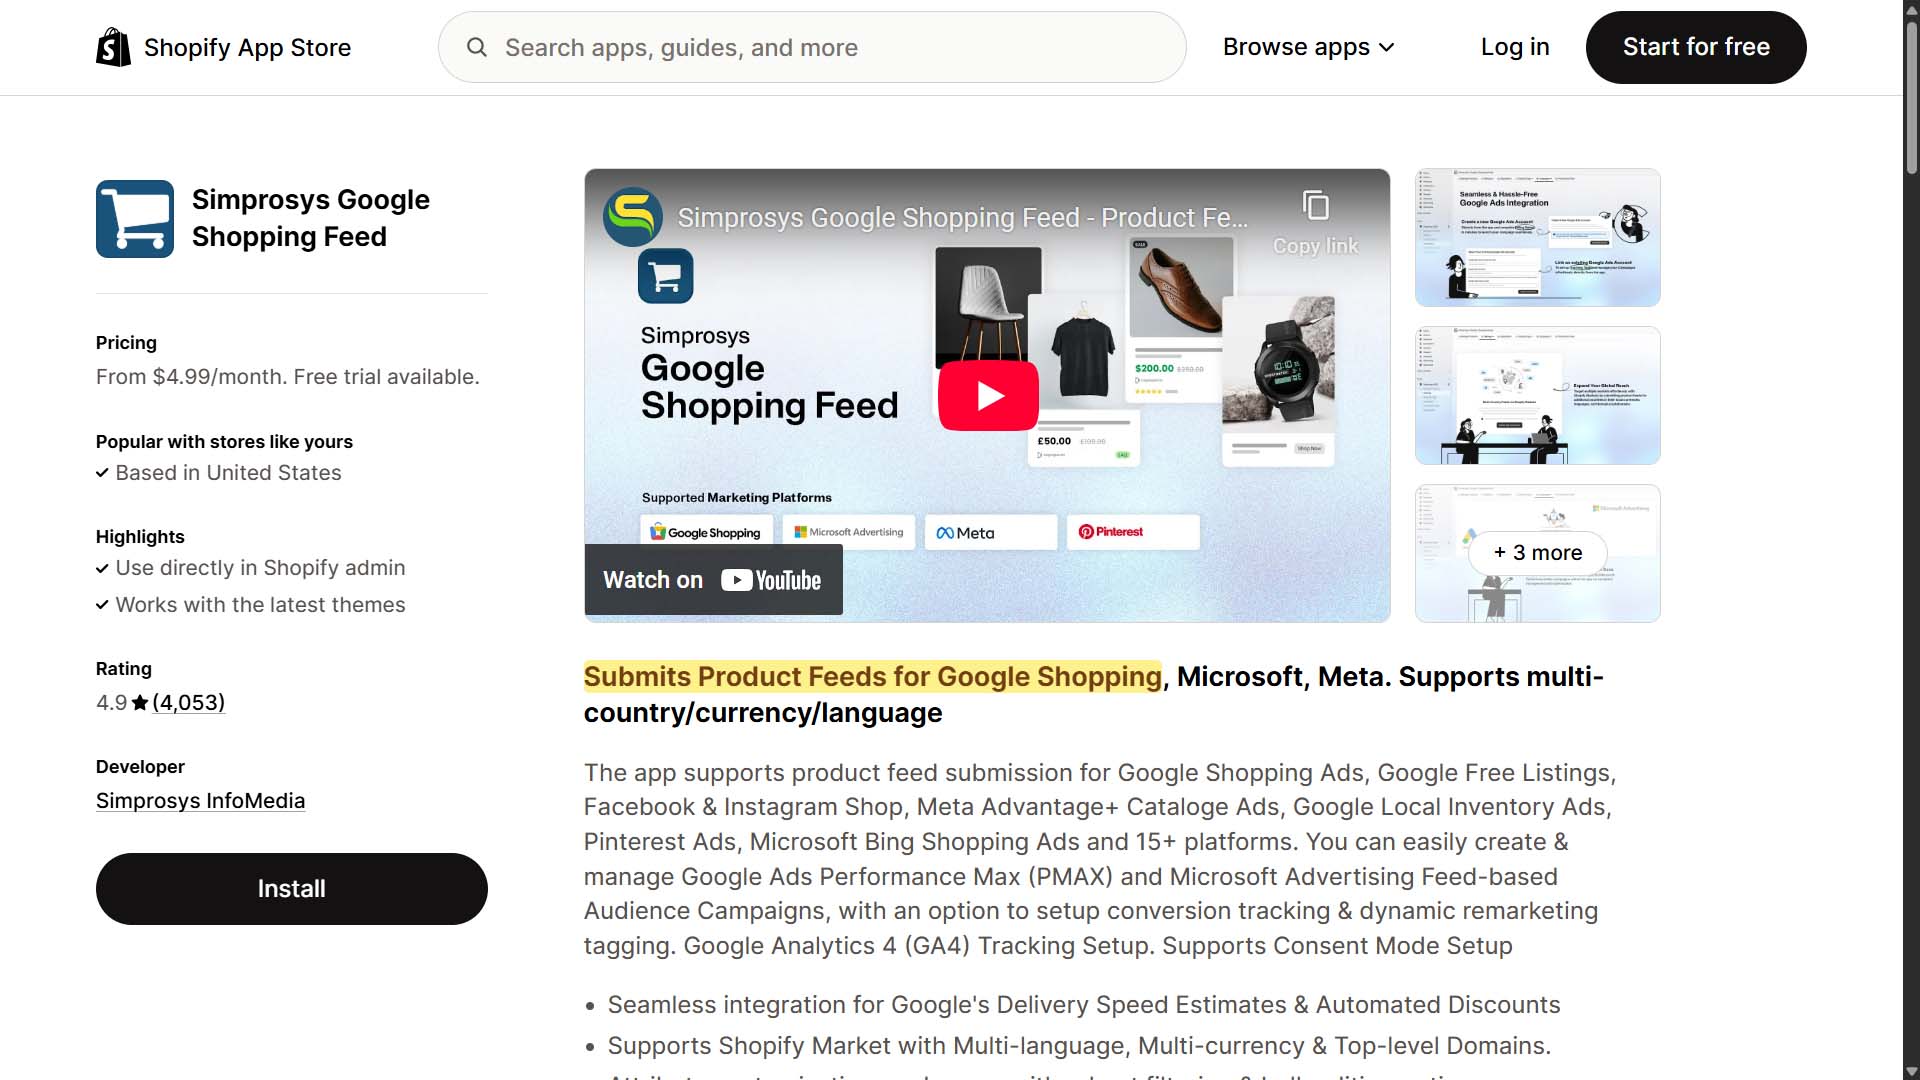
Setup (one time):
- Install Simprosys Google Shopping Feed and connect your Merchant Center account.
- Map attributes: brand, condition, availability, identifiers (GTIN/MPN), color/size/material, gender/age group (for apparel), and shipping/tax settings.
- Choose whether to include all products or target collections/tags. Confirm country/language targets.
Run (ongoing):
- The app builds and maintains your product feed from Shopify data—variants included.
- Product updates (title, price, availability, images) sync to Merchant Center automatically.
- Use built-in tools to exclude draft/low-margin items, override fields for specific SKUs, or fix disapprovals quickly.
Unlock “free traffic” immediately:
Merchant Center powers Free Listings on Google, Surfaces Across Google, and supports Shopping ads if/when you decide to run PPC.
Because the feed uses your Shopify product info, all the long-tail phrases you engineered in TASK 1 carry directly into Google’s product discovery surface—no duplicate work.

The benefits of automating these tasks
- Instant catalog coverage on Google surfaces: Hundreds or thousands of SKUs become discoverable via free listings—no manual exports.
- Always current: Price/availability changes sync automatically; no stale data penalties.
- Error reduction: Attribute mapping and variant handling are standardized, reducing disapprovals.
- SEO carryover: Your Shopify titles/descriptions (already long-tail optimized) flow straight into Google’s product index.
- Foundation for ads, when ready: Flip on Shopping ads later without rebuilding infrastructure.
TASK 9 — Updating Products / Specific Collections With Sale Prices
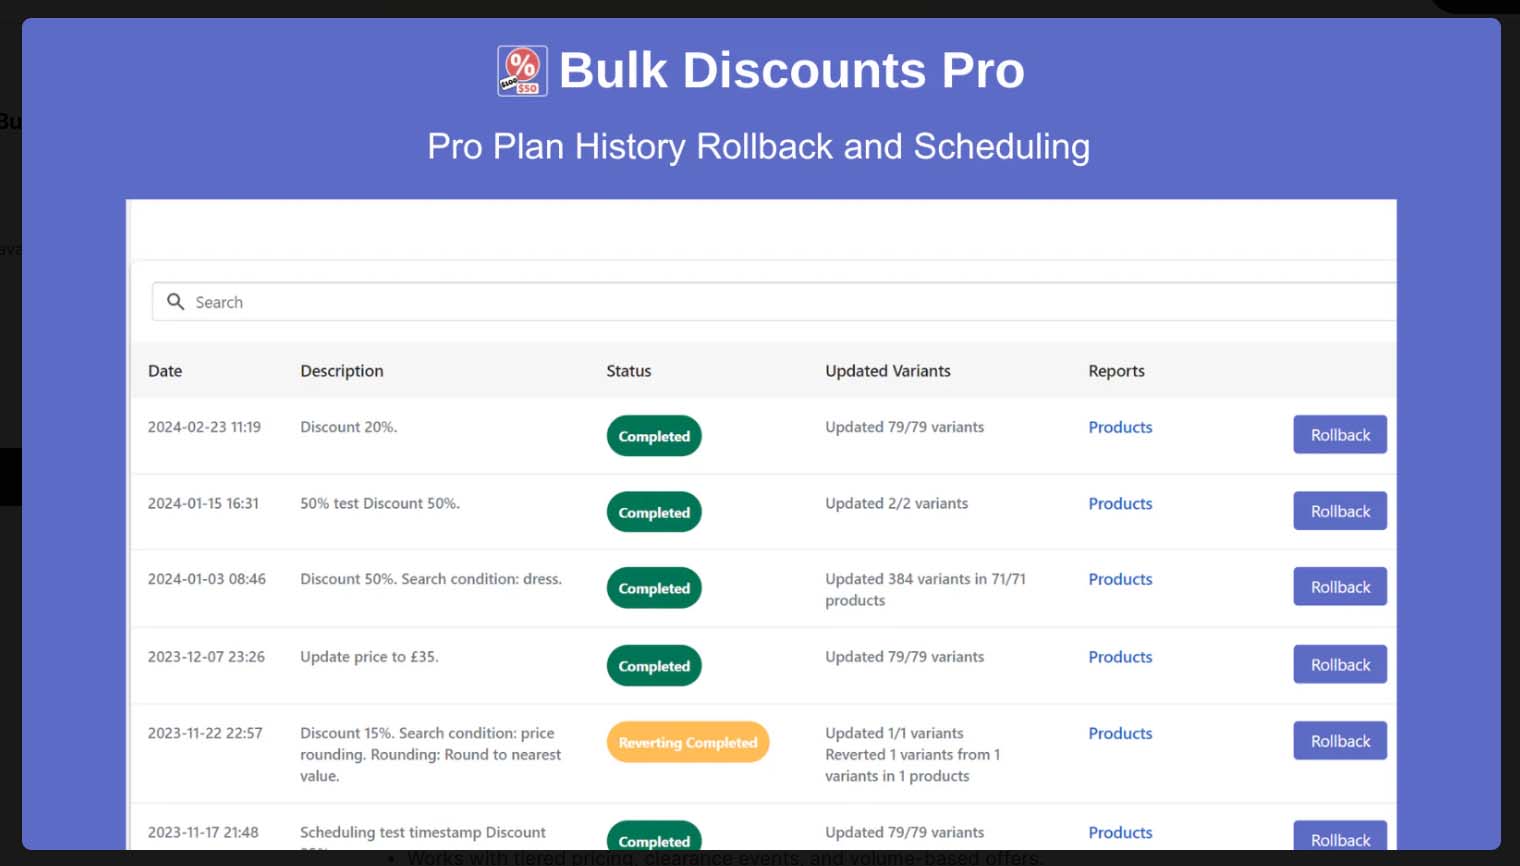
(Automate with the Bulk Discount Editor app for Shopify by Liftkit: bulk price edits + scheduled sales)
What the manual process looks like
You open each product, edit every variant’s price/compare-at price, save, and repeat—dozens or hundreds of times. You try to remember which items should be 15% off vs. 25% off, and when the sale should end. Rolling back prices after the sale is another manual marathon, and mistakes linger (wrong variants, stale compare-at prices).
How to automate these tasks on your Shopify store
Use the Bulk Discount Editor app to apply percentage or fixed-amount discounts across entire catalogs, collections, tags, or hand-picked product sets—and schedule both the start and end times.
Core setup
- Targeting: Choose scope by collection, product type, vendor, tag, or specific SKUs.
- Discount rule: Set % off (e.g., 20%), amount off (e.g., $5), or set price (uniform price).
- Compare-at logic: Automatically populate compare-at prices so customers see the “was/is” savings on PDPs and collection pages.
- Scheduling: Put your sale on the calendar—start at 12:01 AM Friday, revert Sunday 11:59 PM—so prices roll back automatically.
Operational patterns that scale
- A/B pricing: Duplicate a small collection, run 15% vs. 25% off, monitor conversion/AOV, then standardize the winner.
- End-to-end automation: Pair scheduled sales with Mailchimp (Task 5) to pre-schedule announce/reminder/last-chance emails and with Predis.ai (Task 3) for synchronized social posts.
The benefits of automating these tasks
- Minutes, not hours: Update thousands of variants in one operation.
- Fewer errors: Consistent discount math and automatic compare-at prevents mismatched pricing.
- Calendar control: Sales start/stop precisely—no late-night edits.
- Better coordination: Email and social promotions align perfectly with live pricing.
- Repeatable playbooks: Save common rule sets (e.g., “Posters-Weekend-20%”) and reuse.
Bringing It All Together: A Simple, High-Leverage Automation Stack
When these tools run in tandem, your Shopify POD store behaves like a coordinated system instead of a pile of to-dos. The flow is straightforward:
- You generate artwork in batches (OpenArt/OpenAI scripts or Midjourney with ChatGPT-expanded prompts).
- You convert those images into fully configured, SEO-ready products with the Bulk POD Product Creator—titles, descriptions, tags, variants, pricing, and image placement handled in one governed run.
- You export premium, on-brand visuals at scale using the Batch-Replace Smart Objects plugin, so every listing looks like a high-end catalog.
- Distribution happens automatically: the Pinterest Shopify app turns products into Pins, and Simprosys syncs your Google Shopping feed for free product listings.
- Predis.ai schedules a steady drumbeat of social content around new drops and promos, while Mailchimp handles welcome, post-purchase, win-back, and abandoned-cart sequences.
- Onsite, Chatty answers common questions instantly and escalates edge cases to a human.
- When it’s time to run a sale, Bulk Discount Editor updates prices across the right collections and rolls them back on schedule—while your email and social posts fire automatically.
What you get by stacking automation this way
- Throughput without burnout: Large product drops happen in hours, not weeks—because creation, imagery, distribution, and marketing are all systematized.
- Compounding visibility: Every new SKU becomes a Pin and a Google listing by default, multiplying search entry points without extra work.
- Higher perceived value: Premium mockups and consistent product info make your catalog look polished, supporting stronger pricing and conversion.
- Always-on marketing: Social posts and email flows run whether you’re online or not—capturing demand, rescuing carts, and re-engaging past buyers.
- Cleaner operations: Standardized blueprints, automated feeds, and scheduled discounts reduce errors and keep data current across channels.
- Focus on judgment, not drudgery: You decide the creative direction and offers; the stack handles the repetitive mechanics.
If you adopt even half of this stack, you’ll feel the lift immediately. Adopt all of it, and your store starts to behave like a reliable machine—publishing more, showing up more, and converting more, with less manual effort from you.