How To Create POD Products via the Printify API
Overview: A practical guide to creating print-on-demand products programmatically through the Printify API—including API token setup, two implementation paths (DIY code vs. turnkey software), and why the Bulk POD Product Creator is the easiest way to automatically create Printify products with no custom code or complex programming required.
What the Printify API Is (and why it’s the “right” way to automate)
The Printify API lets you perform actions on your store programmatically instead of clicking through the dashboard. In practical terms, software (a script, app, or automation tool) can create products, upload artwork, set variants, and sync to sales channels on your behalf—reliably and repeatably.
APIs are the proper automation interface because they’re designed for machines: they expose documented endpoints, accept structured data, and return deterministic responses. Contrast that with “record my clicks” desktop macros or browser automation: those break whenever the UI shifts, fail silently, and are notoriously brittle. If you want speed, scale, and reliability, use the API.
Bottom line: manual clicking doesn’t scale; API-driven automation does.
How to get a Printify API token (Connections → Generate)
To call the API you’ll need a personal API token, created in Connections:
- Visit: https://printify.com/app/account/api.
- Click Generate to create a new token.
- Name it (e.g., “Bulk Product Automation — Production”).
- Choose All scopes (full access) or Custom scopes. For product-creation automations, the typical minimum is:
shops.readcatalog.readprint_providers.readproducts.readproducts.writeuploads.readuploads.write
What the token is: a long, secret credential that authorizes software to act on your store—functionally, the programmatic equivalent of a password with precise permissions.

Two ways to create Printify products via the API
In practice, you have two approaches to create Printify products via the API:
Method 1 is to write and maintain your own custom code that handles authentication, uploads, blueprint/variant mapping, print-area transforms, pricing, publishing, retries, and error handling—achievable, but technically complex.
Method 2 is to use a simple software tool that automatically creates Printify products for you. This approach lets you start generating products at scale right away (fully automated, in bulk)—no code required.
Method 1: Build it yourself with code
Many developers script against the API using Python or JavaScript/TypeScript. You authenticate with your token, then call endpoints documented in the official Printify API docs.
For example, Printify exposes a product-creation endpoint:
POST /v1/shops/{shop_id}/products.json # Create a new productCore implementation steps (coding this yourself):
- Authenticate every request. Send your API token as a Bearer header and set JSON content headers. Plan for rate limits, transient 5xx, and 401/403 on expired/insufficient scopes.
- Upload your artwork to the Files/Uploads service. The response returns a file identifier (and/or CDN URL). You’ll reference that identifier inside the product payload’s image list. Multiple images mean multiple uploads.
- Inspect a “template” product you built manually. Fetch it via the Products endpoint to learn the print_provider_id, blueprint_id, enabled variant IDs, and the exact print_areas/placeholders structure used by that blueprint. (Each provider/blueprint combination can differ.)
-
Select and normalize variants. Build your
variantsarray with the precise variant IDs you want enabled, plus price and availability flags. (IDs are provider-specific; mixing IDs from another provider will fail.) -
Map print areas to the correct variants. For each print area, supply the list of
variant_idsit covers and define one or moreplaceholdersthat receive your images. Each placeholder generally needs an ordered list of images with transform properties such asx,y,scale,angle, andposition(e.g., front). Values must match the blueprint’s coordinate system. - Attach uploaded images to placeholders. Reference the uploaded file IDs and include the correct transformation values so the artwork lands exactly where the blueprint expects. Different sizes may share the same print area or require separate areas.
-
Add product metadata. Provide a
title,description, andtags. (If you publish to a marketplace, additional channel-specific fields may apply.) -
POST the fully-formed payload to the product-creation endpoint and capture the returned
product_id. If you also wish to publish/sync immediately, follow up with the appropriate publish/update call. - Handle errors and retries. Validate payloads rigorously; a single misplaced key, an out-of-range transform, or an unrecognized variant ID will return a 4xx. Implement exponential backoff for 429/5xx responses.
- Keep in sync as blueprints evolve. Providers can add/change variants and print areas. Re-fetch metadata periodically and regenerate mappings to avoid silent misplacements.
Illustrative (simplified) shape of a product payload
{
            "title": "Your Product Title",
            "print_provider_id": <provider_id>,
            "blueprint_id": <blueprint_id>,
            "variants": [
                { "id": <variant_id>, "price": 1999, "is_enabled": true }
                // ...more variants
            ],
            "print_areas": [
                {
                "variant_ids": [ <variant_id>, <variant_id> ],
                "placeholders": [
                    {
                    "position": "front",
                    "images": [
                        { "id": "<uploaded_file_id>", "x": 0, "y": 0, "scale": 1.0, "angle": 0 }
                    ]
                    }
                ]
                }
                // ...additional areas as required by the blueprint
            ],
            "tags": ["poster", "wall art"]
            }
Common pitfalls that trip people up:
- Coordinate systems (pixels vs. relative units) and origin points differ by blueprint; transforms that look “right” in one template can be “off” in another.
- Variant/area mismatches: supplying area mappings for variants the provider doesn’t serve results in validation errors.
- Image normalization: forgetting to pre-size or crop leads to unexpected scaling or clipping across sizes.
- Scope gaps: missing
uploads.writeorproducts.writecauses hard failures even though auth works elsewhere. - Publishing workflow: creation succeeds but nothing appears in your channel because publish/sync wasn’t requested or required channel fields were omitted.
Coding this yourself is doable—but you must model payloads exactly, manage retries/backoff, normalize image sizes, and keep your code updated as providers/blueprints evolve. If that sounds excessively complicated, Method 2 (an easy-to-use software tool that creates your print-on-demand products for you) will feel refreshingly simple.
Method 2: Use existing software that creates products via the API
If you’d rather not reinvent the wheel, use a purpose-built tool that already implements the full flow. The Bulk POD Product Creator interfaces with Printify’s API on your behalf and handles the entire product-creation process for you.
Connect with your API token (first things first):
- In the tool, add a Printify store using your Store ID and the API token you generated.
- Ensure the token includes at least:
shops.read,catalog.read,print_providers.read,products.read,products.write,uploads.read,uploads.write. - Select (or paste) an Example Product ID—a finished product in your store that acts as the template for new products.


High-level flow (how operations run):
- Choose/Select Images to transform into products.
- Select Placement Mode (how artwork is positioned on print areas):
- Stretch to fit — fills the canvas quickly and uniformly.
- Preserve aspect ratio & center — no distortion; centered composition.
- Exactly match Example image(s) — pixel-accurate replication.
- Connect your Printify store (API token) and pick your Example Product.
- Configure New Product Creation Rules (SEO automation for titles, descriptions, tags).
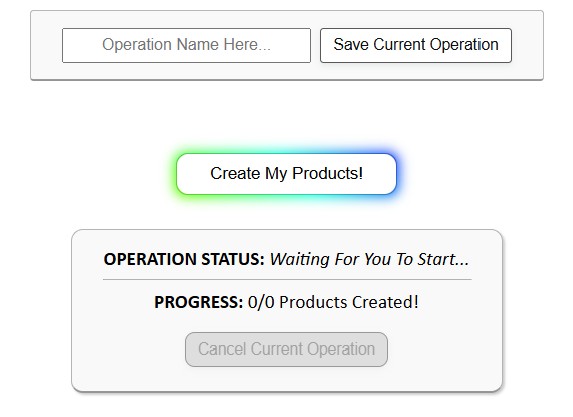
- Run the operation—the software batches the API calls and creates Printify products automatically at scale.
- Save as a reusable Saved Operation to Load and Run later with one click (optional).


Customize exactly how your print-on-demand products get created:
- Titles — Simple or Compound multi-segment keywords; append Custom Title Text such as “— Poster Wall Art” for better query match.
- Descriptions — AI-generated detail about subject/style/colors; or copy from Example Product; plus Custom Description HTML for evergreen specs (paper type, finish, sizes).
- Tags — AI-generated artwork-specific tags + standardized evergreen tags (e.g.,
poster,posters,wall art,wall decor). - Variants & pricing — replicate sizes/variants from the Example Product, apply uniform markups without hand-editing each SKU.
- Image handling — automatic resizing, upscaling and placement per your chosen mode for crisp results across sizes.
Why API-based, programmatic creation beats manual uploads
Speed & scale: spin up hundreds or thousands of products in the time manual creation would produce a handful. Batched calls and parallelism let you expand catalogs on demand.
Consistency & standardization: every listing follows the same placement rules, title schema, description format, tag strategy, and pricing logic—fewer typos and missed variants.
Deterministic quality: programmatic placement removes alignment guesswork; re-running an operation with new images yields predictable results.
SEO at scale: AI-generated titles, descriptions, and tags mean every item is published with strong metadata from day one. Compound titles + evergreen tags broaden long-tail coverage, boosting impressions and CTR.
Conclusion
The Printify API is the correct foundation for automating Printify product creation. You can either write and maintain your own pipeline—or rely on software that already handles authentication, uploads, placements, variants, pricing, and SEO text generation with one setup and one click.
If you’re serious about scaling a POD business, programmatic creation isn’t optional—it’s the only reliable way to move fast without errors. Connect your store with an API token, point the tool at a perfected Example Product, set your New Product Creation Rules, and launch. The hours you save are better invested in design, marketing, and growth.