How To Automate Your Printify Workflow: Print-on-Demand Automation Made Easy
Summary: Stop spending your best hours on manual clicks. This comprehensive guide shows how to automate your end-to-end Printify pipeline: generate artwork at scale using AI, curate images as rapidly as possible, create SEO-ready POD products automatically (instead of manually), and export product mockup images in bulk.

Step 1 — Bulk-generate artwork images with AI, then curate images with maximum efficiency
The best tool for generating outstanding POD artwork images at scale is Midjourney. If you've never heard of it, Midjourney is an AI image generator that produces original artwork from natural-language prompts. Describe subject, style, medium, composition, lighting, and palette; Midjourney returns four candidates per prompt that you can upscale or vary.
For print-on-demand sellers, the benefits are clear:
- Throughput: Quickly produce large, on-theme collections without commissioning every piece.
- Control: Encode brand/style rules directly into prompts (palette, medium, composition, era).
- Aspect-ratio targeting: Apply parameters like
--ar 2:3to match poster/wall-art formats. - Niche specificity: Dial prompts to exact sub-niches (breeds, interiors, hobbies, moods).
⚠️ IP note: Avoid prompts that could generate trademarked characters, logos, or other protected IP. Always comply with platform policies.

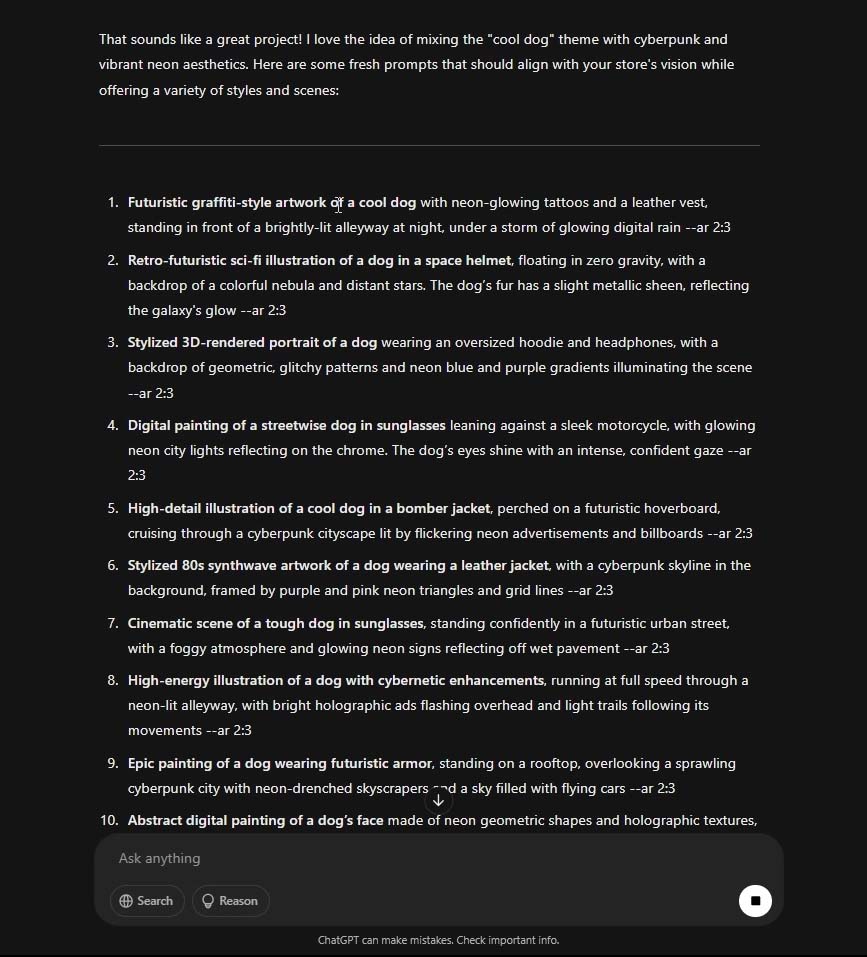
Use ChatGPT to bulk-generate high-quality prompts
Once you lock a winning visual direction, use ChatGPT to programmatically produce hundreds of varied, on-brief prompts. Ask for one prompt per line so you can paste directly into a spreadsheet.
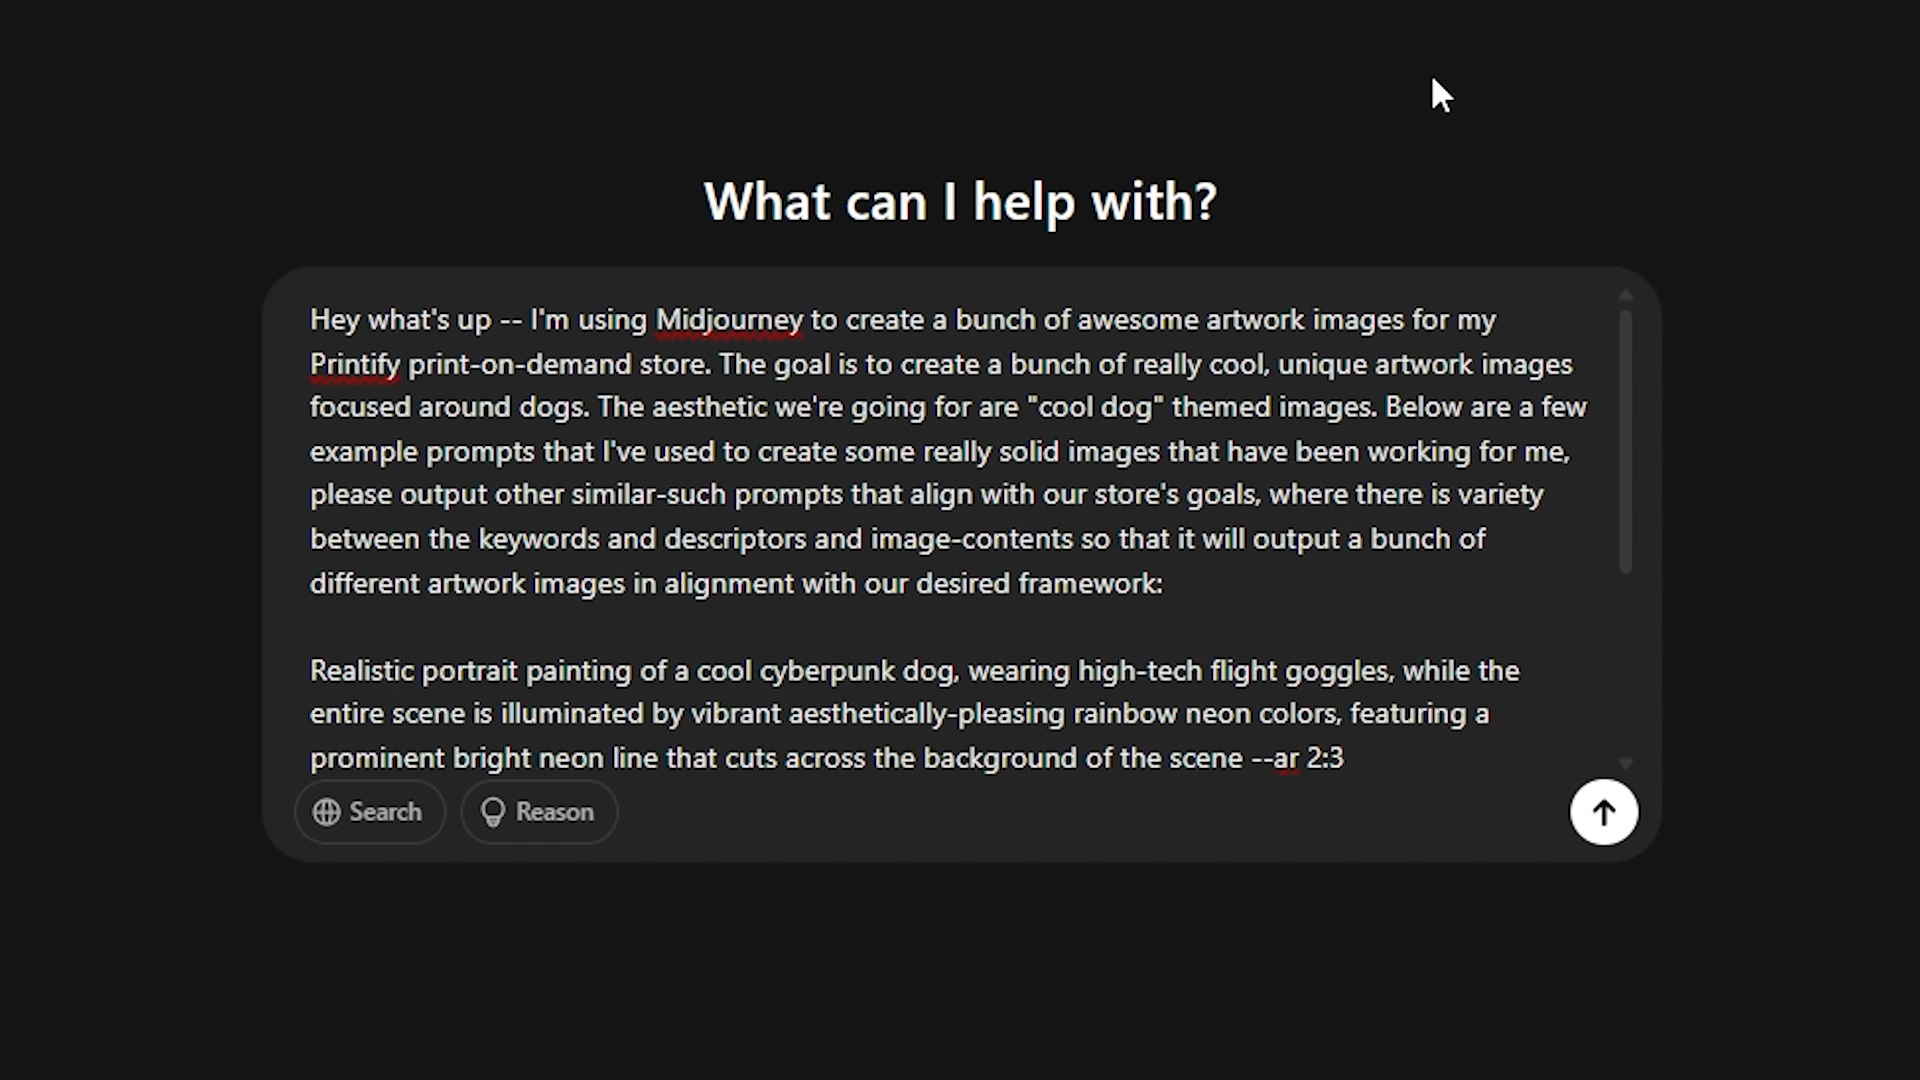
Example ChatGPT instruction, to bulk-generate optimal prompts for Midjourney:
Goal: Generate a large set of Midjourney prompts for print-on-demand artwork in the niche “cool dog artwork”.
Requirements:
- Each prompt must be unique and descriptive.
- Include subject, style, medium, composition, lighting, color palette, and any relevant art movements.
- Use varied phrasing to avoid near-duplicates.
- Append the Midjourney parameter --ar 2:3 to every prompt (portrait poster format).
- Output one prompt per line (no bullets, no numbering).
- Produce 250 prompts.
Two examples of the desired style and specificity:
- surreal portrait of a shiba inu wearing a vintage bomber jacket, cinematic key light, kodachrome color palette, shallow depth of field, fine-grain film texture, editorial fashion photography style, 35mm look, clean studio backdrop --ar 2:3
- geometric illustration of a border collie mid-leap, bold vector shapes, bauhaus color blocking, crisp negative space, posterized halftone shadows, contemporary gallery print aesthetic --ar 2:3
Now generate 250 more in this spirit. Output only the prompts, one per line.
Midjourney automation: practicalities and risks
As of September 2025, Midjourney does not provide a public API or native bulk-creation. Pasting prompts manually is required. (However, we will show you an extremely efficient way to get this done below. Additionally, we will explore an alternative to Midjourney below that *does* allow automated/bulk image creation.)
⚠️ Be cautious of “unofficial Midjourney APIs,” Chrome Extensions that claim to automatically create Midjourney images, or any other SaaS service that promises to automate Midjourney image creation: These typically violate Midjourney’s Terms of Service and may put your account at risk!
As Midjourney plainly states in their Terms of Service: "You may not use automated tools to access, interact with, or generate Assets through the Services."
The solution to "no Midjourney automation allowed"? Delegate prompt submission to a freelancer (with IP safeguards)
Hiring a VA on a marketplace (e.g., Upwork) to paste prompts, wait for images, download all four results, and deliver a zipped batch is a cost-effective way to scale. Typical quotes we’ve seen: ≈ $20 per 1,000 images. That easily beats spending 5–10 hours doing it yourself.
Two ways to structure it:
- They use your Midjourney account (access-control risk, which could potentially compromise your Midjourney account).
- They use their Midjourney account and deliver images with a written copyright transfer.
For option (2), consider (after consulting your own attorney) clauses such as:
- The freelancer creates original images using their Midjourney subscription and, in exchange for the agreed fee, assigns and transfers to you all right, title, and interest in and to the images delivered, to the fullest extent permitted by law.
- The freelancer represents and warrants the images do not knowingly infringe third-party IP and were created in compliance with Midjourney’s terms.
- The freelancer agrees to indemnify you for claims arising from their breach of the above representations (subject to jurisdictional enforceability).
- The agreement clarifies jurisdiction, governing law, deliverables (formats/folders), and timelines.
Not legal advice. Consult qualified counsel before relying on any contract language or making IP-sensitive decisions.
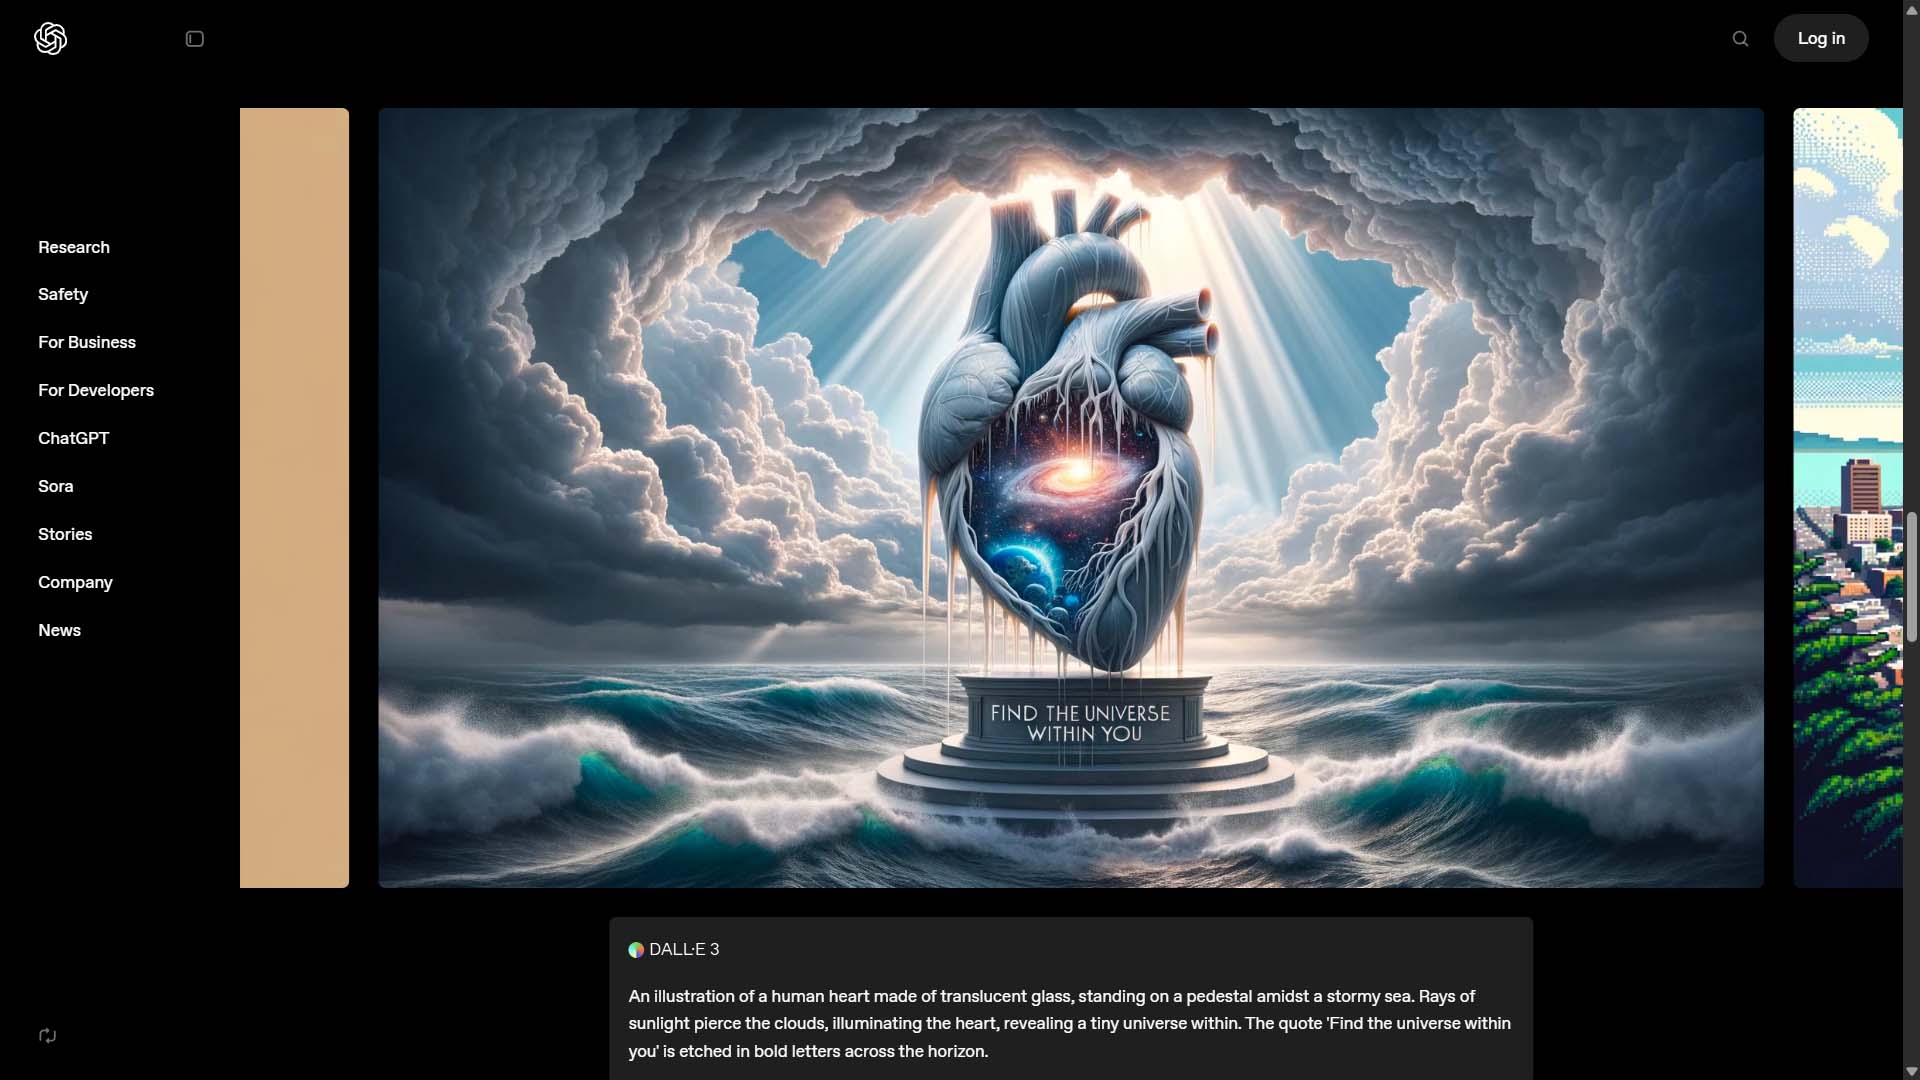
Automated alternative to Midjourney: OpenAI’s DALL·E
Unlike Midjourney, OpenAI’s DALL·E offers a fully supported API, which means you can generate images in bulk through simple code or automation workflows. By writing a script, you can feed in hundreds of prompts (from a spreadsheet or database) and have DALL·E automatically return artwork files — no manual copy-pasting required.
The process is straightforward:
- Prepare your list of prompts (e.g., in Excel or CSV format).
- Write a script (Python, Node.js, etc.) that loops over each prompt and calls the DALL·E API.
- Save the resulting images into a folder for direct use in your product creation workflow.
While Midjourney still leads in raw artistic quality, DALL·E continues to improve rapidly. If your top priority is automation at scale and you’d rather not delegate prompt-submission to freelancers, then DALL·E is a practical alternative that can integrate seamlessly into your automated Printify workflow.
Example Python script to automate artwork image creation via DALL-E:
import os
import openai
from pathlib import Path

openai.api_key = "YOUR_API_KEY_HERE"

# Input: list of prompts (could also load from a CSV/Excel file)
prompts = [
    "surreal portrait of a shiba inu wearing a vintage bomber jacket --ar 2:3",
    "geometric illustration of a border collie mid-leap, bauhaus color blocking --ar 2:3",
    "dreamlike watercolor landscape of mountains at sunrise --ar 2:3",
]

# Output folder for images
output_dir = Path("dalle_outputs")
output_dir.mkdir(exist_ok=True)

# Loop through prompts and generate images
for idx, prompt in enumerate(prompts, start=1):
    print(f"Generating image {idx}/{len(prompts)}: {prompt}")

    response = openai.images.generate(
        model="gpt-image-1",   # DALL·E 3 API
        prompt=prompt,
        size="1024x1024"       # adjust to "512x512" or "2048x2048" if desired
    )

    image_url = response.data[0].url

    # Download and save the image
    image_data = openai._utils.download_file(image_url)
    output_file = output_dir / f"image_{idx}.png"
    with open(output_file, "wb") as f:
        f.write(image_data)

    print(f"Saved to {output_file}")
Curate images FAST with a hyper-efficient keyboard-driven curation workflow
Opening thousands of images to decide “keep or delete” is slow. Use a simple Python viewer to approve or delete images instantly with arrow keys. A binary “keep/delete” decision is usually the highest-ROI (as opposed to folderizing images for additional processing or editing, for example.)
Below is the code for a Python image curator script that one of our team members used to process 1000s of images with incredible speed:
import os
from PIL import Image, ImageTk
import tkinter as tk
from tkinter import messagebox


image_folder = r'C:\Users\anton\Pictures\AI Artwork\CURRENT IMAGE FOLDER' # the folder path of the images to curate

all_files = os.listdir(image_folder)
files = [f for f in all_files if f.lower().endswith(('.png', '.jpg', '.jpeg'))]
files_index = 0
transformed_images = 0
processed_images = 0

root = tk.Tk() # creates a simple GUI window
root.geometry('800x600')

canvas = tk.Canvas(root, width=800, height=600)
canvas.pack(side="left", fill="both", expand=True)

scrollbar_v = tk.Scrollbar(root, orient="vertical", command=canvas.yview)
scrollbar_v.pack(side="right", fill="y")
scrollbar_h = tk.Scrollbar(root, orient="horizontal", command=canvas.xview)
scrollbar_h.pack(side="bottom", fill="x")

canvas.configure(yscrollcommand=scrollbar_v.set, xscrollcommand=scrollbar_h.set)

frame = tk.Frame(canvas)
canvas.create_window((0,0), window=frame, anchor='nw')

label = tk.Label(frame)
label.pack()

total_images = len(files)
count_label = tk.Label(frame, text=f"0/{total_images}", fg="white")
count_label.pack(side="top", fill="x")

zoom_state = False
img = None

# Functions for mousewheel scrolling
def scroll_v(event):
    canvas.yview_scroll(int(-1*(event.delta)), "units")
canvas.bind_all("<MouseWheel>", scroll_v)

def scroll_h(event):
    canvas.xview_scroll(int(-1*(event.delta)), "units")
canvas.bind_all("<Shift-MouseWheel>", scroll_h)

# Functions for keyboard scrolling
def scroll_up(event):
    canvas.yview_scroll(-5, "units")

def scroll_down(event):
    canvas.yview_scroll(5, "units")

def scroll_left(event):
    canvas.xview_scroll(-5, "units")

def scroll_right(event):
    canvas.xview_scroll(5, "units")

def load_next_image():
    global img
    global files_index
    global processed_images
    if files_index >= len(files):
        messagebox.showinfo("Information", "No more images left")
        root.quit()
        root.destroy()
    else:
        img_path = os.path.join(image_folder, files[files_index])
        img = Image.open(img_path)
        update_image_display()
        files_index += 1
        processed_images += 1
        count_label.config(text=f"{processed_images}/{total_images}") # updates visual progress display text

def delete_current_image(): # deletes the current image and loads the next one
    global files_index
    img_path = os.path.join(image_folder, files[files_index - 1])
    os.remove(img_path)
    files.pop(files_index - 1)
    files_index -= 1
    load_next_image()

def update_image_display(): # toggles zoom in, zoom out
    global img
    if zoom_state:
        tmp = img.resize((img.width, img.height)) # 100% size
    else:
        tmp = img.resize((int(img.width*0.4), int(img.height*0.4))) # 40% size
    photo = ImageTk.PhotoImage(tmp)
    label.config(image=photo)
    label.image = photo

    # Updating scroll region after image is loaded
    root.update()
    canvas.configure(scrollregion=canvas.bbox("all"))

def toggle_zoom(event): # toggles zoom state pt 2
    global zoom_state
    zoom_state = not zoom_state
    update_image_display()

# Bind the keys to the desired events
root.bind('<Right>', lambda event: load_next_image())  # approves this image, moves to next
root.bind('<Left>', lambda event: delete_current_image())  # deletes this image, as it doesn't meet the criteria
root.bind('e', toggle_zoom) # bounces back between 100% and 40% zoom

# keyboard-based scrolling, allowing you to evaluate portions of the image in more detail if needed.
root.bind('f', scroll_down)
root.bind('r', scroll_up)
root.bind('d', scroll_left)
root.bind('g', scroll_right)

load_next_image() # start the workflow
root.mainloop() # start the GUI main loop
Step 2 — Turn images into SEO-ready Printify products automatically
Manually creating Printify products is a multi-step grind: choose a product, set variants, upload art, adjust placements per variant, write titles/descriptions/tags, set pricing—repeat dozens or hundreds of times. The Bulk POD Product Creator replaces this with one fully-automated operation.
What the Bulk POD Product Creator does (high-level)
- Ingests a folder of images and creates one product per image.
- Clones the structure of a single Example Product in your Printify store (variants, print areas, provider).
- Places artwork according to your rules (Stretch / Preserve Aspect Ratio & Center / Exactly Match Example).
- Generates SEO text (titles, descriptions, tags) with AI, or reuses your own.
- Carries over pricing and relevant settings from the Example Product.
- Saves the entire configuration as a Saved Operation for one-click reuse.
The setup (step-by-step)
- Select your images: Load dozens or hundreds at once.
- Choose your placement logic:
- Stretch Images To Fit Print Area(s) — fastest coverage; can distort if aspect ratios differ.
- Preserve Image Aspect Ratios & Center — scales to the nearest boundary without distortion, then centers. Great for photography/typography.
- Exactly Match Example Images — reproduces the example product’s placements pixel-for-pixel—ideal for series work or specific crops.
- Choose the target Printify store: Connect/select where products should be created.
- Pick your Example Product: A real product in your store with the correct variants, materials, print-areas, and price structure. The tool clones these settings for every new product.
- Configure content rules:
- Titles: use filenames or generate with AI; choose Simple or Compound (multi-segment, you set subtitle count); optionally append Custom Text (e.g., “— Canvas Wall Art”) and control structure with title templates.
- Descriptions: copy from Example Product or generate with AI; set paragraph count (1–2 typical); append Custom HTML for materials, sizing, care notes, links.
- Tags: copy or AI-generate; set a max tag count; append evergreen tags you always want included.
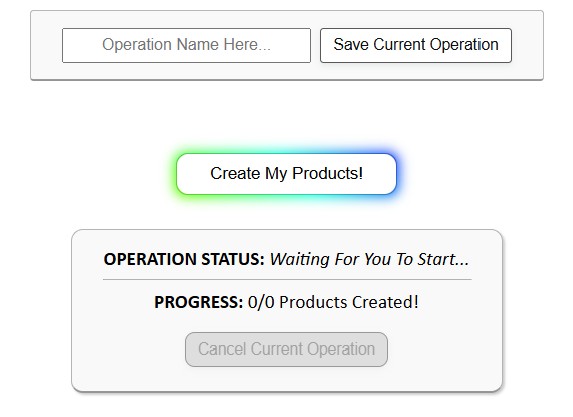
- Create the batch of products (fully automated): Click Create My Products. The tool processes artwork, applies placements, generates copy, and creates new print-on-demand products automatically. Monitor progress and cancel if needed.
- Save the configuration, then Load and Run later with 1 click: Store, Example Product, placement mode, and all content rules can be saved as a Saved Operation (e.g., “Posters 2:3 — Compound Titles — AI Tags 20”).


Why this approach saves time (and improves quality)
- Zero repetitive clicks: The Example Product handles variants, print-areas, and price rules.
- Consistent placement: Every variant in every product is framed identically according to your chosen logic.
- SEO at scale: Titles/descriptions/tags are image-aware and naturally capture long-tail queries.
- Repeatability: Saved Operations let you replicate a winning configuration for every new collection with one click.
- Quality defaults: High-resolution processing happens automatically; no separate “upscale” checkbox to remember.
Practical guardrails and tips
- Start with a perfect Example Product. Set variants, pricing, and layout exactly as you want them replicated.
- Group images by aspect ratio where possible; if mixed, use Preserve & Center or run separate batches.
- Keep titles readable. Compound titles work, but avoid keyword stuffing.
- Append evergreen tags sparingly. Too many generic tags dilute relevance.
- Spot-check the first 5–10 outputs before publishing a large batch.
Step 3 — Automate product mockup image creation
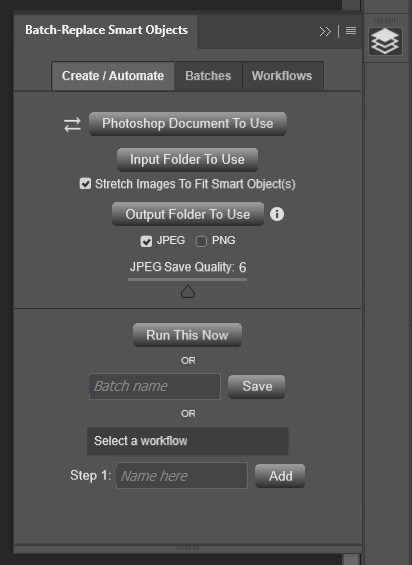
Custom mockups elevate conversion rates but are tedious to produce by hand. The Batch-Replace Smart Objects plugin for Photoshop lets you export mockups for an entire collection automatically.
Core workflow
- Select a PSD mockup (or an entire folder of PSDs).
- Choose your input folder.
- Choose your output folder.
- Set export options: PNG/JPEG, compression level, and Stretch to Fit to fill the mockup area.
- Click Run This Now.
Why it helps
- Scale: Generate dozens or hundreds of mockups per run—room scenes, frames, color variants.
- Web-ready: Compression at export eliminates a separate optimization step (and avoids paying for third-party “image compression” apps).
- Reusable: Save configurations as Batches. One-click re-runs when your workflow is standardized.
- Flexibility: Point to a folder of PSDs to iterate across multiple scenes and product variants in the same operation.
Putting it together: an end-to-end automation blueprint
- Artwork generation: Use Midjourney to create niche-specific images; scale ideation with ChatGPT prompt generation. If using Midjourney, delegate prompt entry to a VA when the economics make sense (with IP protections in place). Or alternatively, automate AI image generation using DALL-E 3.
- Curation: Approve/delete rapidly with a keyboard-driven Python viewer. Keep the decision binary to preserve throughput.
- Product creation: Feed the curated folder into the Bulk POD Product Creator. Clone a perfect Example Product, apply placement logic, and generate SEO metadata automatically.
- Mockups: Export marketing visuals at scale with the Batch-Replace Smart Objects plugin in Photoshop.
The result is a repeatable system that converts a folder of images into a fully merchandised catalog—listings + SEO copy + mockups—with minimal manual effort.
Bottom line
Throughput wins. Generate artwork in batches, curate in minutes, create products automatically, and export mockups on autopilot. With this automation stack, what once took weeks now gets accomplished in no time —leaving your time for the activities that actually move revenue: marketing, merchandising, and strategy.