How To Automate Your Etsy Print-on-Demand Shop
Overview: This guide outlines a practical, end-to-end system for automating your Etsy POD workflow so you can scale faster with fewer clicks. You’ll see how to replace repetitive manual workflow steps with fully-automated, systematized processes—creating POD products (complete with SEO titles/descriptions/tags) in bulk, generating artwork at volume with AI, exporting premium mockups at scale, and creating + scheduling social media content automatically. The result: more listings, broader long-tail SEO coverage, fewer errors, and more time for the strategic and creative work that moves the needle in your Etsy POD business.
The Many Compounding Benefits of Automating Your Etsy POD Shop
If you’re serious about growth, automation isn’t a “nice to have”—it’s the engine that compounds everything that matters on Etsy. When you replace manual, one-off tasks with governed, repeatable systems, you get multiplicative benefits across your entire shop:
- Faster scale, bigger catalogs. Automation turns a folder of images into dozens—or hundreds—of listings without the one-by-one slog. More listings = more surface area for buyers to discover you.
- Stronger SEO footprint. Automated, keyword-rich titles, descriptions, and tags expand your long-tail reach. Each new listing becomes another entry point for highly specific buyer searches.
- Higher leverage per hour. Instead of burning time clicking through menus, your output is driven by rules and presets. One setup can power entire product drops.
- More sales and higher average-order-values. Large, well-structured catalogs help shoppers find multiple items they love. More SKUs and better internal linking lead to more bundles and upsells.
- Time back for high-value work. Creativity, curation, storefront polishing, and marketing strategy move the needle. Automation handles the repetitive mechanics.
- Fewer mistakes, cleaner operations. Cloned variants, governed pricing, and standardized copy reduce errors that cause returns, support tickets, and rework.
- Momentum you can trust. When releases run on presets, you can publish consistently—week after week—without burning out.
Automation #1 — Creating Your POD Products + Writing SEO Product Info
(Automate this with the Bulk POD Product Creator)
Here’s the quick picture: you load a batch of artwork images, choose how they should be placed on your products, point the system at a proven “Example Product” to clone variants/pricing/settings, and define how titles/descriptions/tags should be generated. Then you run the operation. The tool creates all your Etsy-ready POD products in one pass—image placement, variants, pricing, and SEO copy included.
Step 1: Upload Images & Choose a Placement Rule
This is where you tell the system how each image should fit the printable areas across your variants. The rule you pick applies consistently across the entire batch.

Placement modes (and when to use them):
- Stretch Images To Fit Print Area(s): Edge-to-edge coverage across all variants; ideal for posters/canvas where full-bleed looks best.
- Preserve Image Aspect Ratio & Center: Proportional resizing with zero distortion; perfect for logos, typography, or geometry where shape integrity matters (small margins may remain by design).
- Exactly Match Example Image(s): Clones the precise placement/scale from your Example Product, giving you pixel-consistent outputs on complex items.
Step 2: Select Your Example Product (Your “blueprint”)
At a high level, you’re choosing the reference product the system will clone for every new listing in the run.

What gets cloned:
- Variant structure: Sizes, orientations, materials, and any extra options.
- Pricing: Per-variant prices and margin discipline.
- Defaults & policies: The settings you’ve already dialed in on your reference product.
- Exact placement (when using “Exactly Match Example Image(s)”): Guarantees consistent positioning across the whole batch.
Granular advice: Keep multiple blueprints for different product families (e.g., POSTER_2x3_Matte_MidPrice, CANVAS_SQUARE_GalleryWrap). Clear naming makes lane-switching a two-second decision instead of a rebuild.
Step 3: Define New Product Creation Rules (Titles, Descriptions, Tags)
This step turns your operation into an SEO engine, using AI image recognition to evaluate each of your artwork images, while keeping copy on-brand and consistent.

Titles (Simple vs. Compound):
- Simple title: a concise artwork title (e.g., Midnight Pine Forest).
- Compound title: the simple “root” title plus a configurable number of short subtitle segments appended after a colon. These subtitle segments add descriptive keywords (subject, style, mood), expanding your longtail keyword coverage and search-engine/Etsy-marketplace discoverability.

Example (2 subtitle segments):
Midnight Pine Forest: Misty Evergreen Landscape, Moonlit Night Art
Custom Text can be added to your product titles (which is extremely useful for giving your products an SEO boost, and ensuring they rank for optimal exact-match queries (eg, user searches "misty pine forest landscape wall poster"):
Midnight Pine Forest: Misty Evergreen Landscape, Moonlit Night Art — Poster Wall Art
Practical guidance: 1–2 subtitle segments usually balance discoverability with Etsy’s title character limits.
Descriptions:
Choose the paragraph count (typically 1–2). The tool writes artwork-specific prose that naturally covers subject, style, composition, palette, and mood. Then append your Custom HTML to standardize materials, sizes, care notes, or framing guidance—perfect for consistency across hundreds of listings.
Tags:
Let the system generate artwork-specific tags, then layer on your broad, product-level tags (e.g., poster, canvas print, wall decor) to keep catalog organization clean and maximize search coverage.
Click Create My Products (What the tool actually does during a running operation)
With one click, the operation executes in a single automated pass:
- Applies your placement rule across all variants (stretch, preserve, or exact-match).
- Clones your Example Product’s variants, pricing, and settings.
- Runs AI image recognition on every artwork to generate titles, descriptions, and tags automatically according to your rules (simple vs. compound, paragraph count, tag caps).
- Creates all products in your connected store automatically, ready for review and publication.
Save the entire configuration as a Saved Operation. Next drop is simply: load preset → upload new images → click go.

Why This Automation Matters For Etsy POD Sellers:
- Throughput without chaos: Replace hours of clicking with a four-step, rules-driven pipeline you can trust.
- SEO that scales: Artwork-specific titles/descriptions/tags expand long-tail coverage across your entire catalog—without writer’s block.
- Consistent pricing and options: Cloned variants and disciplined margins reduce errors and protect profitability.
- Professional, uniform presentation: Every listing follows the same structure and suffix conventions, building brand trust.
- Compounding speed: Saved Operations and reusable blueprints make each release faster than the last—so you can publish more, more often.
Automation #2 — Creating AI Artwork Images To Feed Your POD Catalog
Your Etsy growth rate is capped by how quickly you can produce usable artwork. The goal here isn’t “a few nice pieces”; it’s a repeatable pipeline that generates hundreds of on-brand images you can convert into products at will. There are three credible routes—pick the one that matches your appetite for setup and control.
Route 1: Fully Automated Batches With the OpenAI API (DALL·E 3 / gpt-image-1)
What you get: A system that can take a list of prompts and automatically generate large sets of images without manual work.
At a high level, this route involves writing a small script that talks to OpenAI’s image generation models. You provide a batch of prompts, the script sends them to the API, and you get folders of finished images back automatically. ChatGPT can actually walk you through this process step by step—helping you set up the environment, write the code, and even customize how outputs are saved.
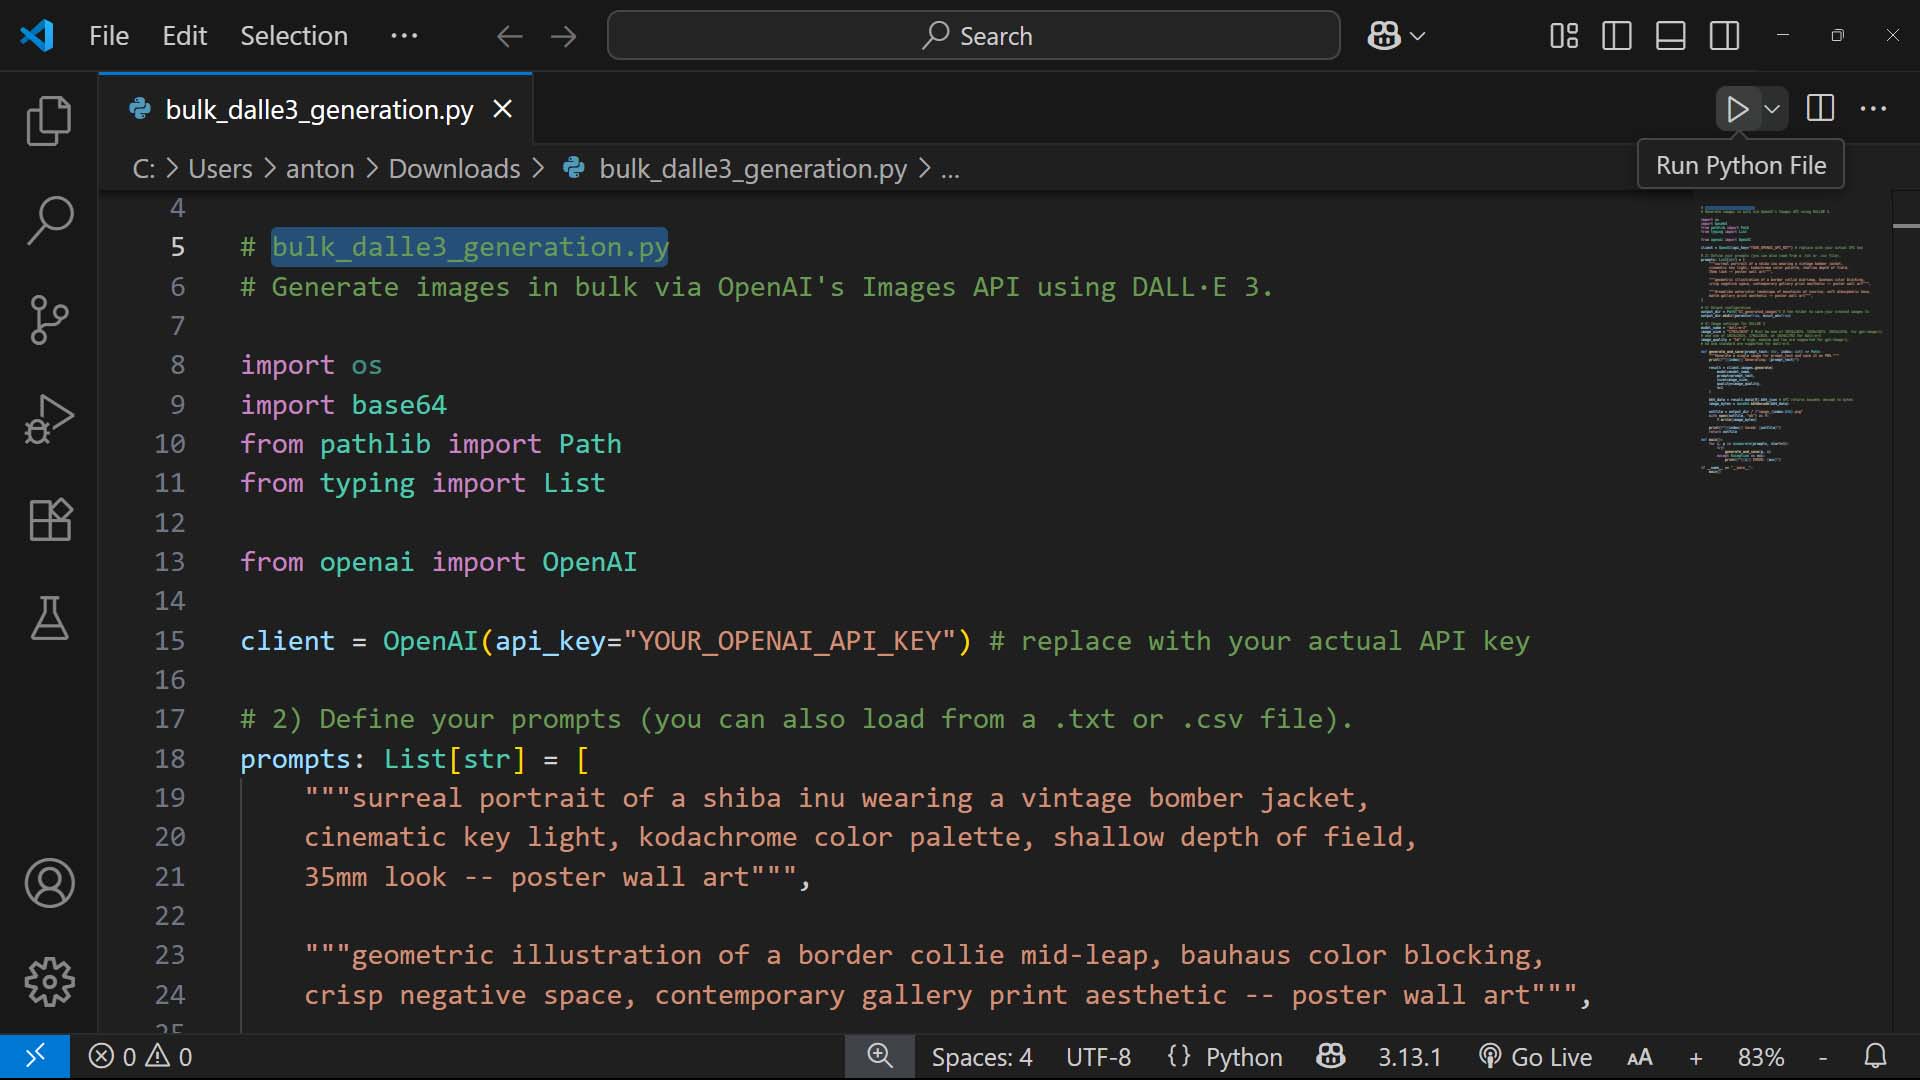
This method does require substantial technical effort (since it involves writing, and running, effective computer programs), but the reward is hands-off, fully automated image generation. Once set up, it can crank out hundreds of images on autopilot, ready to be curated and turned into POD products. (You can view this section of another blog post we published for more details on how to do this, if you're interested in going this "fully-automated via code" route.)
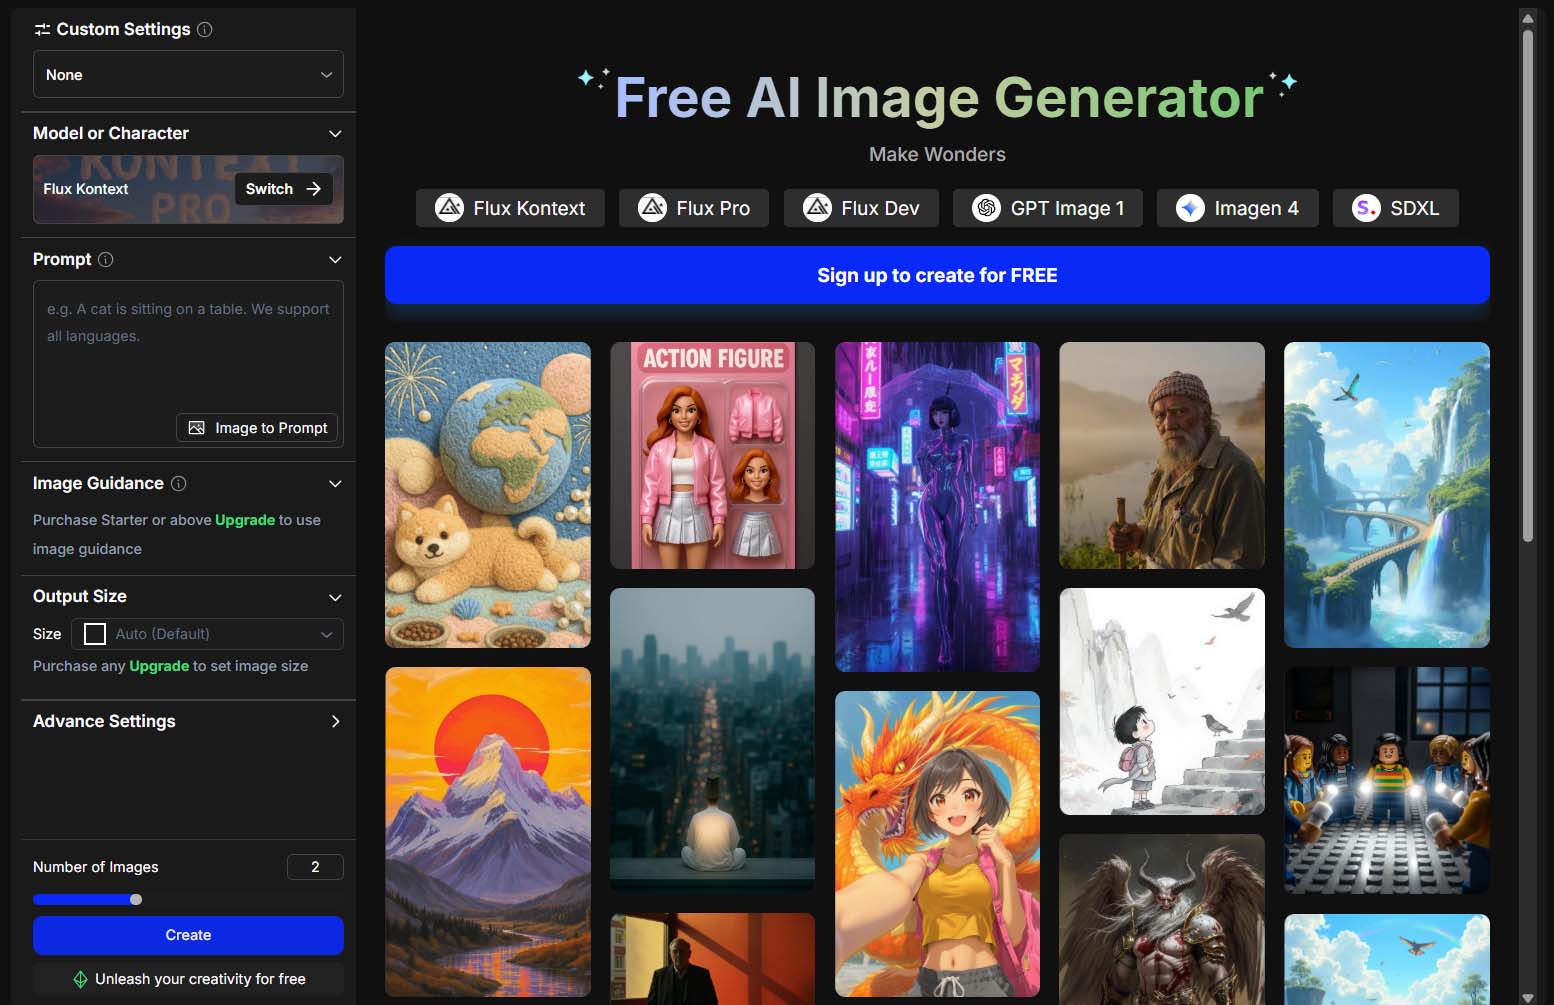
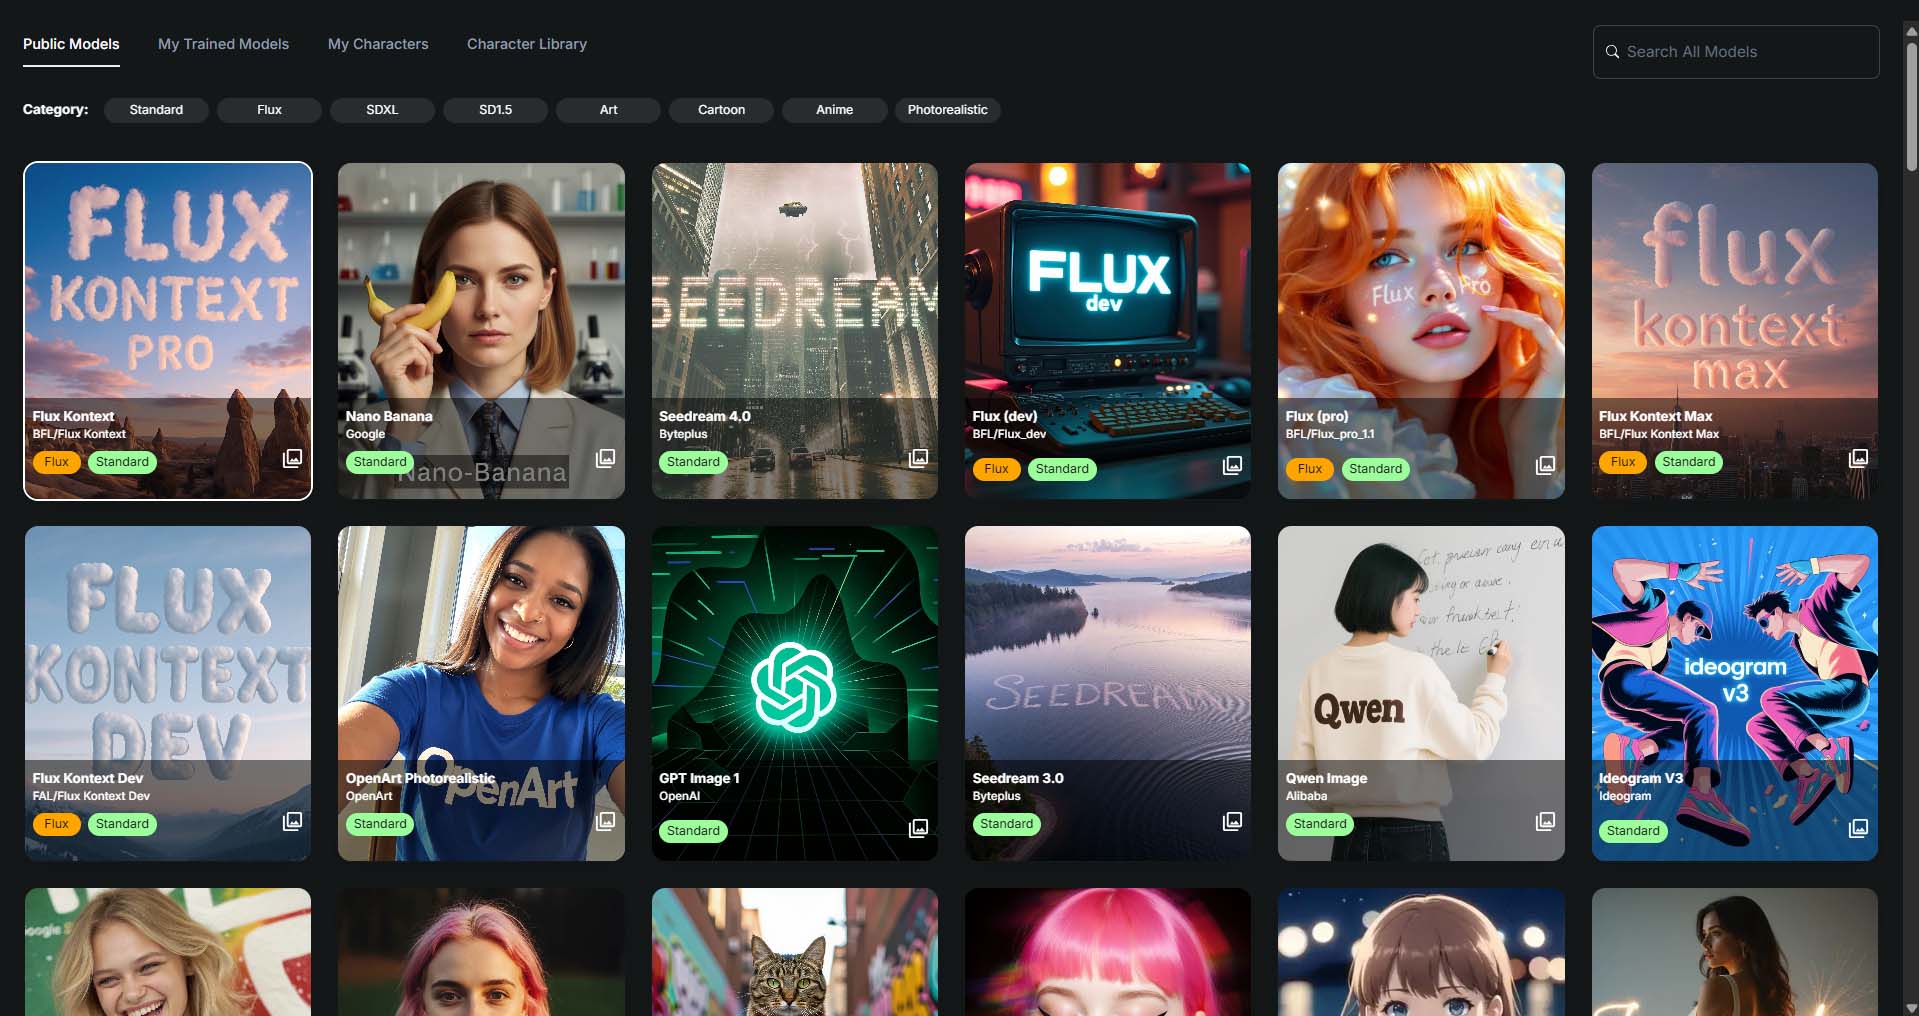
Route 2: No-Code Bulk Generation With OpenArt (Native Bulk + CSV Upload)
What you get: Rapid throughput, truly automated bulk AI image generation, without writing code or running complicated Python scripts.
Set it up:
- Clarify what type of images you'll create. Choose a narrow visual concept (e.g., “landscape artwork scenes”) and fix an aspect ratio that aligns with your product blueprint (2:3 for posters, 1:1 for square canvases, etc.).
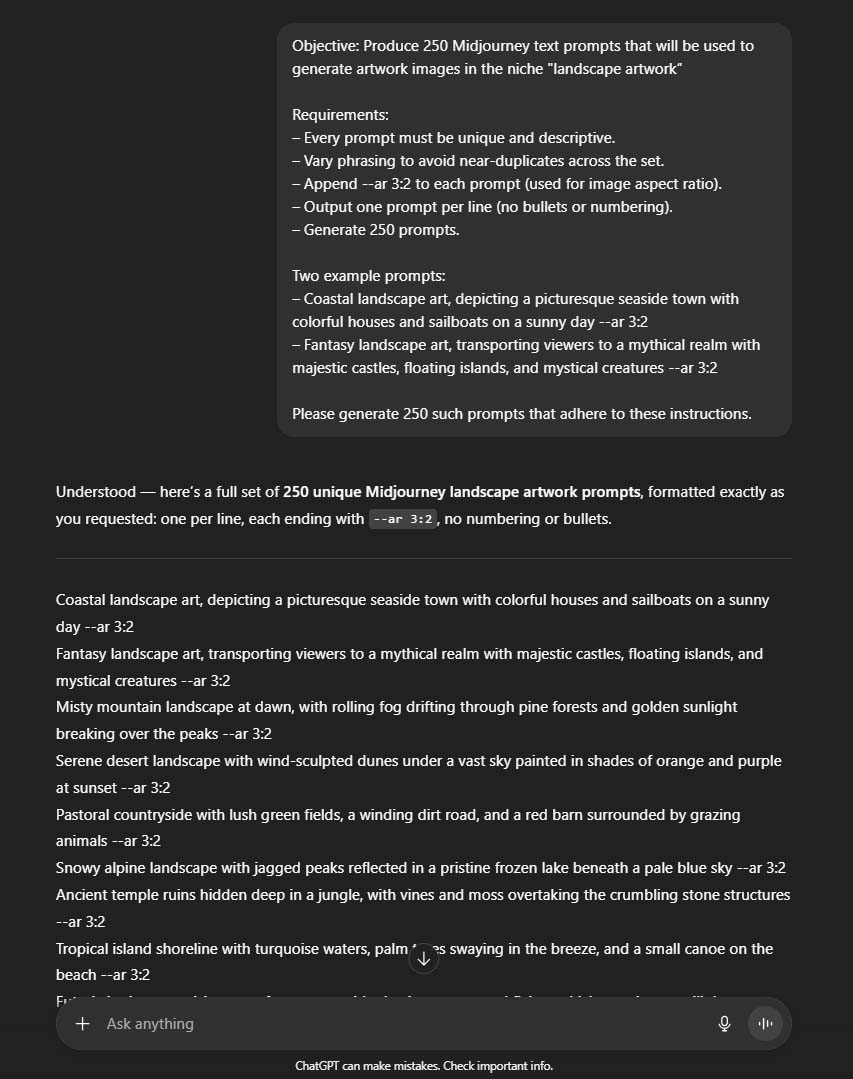
- Generate prompts at scale. Feed ChatGPT your exemplars and ask for 100–500 variations that preserve composition, mood, palette, and other desirable attributes of your text prompts, depending on the types of images you're striving to create.
- Run OpenArt in one of two modes:
- Bulk Create: Set a target image count for a single master prompt to explore a theme rapidly.
- CSV Upload: One prompt per row for tighter control across a large set.
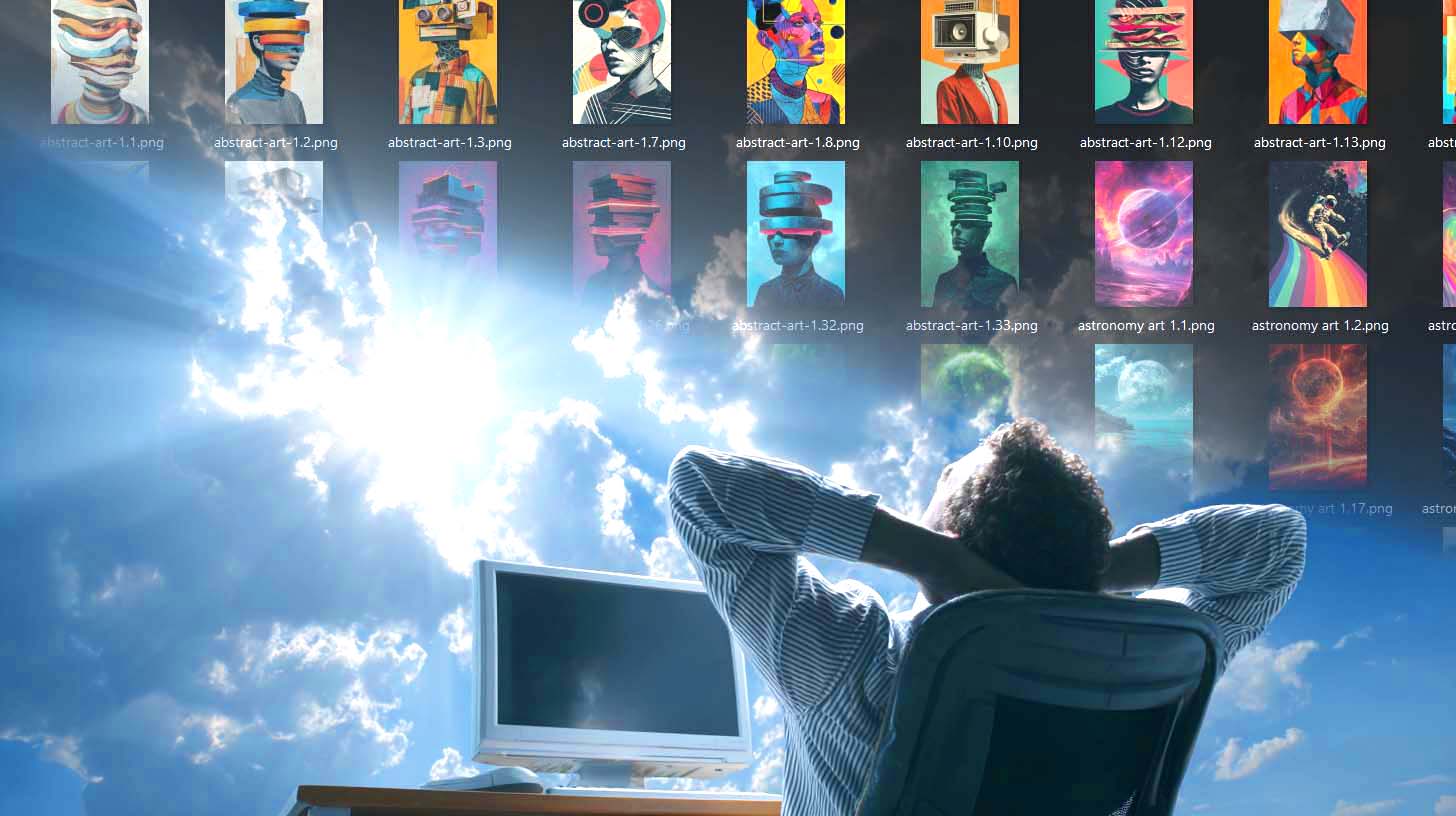
- Name and sort images intelligently. Use a consistent filenaming pattern and drop your generated images into aspect-ratio-specific folders (/2x3, /1x1) so downstream product-creation is streamlined and organized.
- Curate fast. Large-thumbnail view → Ctrl/Cmd-click the obvious winners → move to /selected. With practice, curating hundreds of images takes minutes, not hours.
Useful Feature: The AI-generated image quality of SaaS tools like OpenArt will vary, depending upon the underlying model/tuning. The cool thing about OpenArt is that it allows you to actually select what specific AI model is used to generate your images. This allows you to test out different models, determine which works the very best for the specific types of images you're generating, then scale the one that performs best for your workflow.
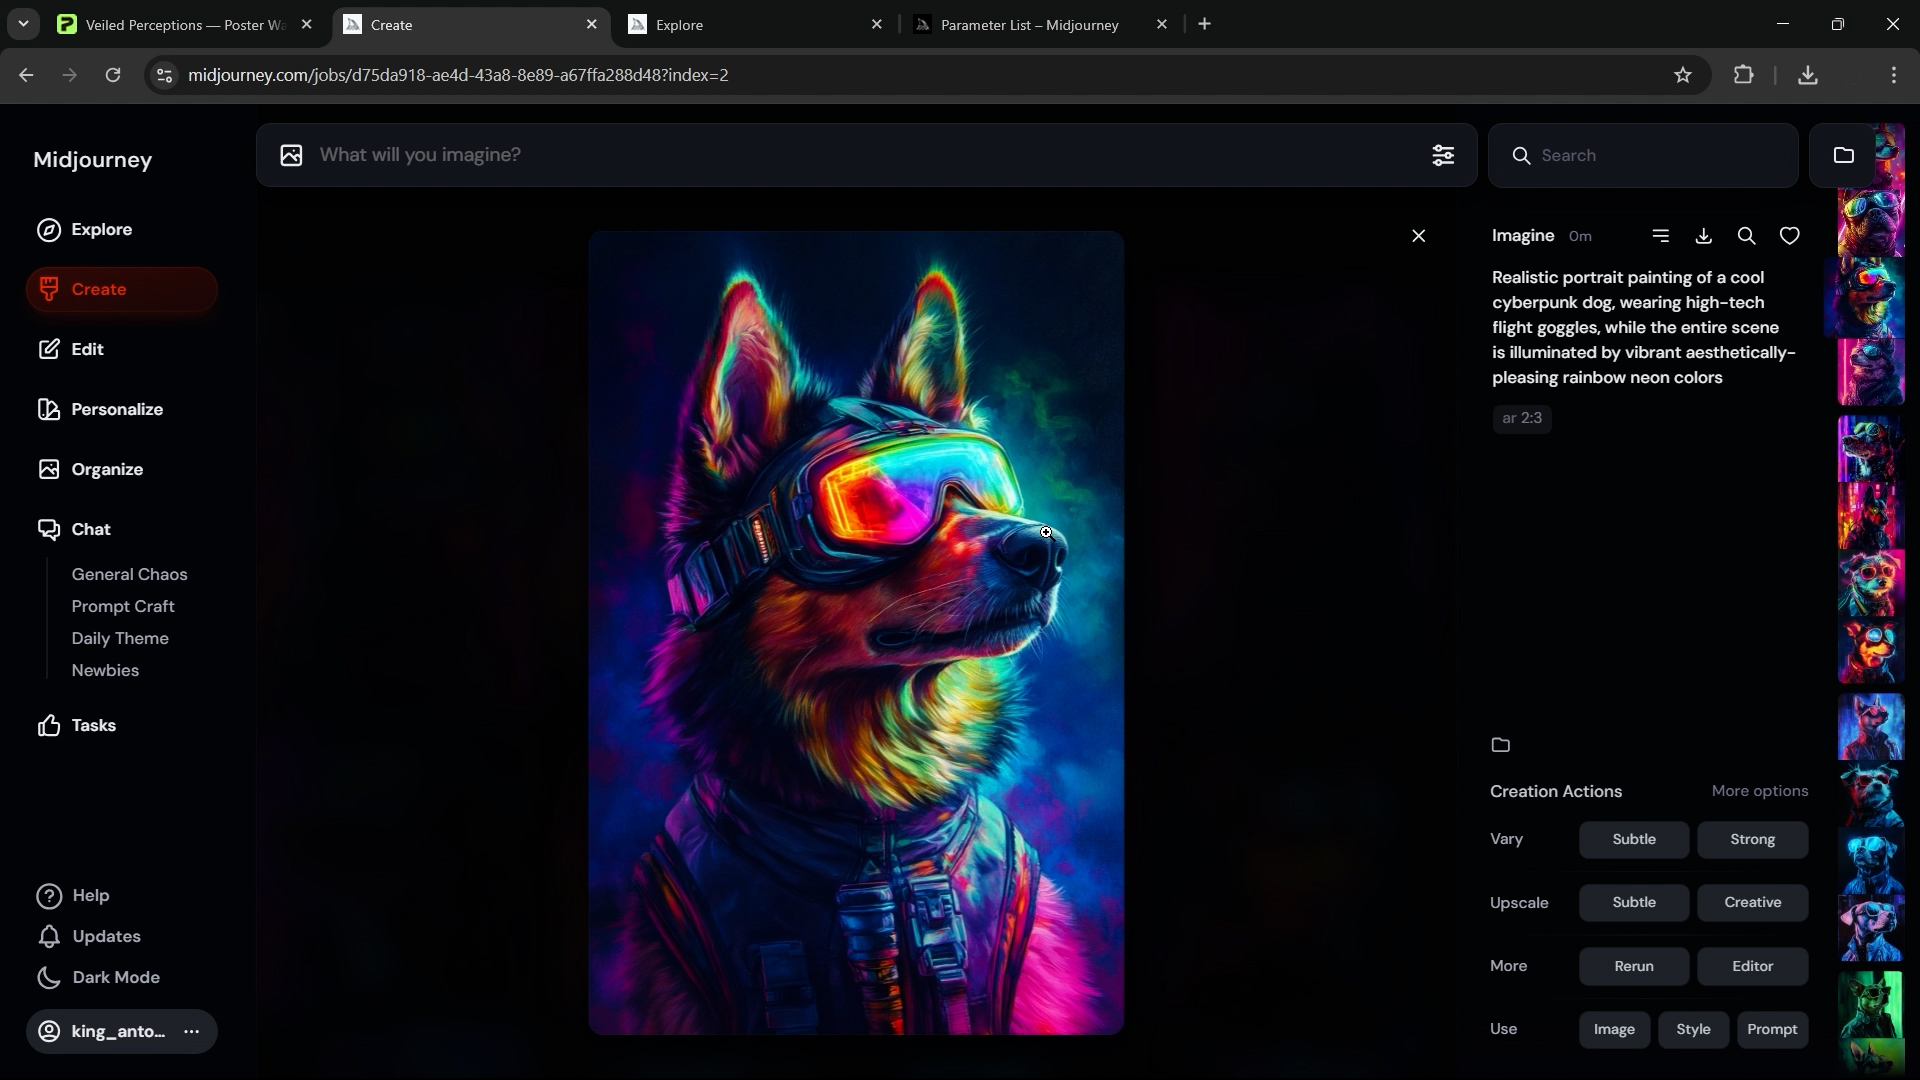
Route 3: Semi-Automated, Highest Image Quality With Midjourney
What you get: Many sellers still consider Midjourney the gold standard for certain looks. It’s not 100% automated, but the image quality can be exceptional.
An efficient Midjourney image-generation workflow:
- Start by proving your prompts actually work. Spend a little time testing a handful of example prompts first. The goal is to find a “recipe” that gives you good results most of the time (at least 3 out of 10 images are keepers). Don’t rush into making hundreds of images until you know which prompts really hit the mark—otherwise you’ll waste a lot of time scaling up bad ones.
- Use ChatGPT to create a big list of prompts. Take the 2–4 best prompts you discovered, and ask ChatGPT to spin them out into 200–500 variations. Tell it to keep the same style, mood, and details you care about, and lock in the aspect ratio you want by adding
--arso the images match your product sizes right away. - Set up a split-screen for speed. Open your spreadsheet of prompts on the left side of your screen, and Midjourney on the right. Then it’s just copy, paste, repeat. Run as many prompts at once as your Midjourney plan allows so you’re generating as fast as humanly possible Midjourney also has something called "Fast Hours" that you can optionally use, which cause the images to be generated even more rapidly.
- Upscale and save the winners. As images come in, upscale the best ones and drop them into a folder that’s labeled by aspect ratio. This way you’re organizing as you go, and future product creation will be smoother.


Why This Automation Matters For Etsy POD Sellers:
A reliable artwork pipeline turns “I wish I had more listings” into “I always have a backlog ready to publish.” Pair your selected images with your Saved Operations in the Bulk POD Product Creator, and you’ll move from sporadic releases to predictable, high-volume drops—the kind that compound search visibility and revenue over time.
Automation #3 — Create High-Quality Custom Mockups At Scale (Photoshop + Batch-Replace Smart Objects)
Polished mockups aren’t decoration; they lift perceived value, reduce purchase hesitation, and justify stronger pricing. If your listings currently rely on default POD previews, upgrading to premium PSD mockups (from marketplaces like Creative Market or Creatsy) is one of the highest-ROI visual improvements you can make—especially when you can output hundreds of images in a single run.
The manual way — why it’s painful
Open a PSD → find the Smart Object → paste in your design → resize it → save → export → repeat for every mockup and every artwork. Sounds simple, but do this hundreds of times and it quickly becomes a nightmare. Even if it only takes 30 seconds per image, making 500 mockups eats up a full day. On top of that, mistakes creep in—wrong file names, crooked placements, or inconsistent exports.
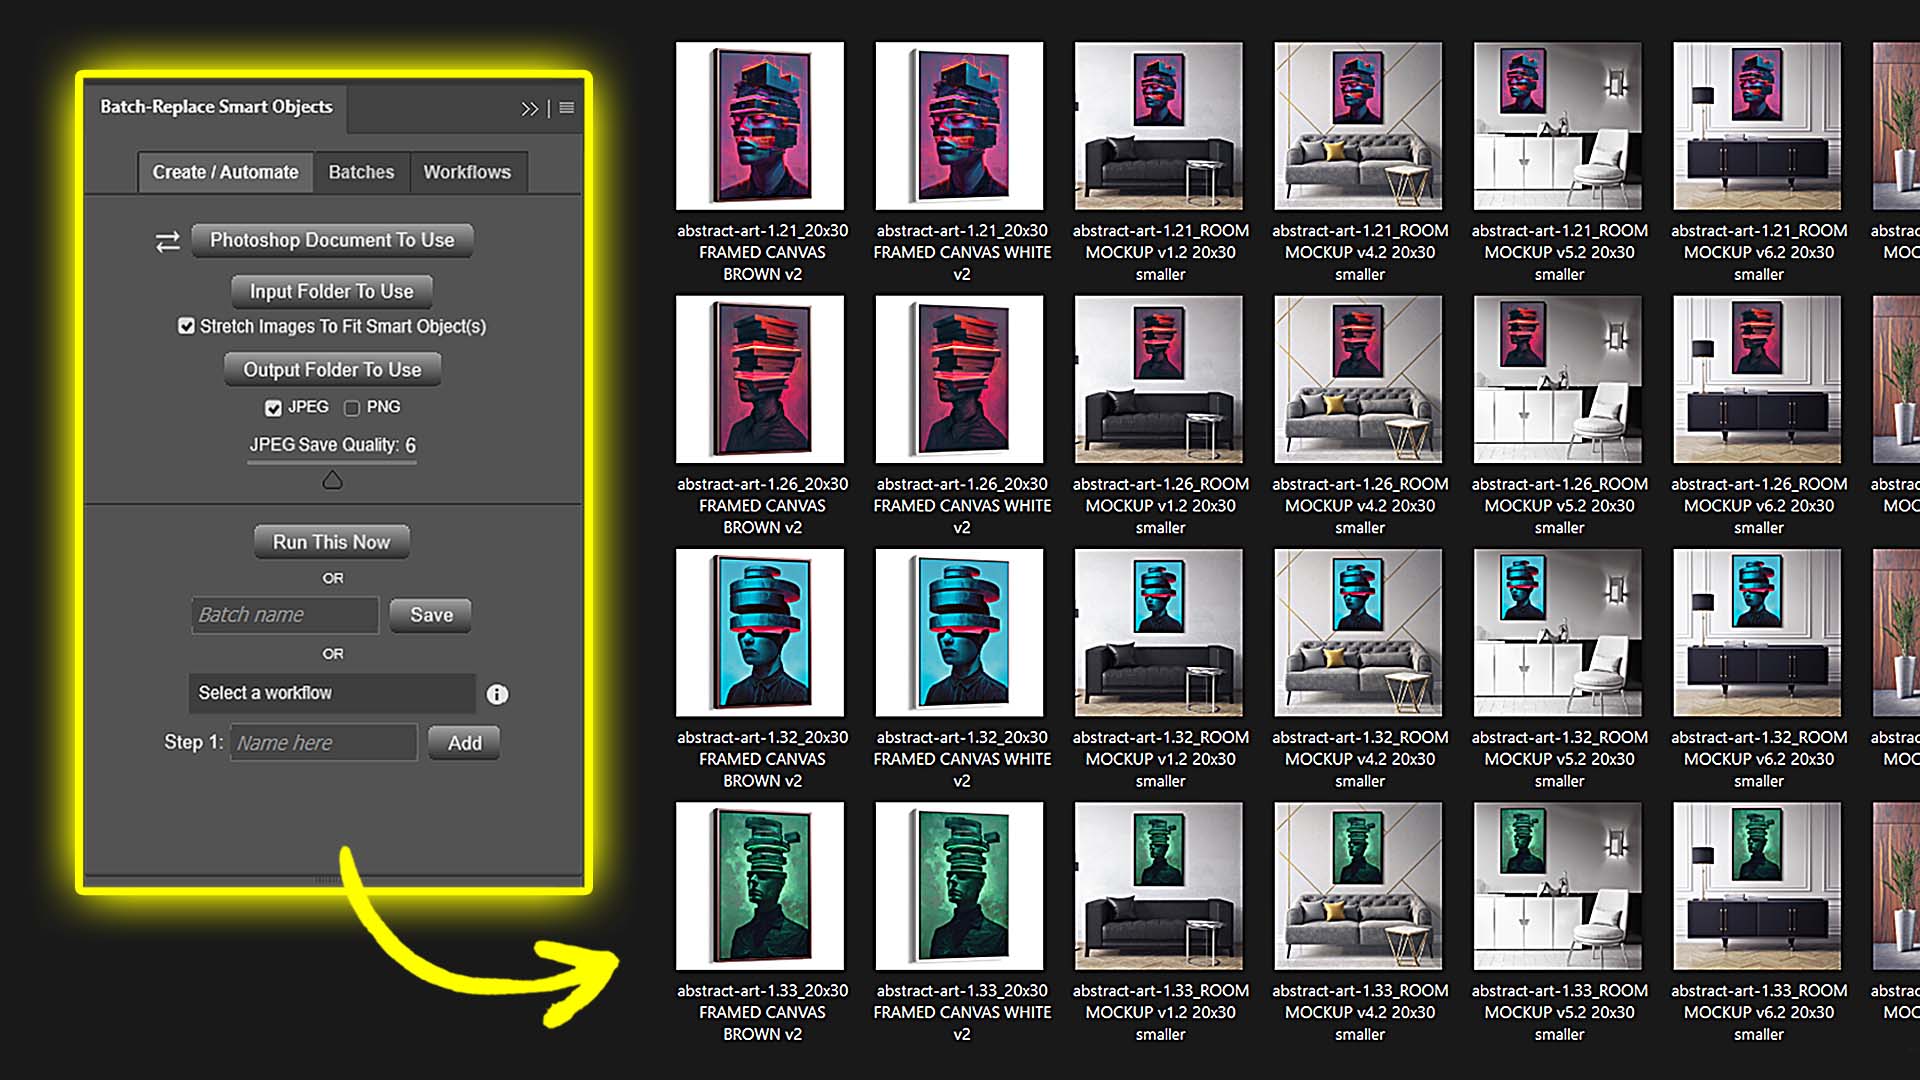
The smarter way — Batch-Replace Smart Objects
With the Batch-Replace Smart Objects Photoshop plugin, you can drop entire folders of artwork into your mockup templates and let the plugin export everything automatically. No endless clicking, no dragging layers around, no babysitting Photoshop.
How you’ll actually use it
- Single-PSD Mode
Have one favorite template? Just point the plugin at it, pick your artwork folder, and hit run. It will cycle through every design, drop it into the template, and export finished JPGs or PNGs—completely hands-off. - Folder Mode (multiple templates)
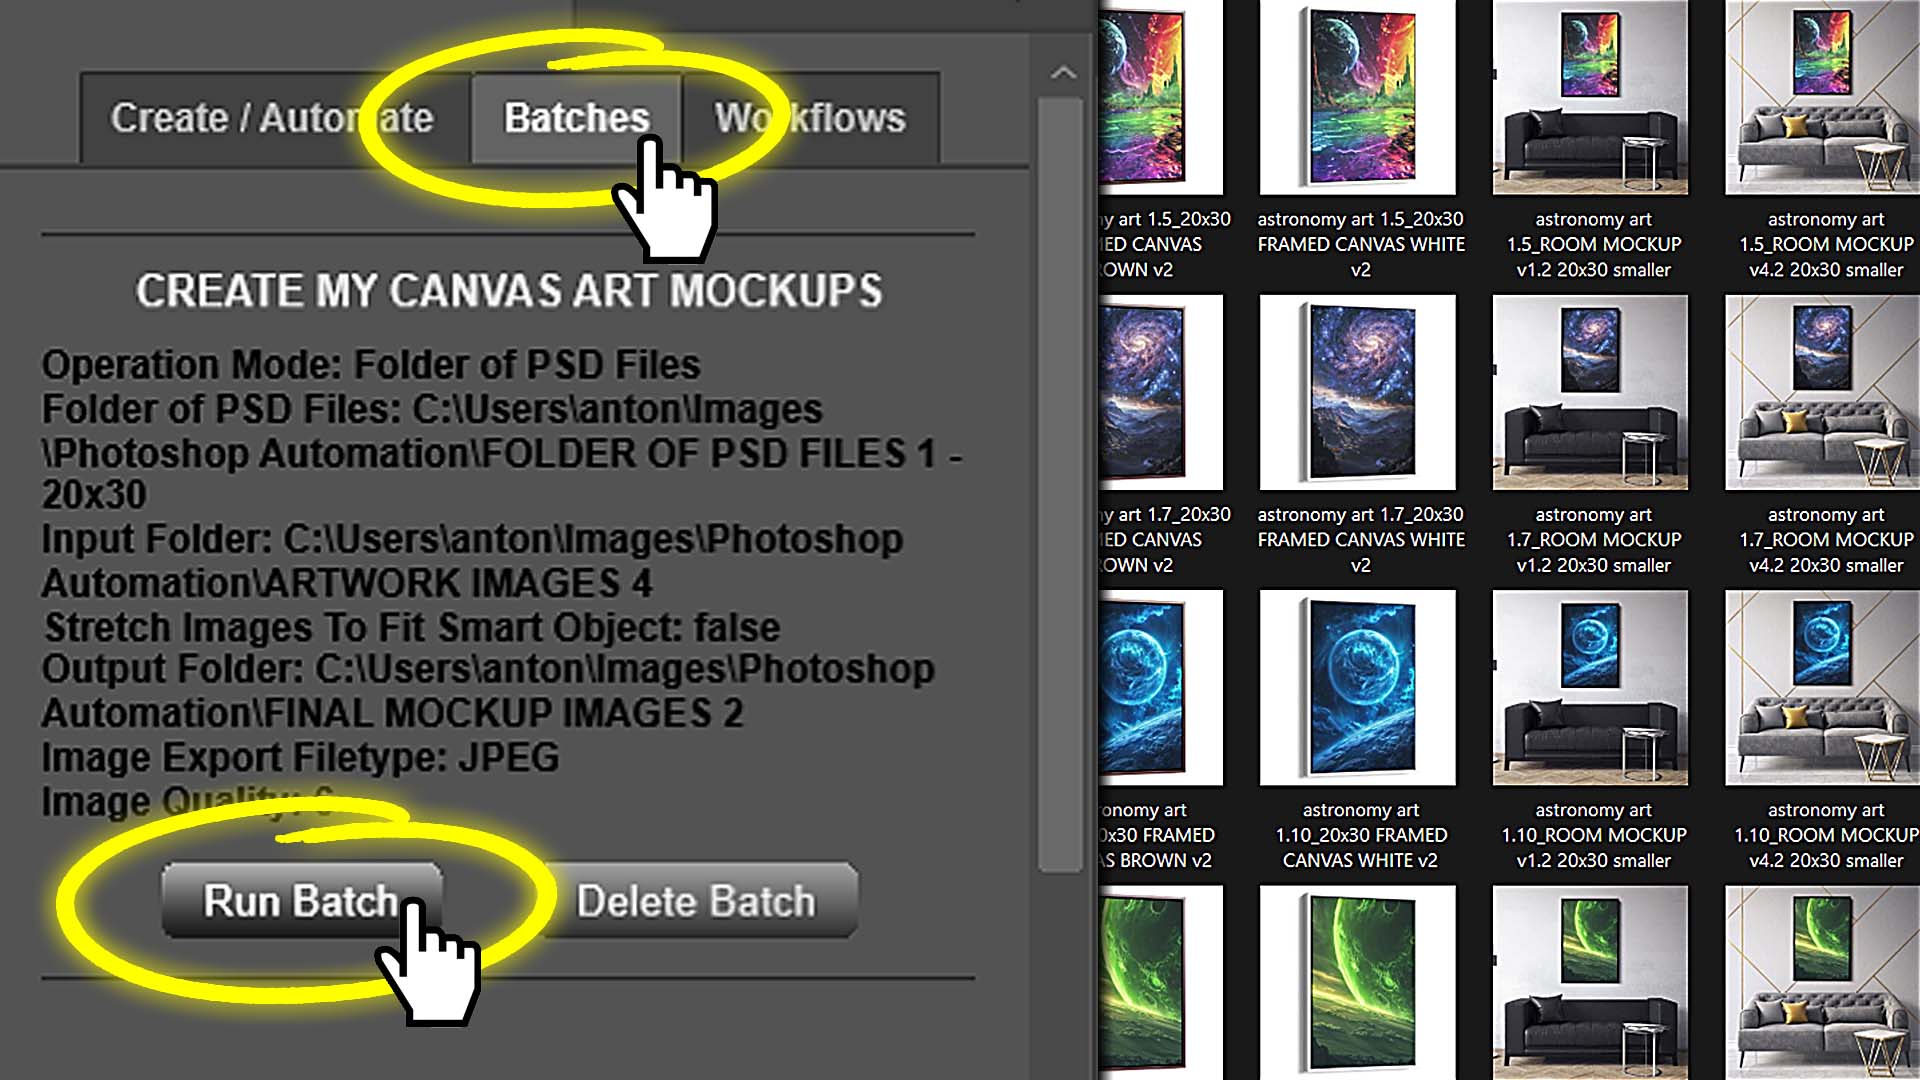
Got a set of templates—like front view, angled view, lifestyle room, close-up, or different apparel colors? The plugin runs your whole artwork folder across all of them, creating a full set of mockups for every design. Perfect for building out a complete product image gallery in one shot. - Saved Workflows
Save your go-to settings (paths, formats, scaling rules) as a Batch, and reuse it anytime. Chain multiple Batches together into a Workflow (e.g., “Frames → Room Scenes → Detail Shots”), and the plugin runs the entire sequence automatically. - Multi-Smart-Object Support
Some templates have more than one Smart Object (like two frames in the same scene). Just select them, and the plugin will apply your artwork to each one before exporting.
Quick setup tips
- Pick high-quality templates. Start with PSDs that already look professional—good lighting, realistic shadows, and materials that match your brand. This is what makes your mockups look like polished product photos instead of quick previews.
- Sort artwork by aspect ratio. Keep separate folders for 2:3, 4:5, 1:1, etc. That way you don’t waste time fixing stretched or misaligned images.
- Test before you scale. Run 5 images first to make sure everything looks right (framing, crop, compression). Once you’re happy, then run hundreds in bulk.
Why This Automation Matters For Etsy POD Sellers:
- Better-looking mockups mean higher prices. Shoppers trust realistic, styled images. Your products look premium, so you don’t have to compete only on low pricing.
- Consistency builds trust. Every product page has the same angles, framing, and perspective, which makes your shop feel professional and reliable.
- Faster turnaround. Launch full mockup sets in minutes, not days, so your store grows faster and stays competitive in search results.
- Easy updates. Change a template once (say, add a logo or tweak branding), re-run your Workflow, and your entire product line refreshes automatically.
The result
Instead of spending hours clicking around Photoshop, you set it up once and let Batch-Replace Smart Objects do the heavy lifting. You end up with hundreds (or thousands) of sharp, consistent, on-brand mockups that make your Etsy listings look professional, help them sell better, and scale right alongside your product catalog.
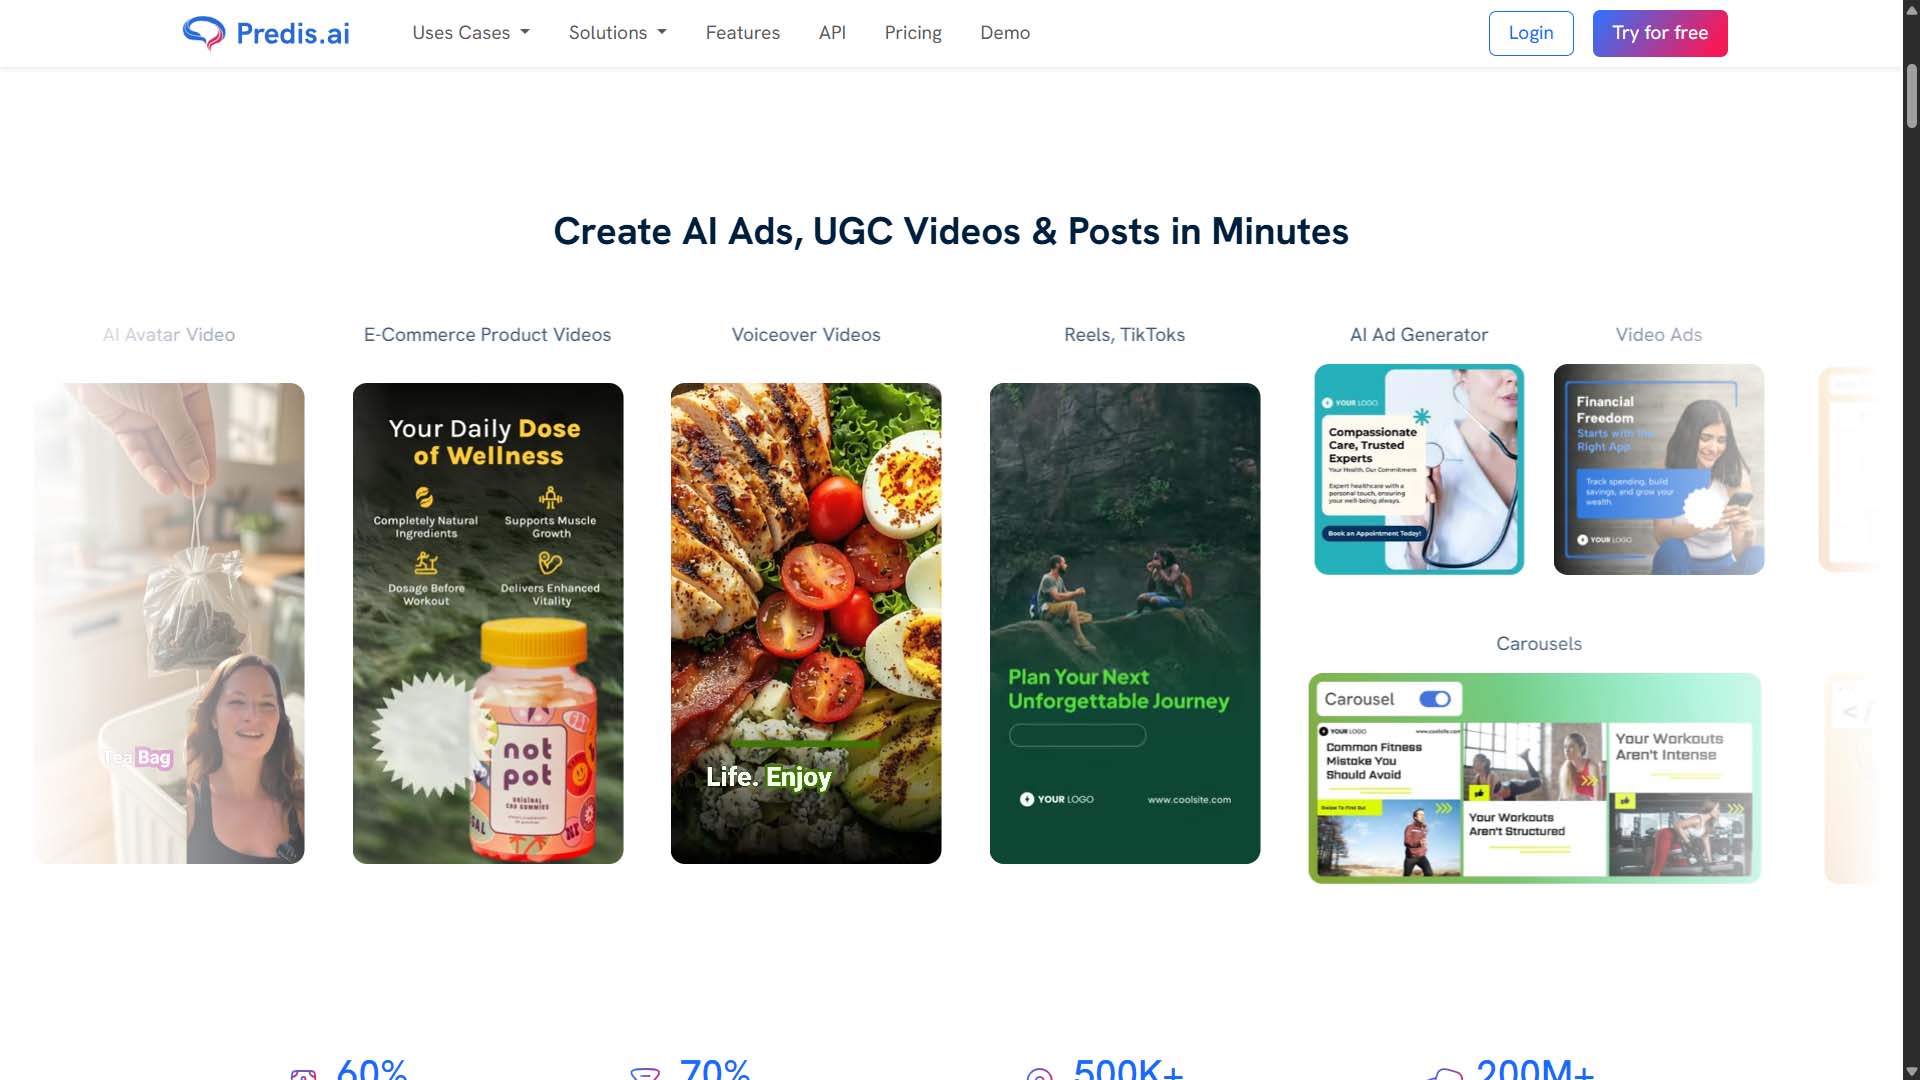
Automation #4 — Automate Social Media With Predis.ai
Social media takes forever if you’re writing every caption, picking every image, and coming up with hashtags by hand. Predis.ai does all of that for you in one place—idea, caption, creative, hashtags, scheduling, and publishing.
What it can do for you:
- Create batches of post ideas connected to your products, collections, promos, or FAQs.
- Write ready-to-use captions in your brand’s tone of voice, and pair them with product photos or generated backgrounds.
- Add hashtags automatically and track results with built-in UTM links.
- Schedule and publish to all your platforms from one calendar—no need to jump between apps.
Set it up once, then keep reusing it:
- Connect the platforms you actually use (Instagram, Pinterest, Facebook, TikTok, X, LinkedIn).
- Save your brand settings—tone, phrases to avoid, emoji use—and lock in templates for common post types like hero shots, carousels, or sales.
- Import product details (titles, prices, URLs) or upload a CSV of SKUs you want featured.
Why This Automation Matters For Etsy POD Sellers:
- You keep a daily presence without the daily grind.
- Posts always match your product data, so prices and links stay accurate.
- Everything lines up with launches and sales, so you don’t end up with “silent drops” that nobody sees.
Conclusion — Build a Shop That Runs on Autopilot
Automation isn’t about cutting corners—it’s about building a store that grows without eating up all your time. When you set up clear rules (like how artwork is sized, how prices are applied, or how descriptions are written) and let software handle the repeat work, you get big wins: more listings, better visibility in search, steady sales, and fewer mistakes—without burning late nights just clicking around.
A simple rollout plan:
- Use the Bulk POD Product Creator to turn your images into polished, SEO-ready products in bulk.
- Keep your artwork pipeline full by generating images in batches with tools like OpenAI, OpenArt or Midjourney (with ChatGPT helping expand your prompts).
- Quickly create high-quality mockups with the Batch-Replace Smart Objects Photoshop plugin.
- Stay active on social media automatically using Predis.ai.
Put these tools together and your shop shifts from constant manual effort to a system that runs itself. That means predictable product launches, steady traffic, and a business that grows because the workflow is designed to—week after week.