How To Automate The Creation of AI Images For Print-on-Demand
Overview: A practical, end-to-end playbook for 1) automating AI artwork image generation for print-on-demand, and also 2) automatically converting your images into sellable POD products in bulk. This automated framework will allow you to start quickly creating hundreds of print-on-demand products in huge batches (in a scalable, systematized manner) with minimal time, effort, or manual work required on your part. Learn why automation beats manual effort, how to efficiently bulk-generate images with OpenAI (DALL·E / gpt-image-1) or Midjourney, setup steps and cost planning, a bonus lightning-fast, keyboard-driven image-curation tool, and how to take your automated workflow to the next level by creating SEO-optimized print-on-demand products in bulk using the Bulk POD Product Creator.
Why automate AI artwork creation for POD (and why it matters)?
Automation lets you produce large, cohesive collections of sellable artwork without burning your best hours on repetitive mechanics. Instead of hand-generating each image and babysitting tools, you can:
- Reallocate time to higher-leverage work: refine brand, test pricing/bundles, improve on-site conversion, build email flows, and run audience research.
- Spend creative energy on concepts and direction (what to make and why)—not on repetitive clicking.
- Mathematically expand your POD store's surface area: more quality listings → more long-tail search coverage, more entry points, longer browsing sessions, higher AOV, better price realization, and stronger brand credibility. All else equal, bigger, relevant catalogs sell more.
- Explore virtually any aesthetic: minimalist posters, surreal portraiture, photo-real composites—the constraint is your prompt and throughput.
- Create a compounding flywheel by pairing automated image generation with automated print-on-demand product creation: generate → curate quickly → convert a folder into SEO-ready products in one run.
Bulk-generating artwork images with OpenAI (DALL·E / gpt-image-1)
Below is a clean Python script that bulk-generates images using OpenAI’s Images API with the DALL·E 3 model. It reads a list of prompts, generates one image per prompt, and saves PNGs locally. Check the code comments for the segments you'll need to customize for your particular workflow and requirements. If needed, you can paste the below Python script into ChatGPT and ask what segments need to be modified for your workflow.
For background and the latest parameters, see the OpenAI Images guide, the Images API reference (Create image), and OpenAI’s DALL·E 3 API overview.
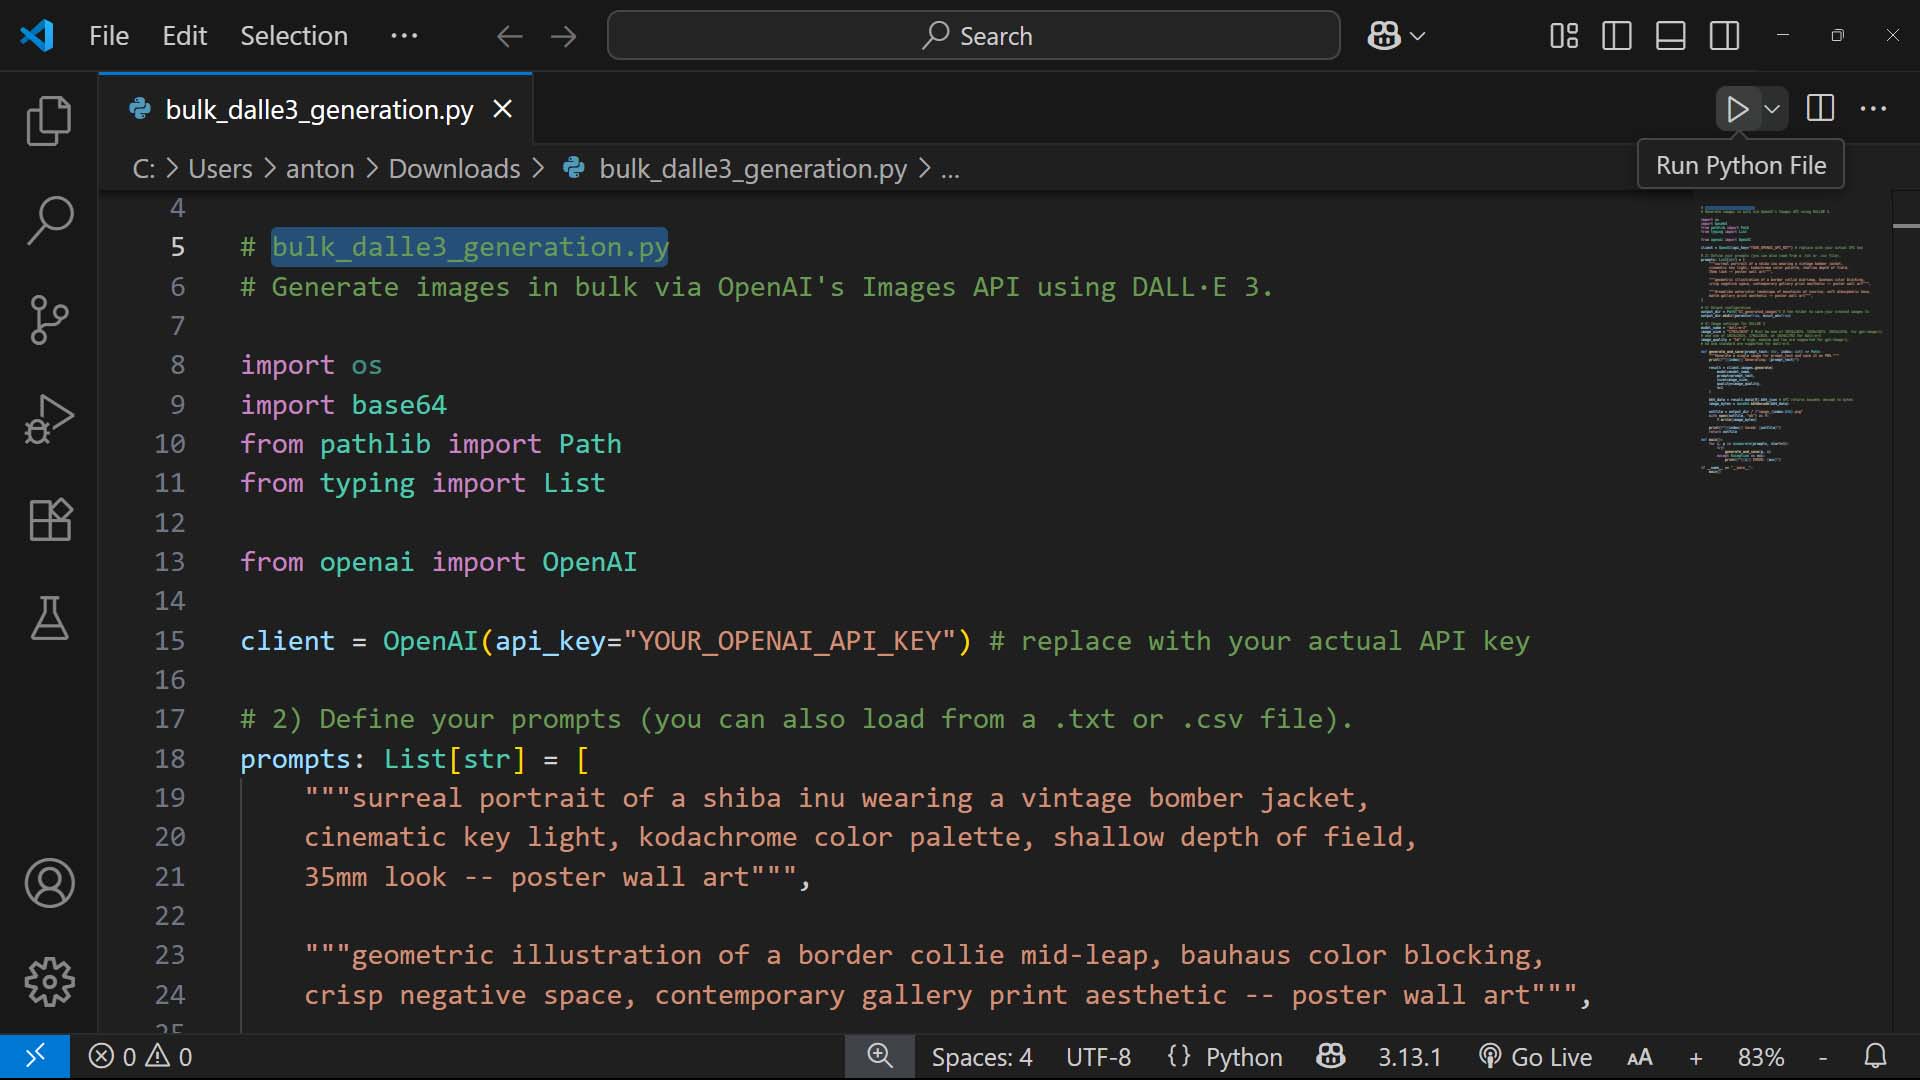
# bulk_dalle3_generation.py
# Generate images in bulk via OpenAI's Images API using DALL·E 3.
import os
import base64
from pathlib import Path
from typing import List
from openai import OpenAI
client = OpenAI(api_key="YOUR_OPENAI_API_KEY") # replace with your actual API key
# 2) Define your prompts (you can also load from a .txt or .csv file).
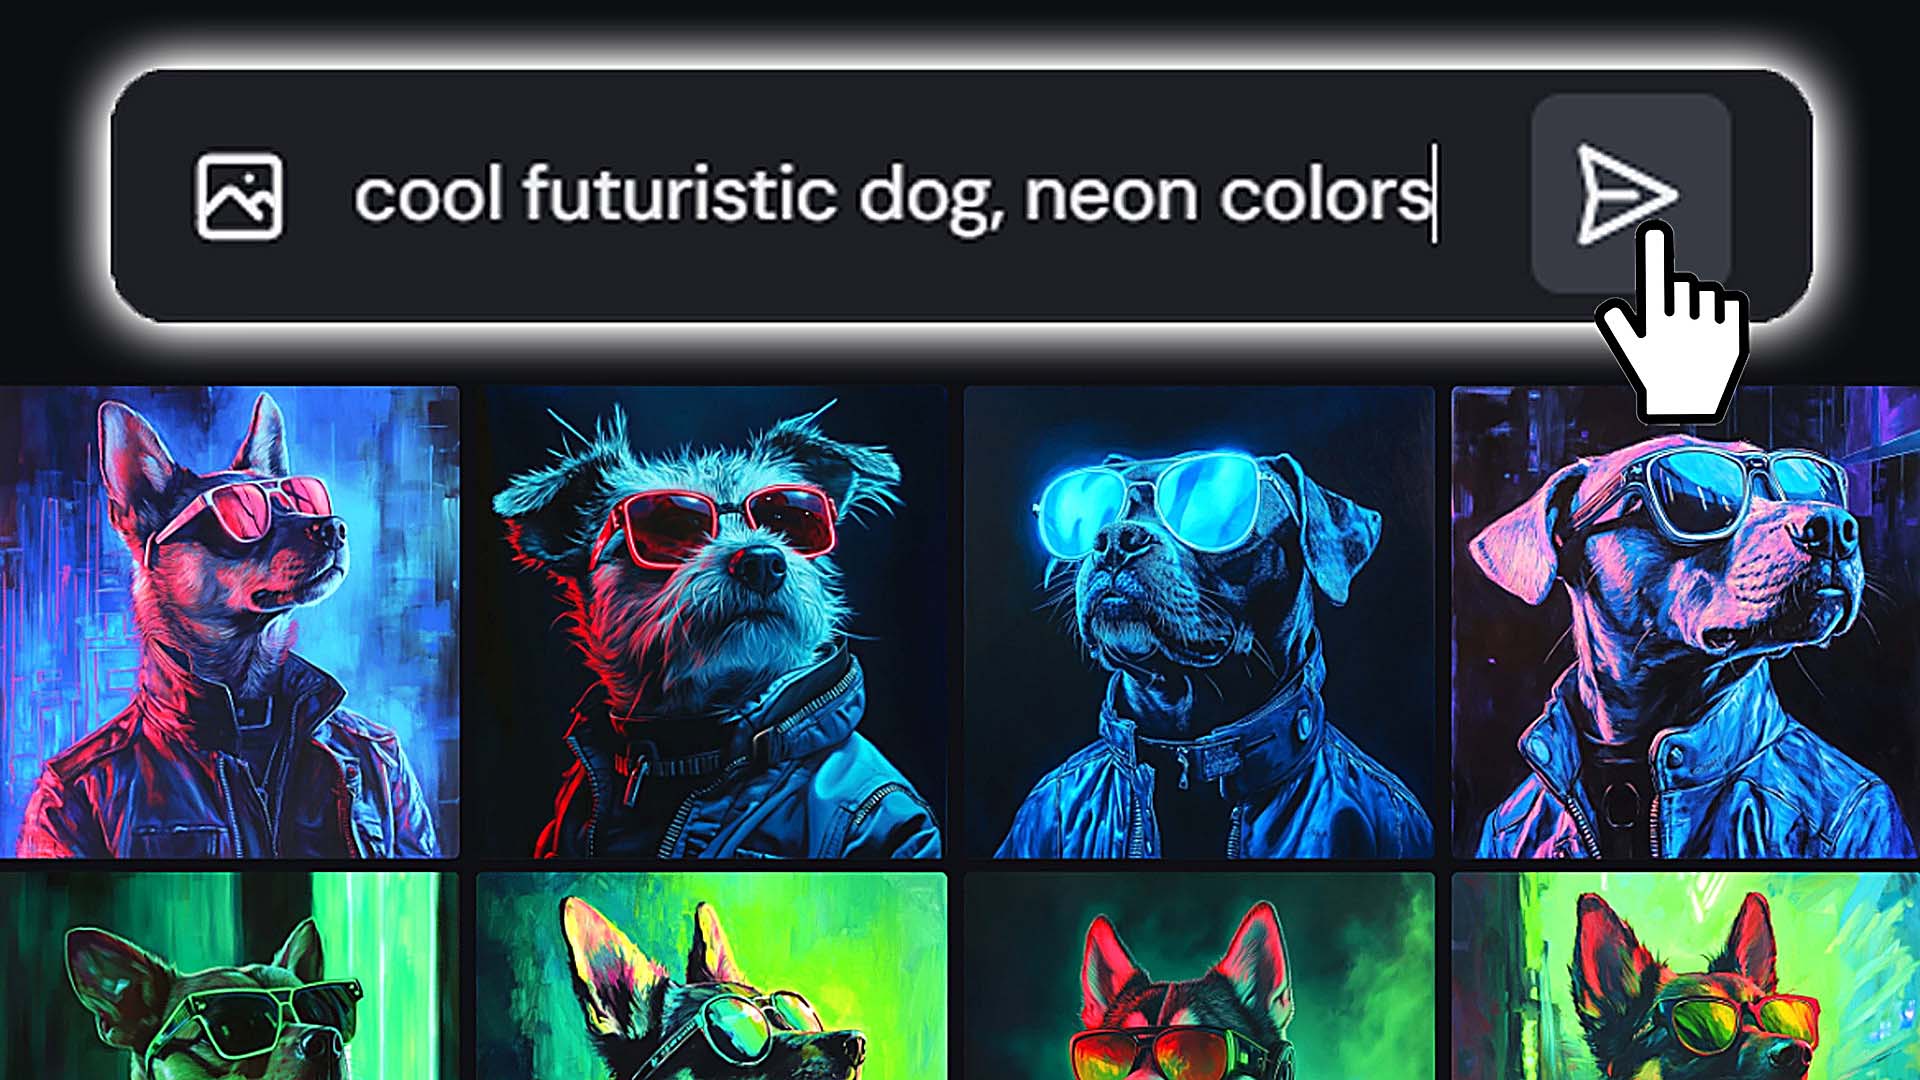
prompts: List[str] = [
"""surreal portrait of a shiba inu wearing a vintage bomber jacket,
cinematic key light, kodachrome color palette, shallow depth of field,
35mm look -- poster wall art""",
"""geometric illustration of a border collie mid-leap, bauhaus color blocking,
crisp negative space, contemporary gallery print aesthetic -- poster wall art""",
"""dreamlike watercolor landscape of mountains at sunrise, soft atmospheric haze,
matte gallery print aesthetic -- poster wall art""",
]
# 3) Output configuration
output_dir = Path("AI_generated_images") # the folder to save your created images to
output_dir.mkdir(parents=True, exist_ok=True)
# 4) Image settings for DALL·E 3
model_name = "dall-e-3"
image_size = "1792x1024" # Must be one of 1024x1024, 1536x1024, 1024x1536, for gpt-image-1;
# and one of 1024x1024, 1792x1024, or 1024x1792 for dall-e-3
image_quality = "hd" # high, medium and low are supported for gpt-image-1;
# hd and standard are supported for dall-e-3.
def generate_and_save(prompt_text: str, index: int) -> Path:
"""Generate a single image for prompt_text and save it as PNG."""
print(f"[{index}] Generating: {prompt_text}")
result = client.images.generate(
model=model_name,
prompt=prompt_text,
size=image_size,
quality=image_quality,
n=1
)
b64_data = result.data[0].b64_json # API returns base64; decode to bytes
image_bytes = base64.b64decode(b64_data)
outfile = output_dir / f"image_{index:04d}.png"
with open(outfile, "wb") as f:
f.write(image_bytes)
print(f"[{index}] Saved: {outfile}")
return outfile
def main():
for i, p in enumerate(prompts, start=1):
try:
generate_and_save(p, i)
except Exception as exc:
print(f"[{i}] ERROR: {exc}")
if __name__ == "__main__":
main()Alternative: GPT-Image-1
Prefer the newest image model branded as GPT-Image-1? Just switch model_name to "gpt-image-1" and pick one of the sizes commonly available for this model (e.g., 1024x1024, 1536x1024, 1024x1536).
How to set this up end-to-end (accounts, costs, running the script)
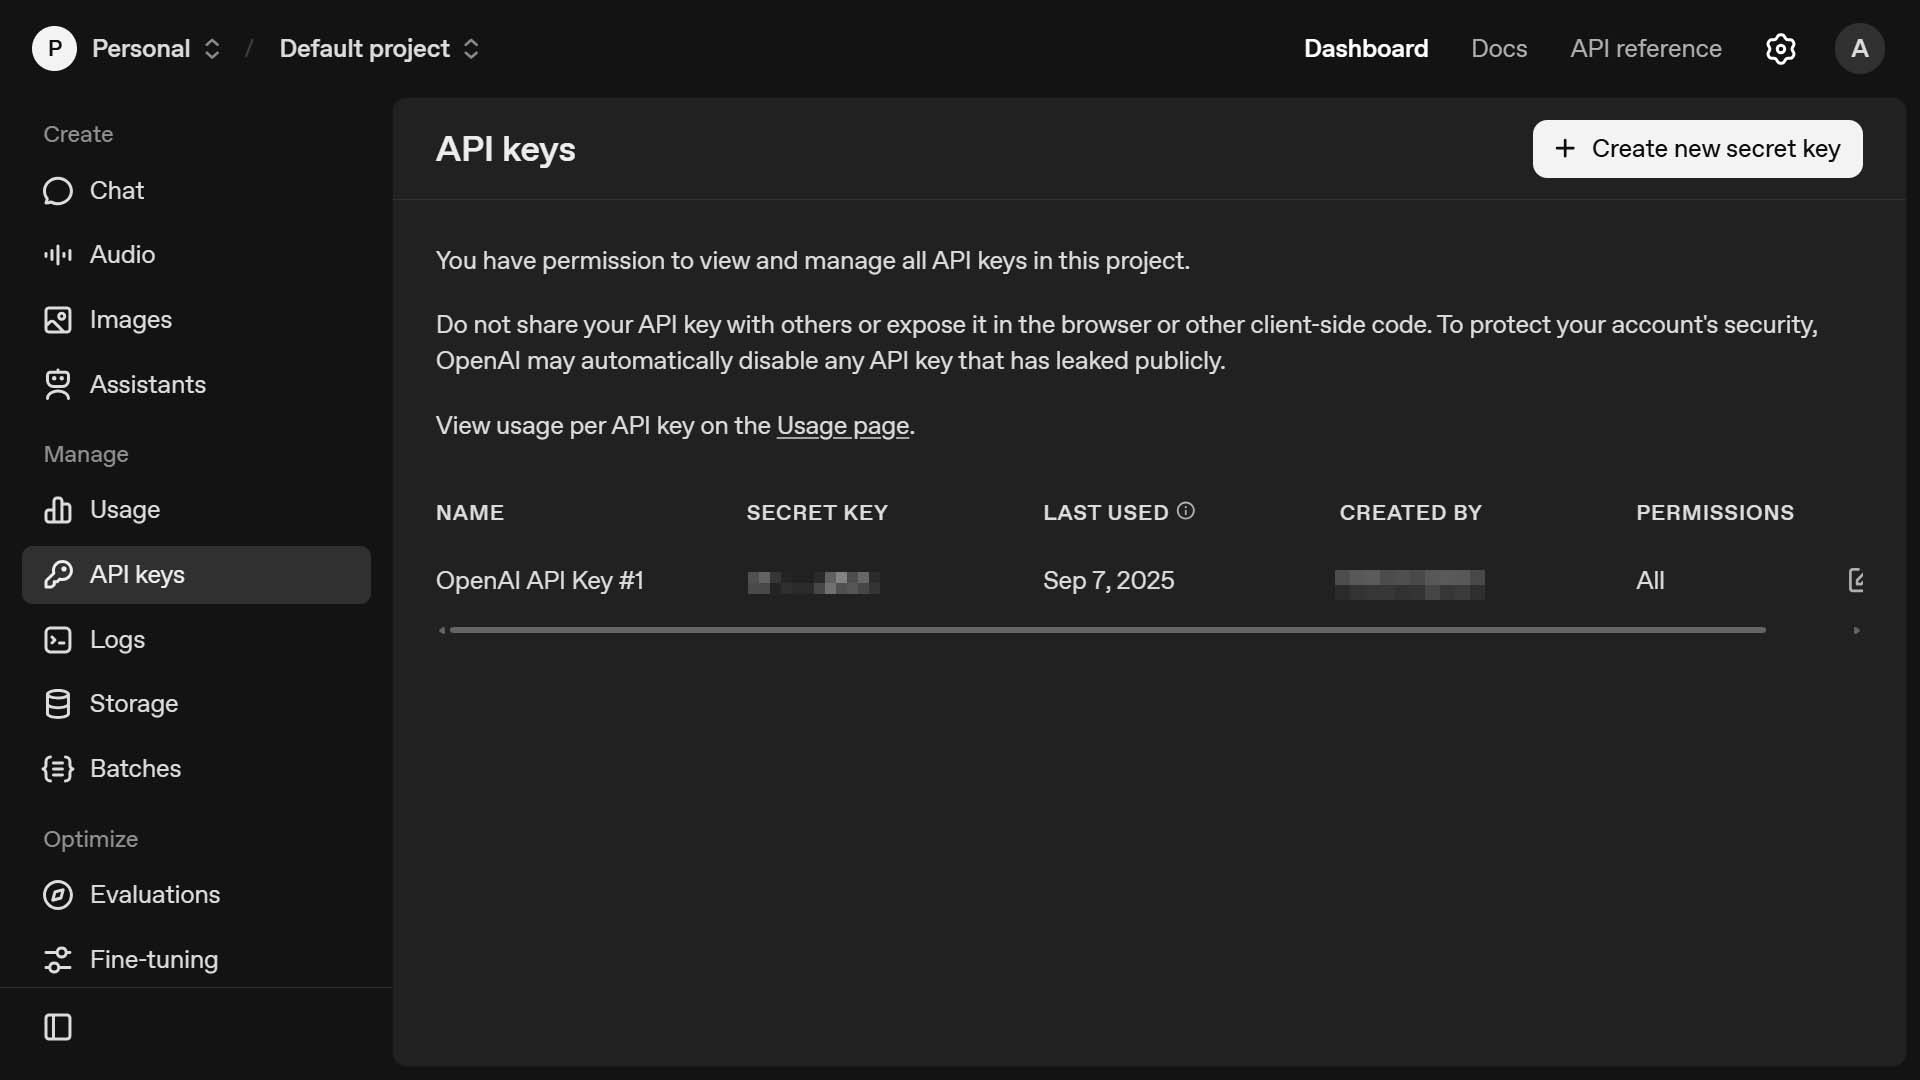
Part 1 — OpenAI account, API key, and costs
- Create/Open your OpenAI account and add a payment method.
- Generate an API key and store it safely.
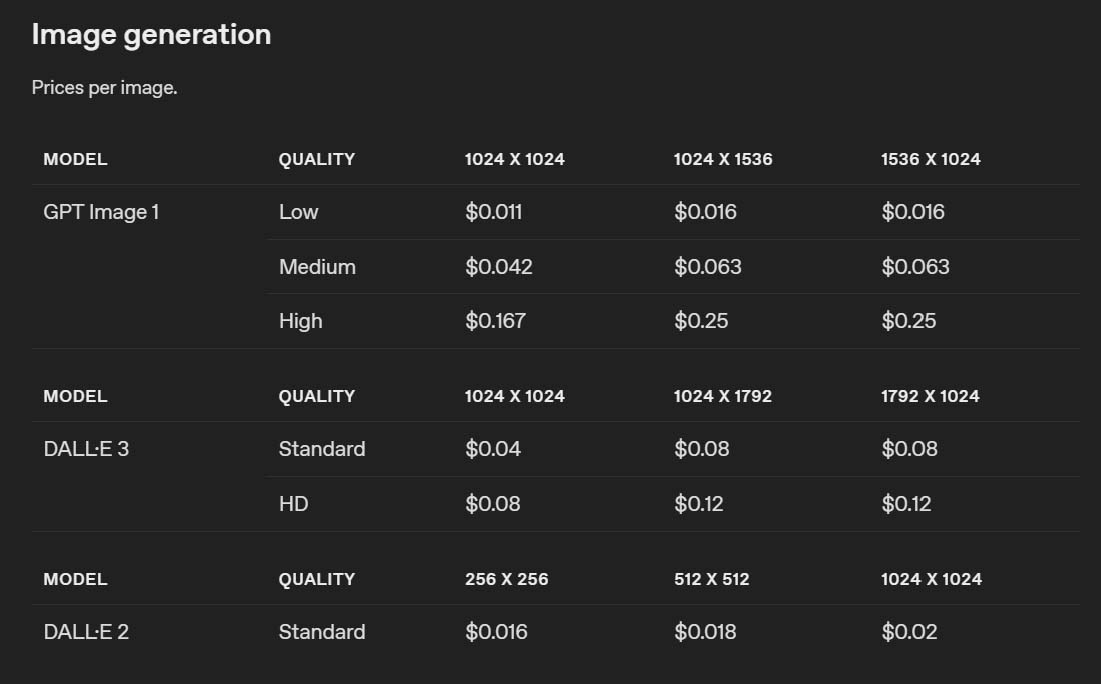
- Costs: Image pricing varies by model, size, and quality. To calculate your cost, simply multiply the cost per created image (for the AI model you'll use, and for the image size/quality you'll be creating) by the number of images you plan to create. For example, if an HD quality image produced by DALL-E 3 at 1792x1024 resolution costs $0.12 per image, then 100 images = $12 and 1000 images = $120. Always confirm current pricing on the official OpenAI pricing page before large runs.
Below is OpenAI's API image generation pricing — broken down by AI model, image size, and image quality — as of 9/7/2025:
Part 2 — Running the Python script locally
- Install Python 3.10+ from https://www.python.org/downloads/
- Install Visual Studio Code (free, by Microsoft) and add the Python extension.
- Create a project folder; save the Python script as
bulk_dalle_generation.py. - In Visual Studio Code, click "Terminal", "New Terminal", then paste the following and hit the "Enter" key:
pip install --upgrade openai - Run the script, after you've modified the pertinent spots for your particular needs. To do this, press the Run/Play button (at top right) in Visual Studio Code while your Python script file is opened.
- Verify images appear in the
AI_generated_images/folder.
Bulk-generating artwork images with Midjourney
Midjourney is arguably the gold-standard for AI art quality and stylistic range. For print-on-demand sellers, it can produce striking, on-brand visuals across many aesthetics (illustrative, painterly, photoreal, cinematic) with excellent consistency.

Key limitations to understand first
- No native bulk creation / no public API: Midjourney does not provide an official API for programmatic generation, and there’s no built-in bulk mode.
- Automation violates current Terms of Service (as of 9/7/2025): Creating images via automated means (bots, scripts, headless tools, etc.) is not allowed and can risk account bans.
- Ignore “automation” plugins and SaaS tools: Browser extensions or third-party sites that claim to mass-generate Midjourney images typically violate the ToS and place your account at risk. Don’t use them.
If you’re set on the Midjourney look: delegate to a freelancer (human-operated, ToS-compliant)
Because Midjourney requires human-operated use, the practical way to scale output—without breaking rules—is to delegate prompt submission and upscaling to a freelancer/VA. You can easily find freelancers from all over the globe on sites like Upwork willing to perform these tasks for a surprisingly low dollar-cost. You keep the strategy and brand direction; they perform the manual, compliant steps at speed.
(One of our team members had implemented such a delegated workflow for a dollar-cost of $20 per 1000 returned Midjourney images. Compared against the time-cost of manually entering your prompts in the Midjourney interface, and waiting for the images to generate, then downloading them individually, spending a measly $20 to have 1000 artwork images returned to you by a competent VA is almost certainly worth the cost. Given the real number of hours this would free up — which can then be spent on other, higher-payoff tasks in your POD business — delegating this out is almost certainly worth the cost, assuming you value your time and assuming you can find more important tasks to focus on.)
Simple step-by-step delegation workflow
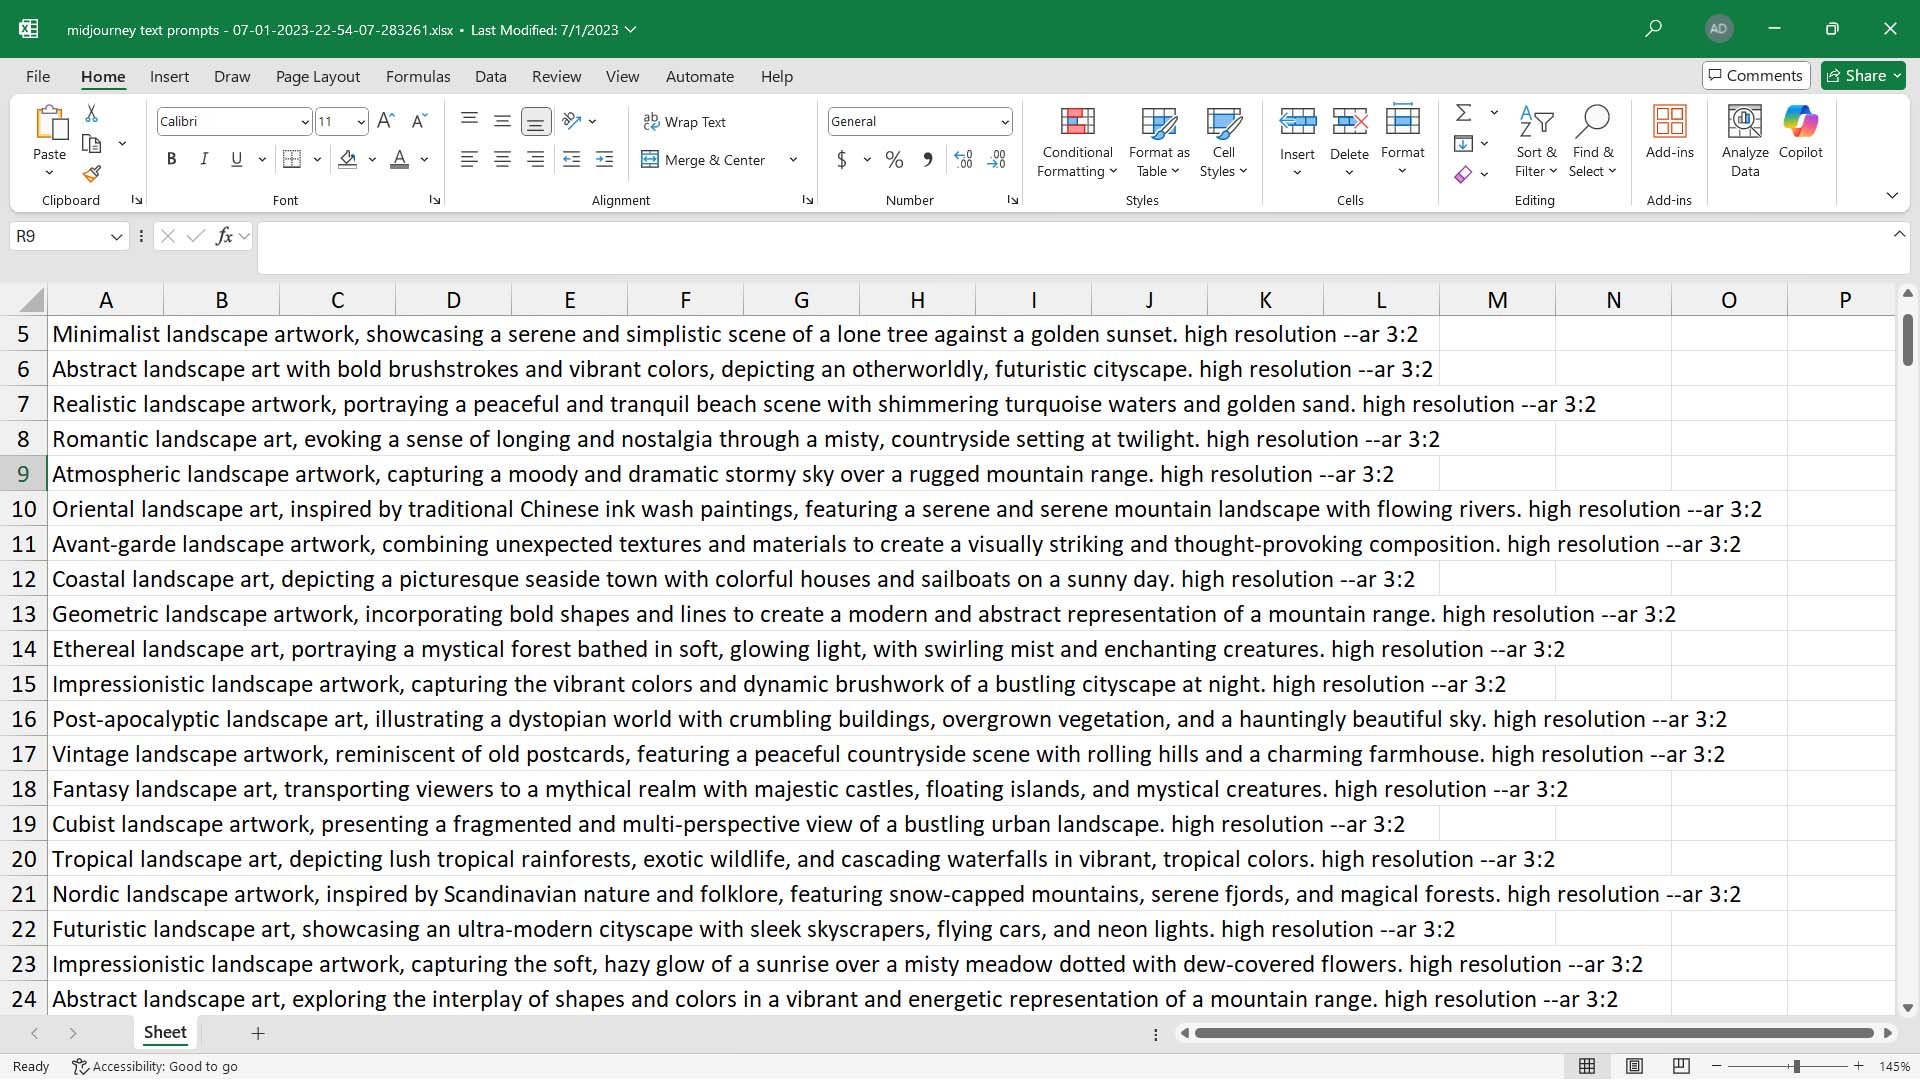
- Prepare a prompt pack. Create a spreadsheet of prompts (one per line). Include target aspect ratios (e.g.,
--ar 2:3for posters) and any other parameters you want used consistently appended to your prompts. Power tip: Leverage ChatGPT to bulk-generate these text prompts for you, in alignment with the type of artwork you'd like to generate. - Choose the account model.
- Preferred: The freelancer uses their Midjourney account and delivers assets to you. They sign a copyright transfer document, agreeing to transfer the copyright of the created images over to you and your company, in exchange for the dollar-amount you are paying them. (Note: This is not legal advice, but merely an idea you could consider exploring. You should consult with a qualified legal professional before making business decisions, entering into agreements, or creating/using any legal documents.)
- Alternative (higher risk): They operate your account. If you do this, use strict access controls. (We recommend the first option.)
- Define deliverables. Request maximum-size upscales, organized into a single zipped folder to simplify everything to the maximum. They do the menial, repetitive work of copy/pasting the prompts into Midjourney and upscaling/downloading the images, and you focus your time on simply curating the returned images to determine which ones to convert into POD products for your store.
- Set IP & compliance expectations. Ask the freelancer to confirm in writing that they created the images in compliance with Midjourney’s terms and will assign/transfer rights in the delivered images to you to the extent permitted by law. (Note: This is not legal advice, but merely an idea you could consider exploring. You should consult with a qualified legal professional before making business decisions, entering into agreements, or creating/using any legal documents.)
Bottom line: Midjourney can create outstanding artwork images for your print-on-demand catalog. You simply can’t automate it directly while staying in compliance with their Terms of Service. The compliant way to scale is human-operated delegation for generation, then run your downstream automation stack (curation, placement, and bulk product creation) to achieve true end-to-end scale. If you've decided that you must also automate the artwork image generation itself, using an alternate AI image generator such as DALL-E 3 is probably the way to go.
Use ChatGPT to bulk-generate artwork-creation prompts
Once you’ve settled on a clear visual direction, leverage ChatGPT to produce hundreds of high-quality prompts in minutes. Ask for one prompt per line so it’s easy to paste into a spreadsheet or text file for batch work.
Why generate prompts with ChatGPT instead of writing them by hand?
- Speed & scale: Create 250–1,000 unique prompts in a single pass—no fatigue, no copy/paste drift.
- Consistency with flexibility: Encode your style rules (palette, medium, composition) while still varying subject matter and phrasing.
- Cleaner data: Force a CSV-ready format (one prompt per line) that slots directly into your workflow.
- Fewer near-duplicates: Instruct ChatGPT to check for repetitious wording and to diversify descriptors.
- On-brand quality: Provide a short style guide and a few “exemplar” prompts; ChatGPT will match tone and specificity.
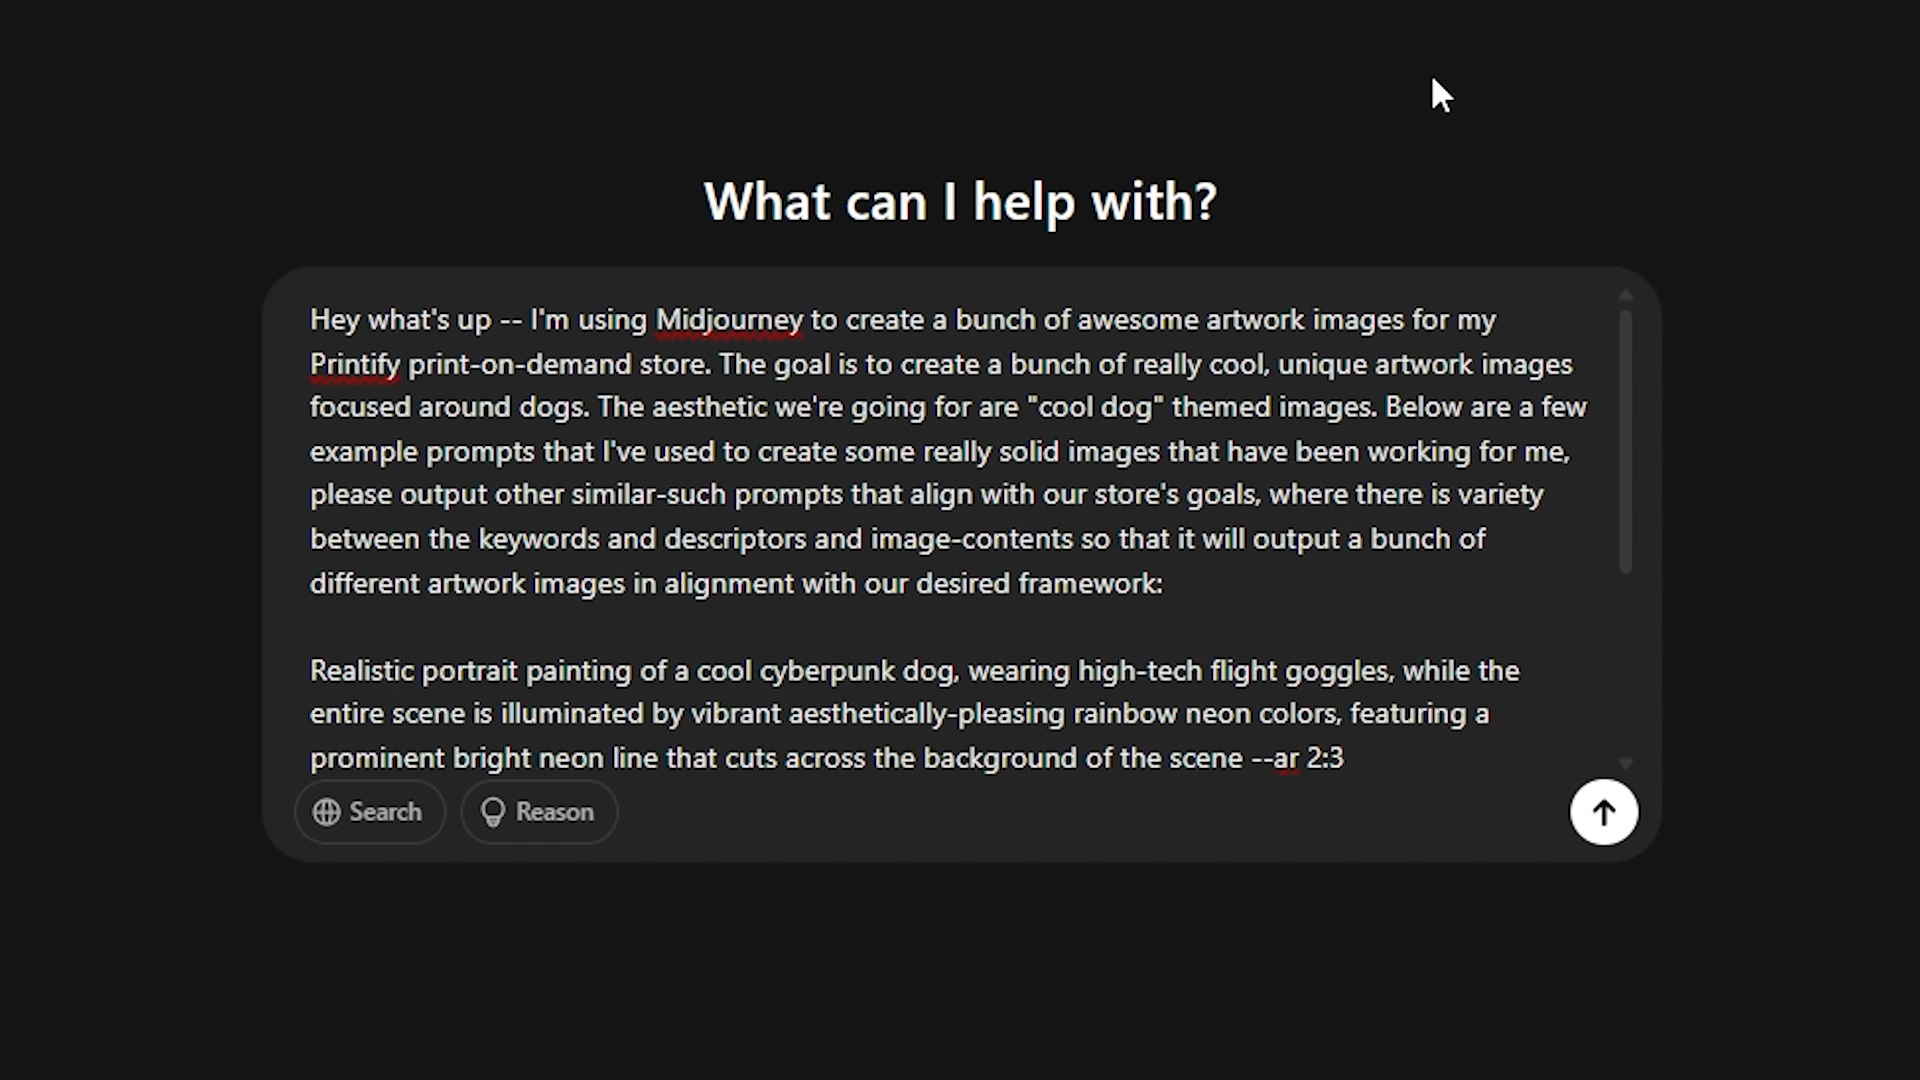
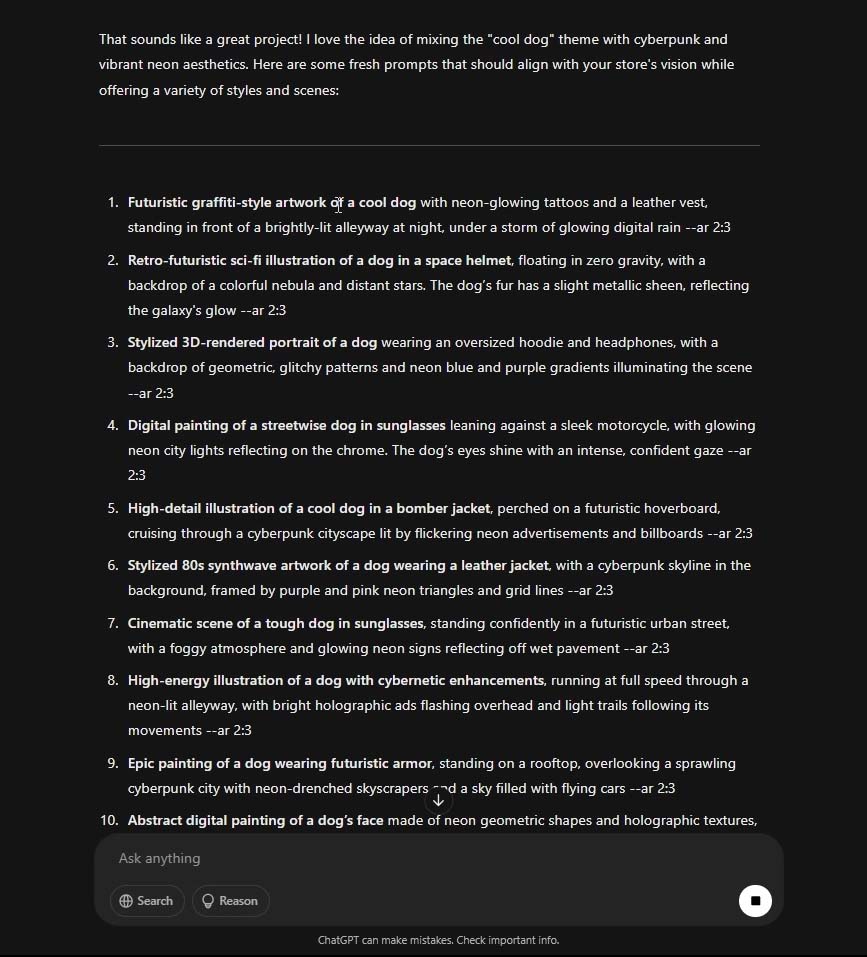
Example ChatGPT instruction to bulk-generate optimal prompts for Midjourney
Objective: Produce a large set of Midjourney prompts for print-on-demand artwork in the niche “cool dog artwork.”
Requirements:
– Every prompt must be unique and richly descriptive.
– Include: subject, style, medium, composition, lighting, color palette, and relevant art-movement references when helpful.
– Vary phrasing to avoid near-duplicates across the set.
– Append--ar 2:3to each prompt (portrait poster ratio).
– Output one prompt per line (no bullets, no numbering, no extra commentary).
– Generate 250 prompts.
– Avoid protected IP (no brands, logos, or trademarked characters).
Two sample prompts that illustrate the desired specificity:
– stylized studio portrait of a shiba inu in a retro flight jacket, cinematic rim light, kodachrome-inspired palette, shallow depth of field, fine grain texture, editorial fashion photo look, minimal backdrop --ar 2:3
– bold geometric poster of a border collie mid-leap, bauhaus color blocking, crisp negative space, graphic vector forms, subtle halftone shading, contemporary gallery print aesthetic --ar 2:3
Now generate 250 more in this spirit. Output only the prompts, one per line.
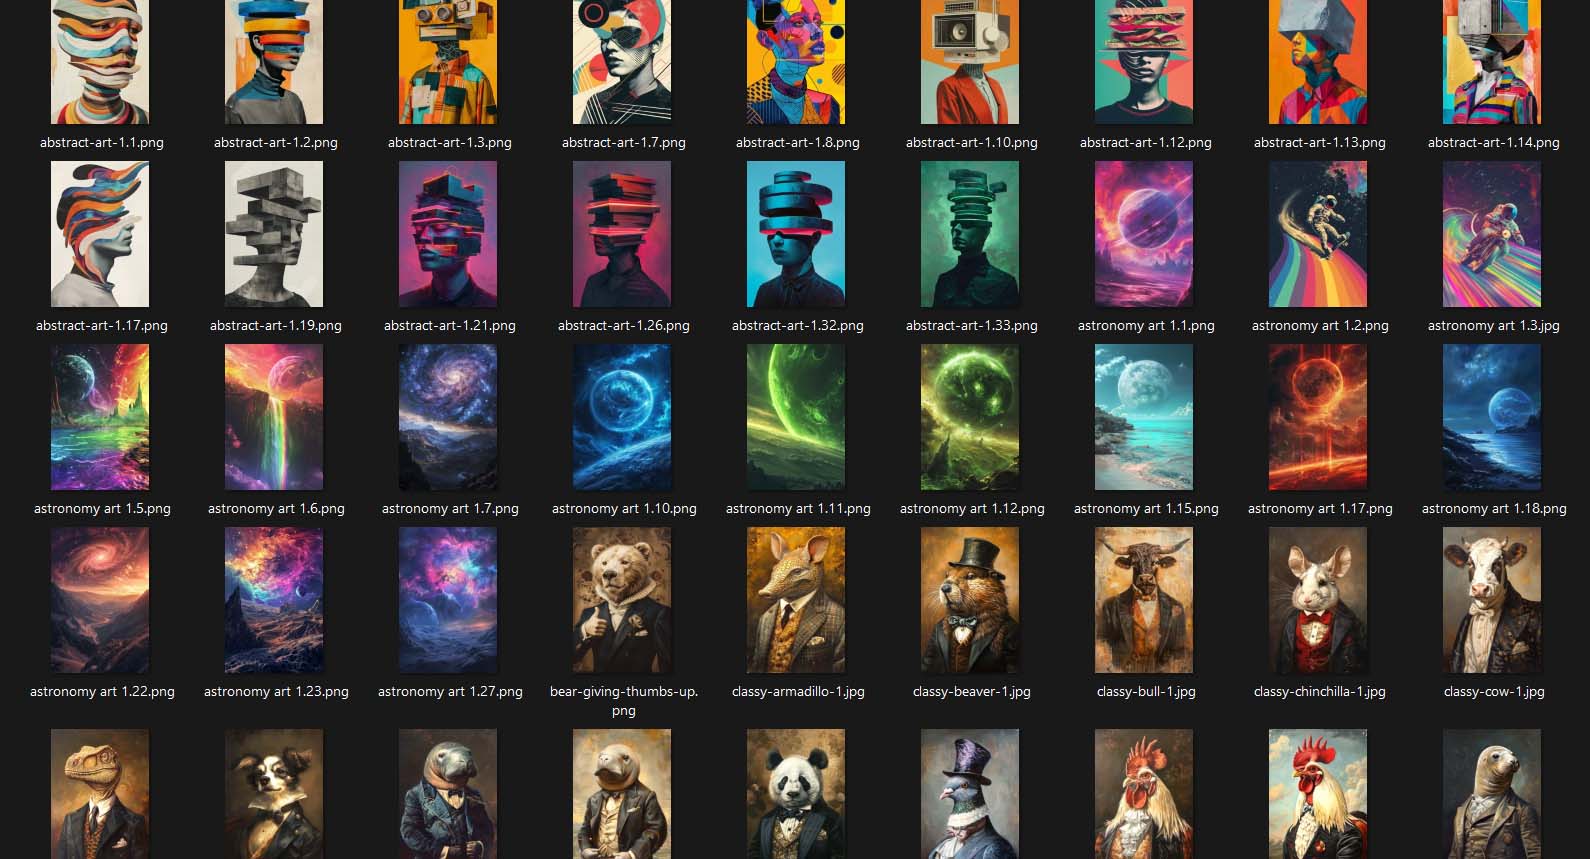
BONUS: Ultra-fast, keyboard-driven, image-curation tool
Once you've generated hundreds or even thousands of artwork images using AI, the next step is to curate the artwork images to decide which ones to delete, and which ones are outstanding enough that they are worth converting into print-on-demand products to sell on your store.
Opening thousands of files manually to decide which ones to “keep or delete” is slow. The simple Python script below opens a viewer which will display all of the images from the specified folder, one after the other. It lets you approve with → (right arrow key), delete with ← (left arrow key), and toggle zoom in/zoom out with e (to take a closer look at the details, if necessary).
This Python script allows you to execute on a blazing fast, image curation workflow that pushes the time-efficiency of this process to the absolute upper maximum of what's possible. (To run this Python script, you will need to follow a similar set of steps to those described in the above "Running the Python script locally" section.)
import os
from PIL import Image, ImageTk
import tkinter as tk
from tkinter import messagebox


image_folder = r'C:\Users\anton\Pictures\AI Artwork\CURRENT IMAGE FOLDER' # the folder path of the images to curate

all_files = os.listdir(image_folder)
files = [f for f in all_files if f.lower().endswith(('.png', '.jpg', '.jpeg'))]
files_index = 0
transformed_images = 0
processed_images = 0

root = tk.Tk() # creates a simple GUI window
root.geometry('800x600')

canvas = tk.Canvas(root, width=800, height=600)
canvas.pack(side="left", fill="both", expand=True)

scrollbar_v = tk.Scrollbar(root, orient="vertical", command=canvas.yview)
scrollbar_v.pack(side="right", fill="y")
scrollbar_h = tk.Scrollbar(root, orient="horizontal", command=canvas.xview)
scrollbar_h.pack(side="bottom", fill="x")

canvas.configure(yscrollcommand=scrollbar_v.set, xscrollcommand=scrollbar_h.set)

frame = tk.Frame(canvas)
canvas.create_window((0,0), window=frame, anchor='nw')

label = tk.Label(frame)
label.pack()

total_images = len(files)
count_label = tk.Label(frame, text=f"0/{total_images}", fg="white")
count_label.pack(side="top", fill="x")

zoom_state = False
img = None

# Functions for mousewheel scrolling
def scroll_v(event):
    canvas.yview_scroll(int(-1*(event.delta)), "units")
canvas.bind_all("<MouseWheel>", scroll_v)

def scroll_h(event):
    canvas.xview_scroll(int(-1*(event.delta)), "units")
canvas.bind_all("<Shift-MouseWheel>", scroll_h)

# Functions for keyboard scrolling
def scroll_up(event):
    canvas.yview_scroll(-5, "units")

def scroll_down(event):
    canvas.yview_scroll(5, "units")

def scroll_left(event):
    canvas.xview_scroll(-5, "units")

def scroll_right(event):
    canvas.xview_scroll(5, "units")

def load_next_image():
    global img
    global files_index
    global processed_images
    if files_index >= len(files):
        messagebox.showinfo("Information", "No more images left")
        root.quit()
        root.destroy()
    else:
        img_path = os.path.join(image_folder, files[files_index])
        img = Image.open(img_path)
        update_image_display()
        files_index += 1
        processed_images += 1
        count_label.config(text=f"{processed_images}/{total_images}") # updates visual progress display text

def delete_current_image(): # deletes the current image and loads the next one
    global files_index
    img_path = os.path.join(image_folder, files[files_index - 1])
    os.remove(img_path)
    files.pop(files_index - 1)
    files_index -= 1
    load_next_image()

def update_image_display(): # toggles zoom in, zoom out
    global img
    if zoom_state:
        tmp = img.resize((img.width, img.height)) # 100% size
    else:
        tmp = img.resize((int(img.width*0.4), int(img.height*0.4))) # 40% size
    photo = ImageTk.PhotoImage(tmp)
    label.config(image=photo)
    label.image = photo

    # Updating scroll region after image is loaded
    root.update()
    canvas.configure(scrollregion=canvas.bbox("all"))

def toggle_zoom(event): # toggles zoom state pt 2
    global zoom_state
    zoom_state = not zoom_state
    update_image_display()

# Bind the keys to the desired events
root.bind('<Right>', lambda event: load_next_image())  # approves this image, moves to next
root.bind('<Left>', lambda event: delete_current_image())  # deletes this image, as it doesn't meet the criteria
root.bind('e', toggle_zoom) # bounces back between 100% and 40% zoom

# keyboard-based scrolling, allowing you to evaluate portions of the image in more detail if needed.
root.bind('f', scroll_down)
root.bind('r', scroll_up)
root.bind('d', scroll_left)
root.bind('g', scroll_right)

load_next_image() # start the workflow
root.mainloop() # start the GUI main loop
Turn images into POD products automatically (the synergy that unlocks scale)
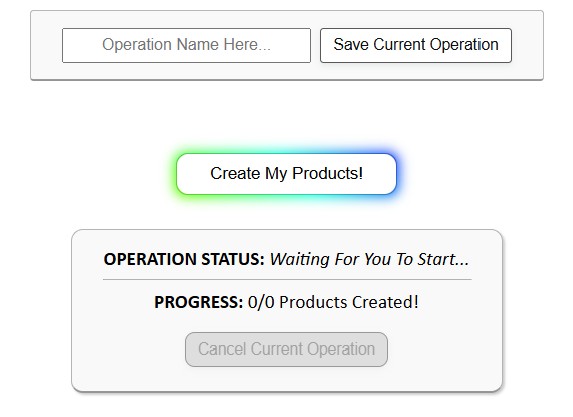
Once you’ve generated and curated a solid set of images, feed them into the Bulk POD Product Creator, which allows you to create SEO-optimized print-on-demand listings in bulk with just a few button clicks. The tool clones a perfected Example Product (print areas, variants, provider/blueprint, pricing), applies your placement logic, and generates titles/descriptions/tags with AI—or uses your templates. Save the whole configuration as a Saved Operation for one-click reuse.
- Zero repetitive clicks: from a folder of images to a batch of products automatically.
- Consistent quality: uniform placements and pricing from your Example Product; standardized metadata on every listing.
- SEO coverage at scale: image-aware titles/descriptions/tags raise impressions and CTR across the catalog.
- Repeatability: once you like the outputs, re-run the same Saved Operation for the next theme.
Using the Bulk POD Product Creator to automate POD product creation
- Choose/select your images (dozens or hundreds).
- Select placement mode
- Stretch Images To Fit Print Area(s) — fills the print area quickly and uniformly, even across different variant aspect ratios.
- Preserve Image Aspect Ratio & Center — no distortion; centered composition within the print area, touching the nearest boundary.
- Exactly Match Example Image(s) — pixel-accurate replication of the images in your Example Product.
- Connect your Printify store with your API token.
- Pick your Example Product (blueprint for print areas, variants, pricing, and other settings to mirror in created products).
- Configure SEO rules
- Define AI-generated title format (simple vs. compound) and standardized suffixes.
- Generate artwork description using AI and append reusable HTML blocks that summarize product info.
- Tags: AI-generated artwork-specific tags + broad, product-level tags you apply to each product.
- Save operation (optional) to Load and Run later with one click.
- Run operation and review outputs.


Putting it together
Generate images in batches with OpenAI’s API (or keep Midjourney human-operated if you prefer that style). Curate fast with the keyboard viewer. Create POD products automatically from a folder of images with the Bulk POD Product Creator—placements, variants, pricing, and SEO handled in one pass.
The result is a repeatable, scalable pipeline that frees your time for the work that actually moves revenue: better ideas, better marketing, better storefronts. Automation is the most effective way to push your print-on-demand business to the next level of results and scalability.